
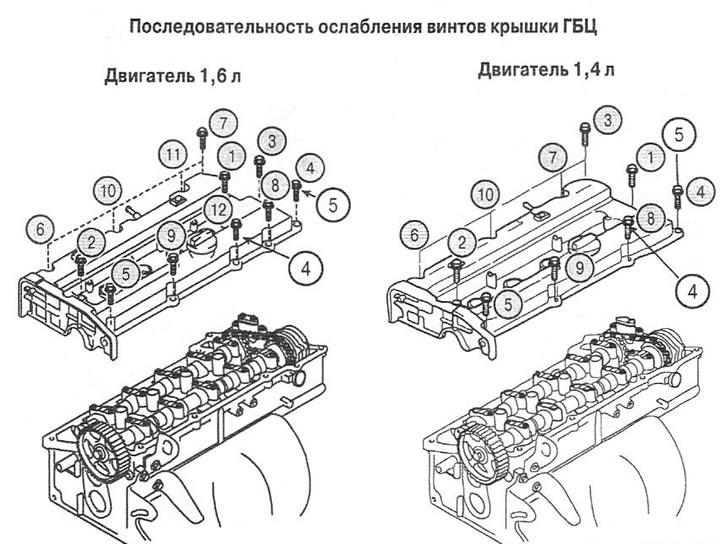
Note: The illustration shows a 1.6L engine cylinder head. The cylinder head of the 1.4 liter engine differs slightly in design and is characterized by a different tightening torque of the fixing screws.
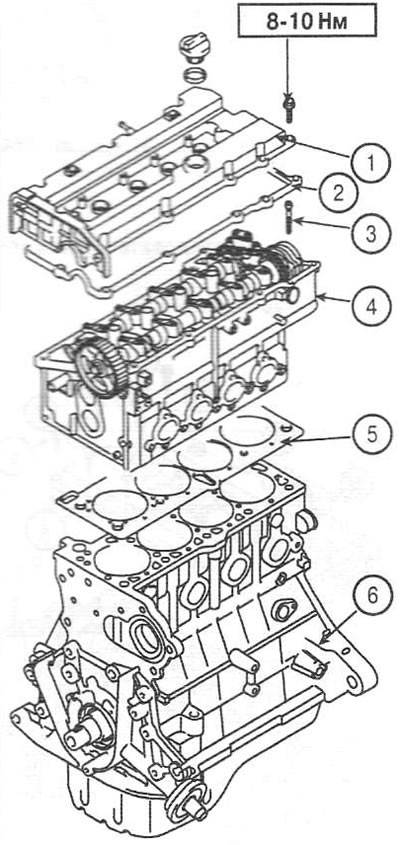
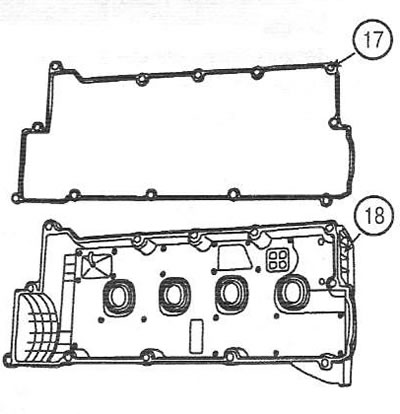
- 1. Valve cover
- 2. Gasket
- 3. Screw
29 Nm + 90°-> loosen all screws -> 29 Nm + 90° (engine 1.6 l)
34 Nm + 90°-> loosen all screws -> 34 Nm + 90° (engine 1.4 l) - 4. block head
- 5. Head gasket
- 6. Cylinder block
Removing the cylinder head
Note: The cylinder head removal procedure is described for a removed engine. If it is necessary to remove the head on the vehicle, follow the appropriate steps in the engine removal procedure.
Label connectors and hoses before disconnecting.
1. Remove ignition coils.
2. Remove the intake and exhaust manifolds.
3. Remove the timing belt.
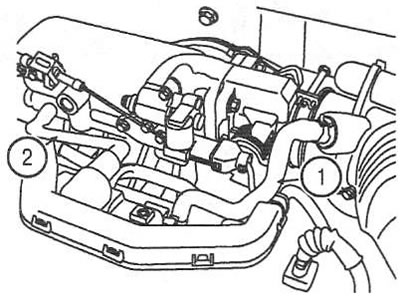
4. Disconnect the crankcase ventilation hose (1) and vacuum hose (2) from the cylinder head cover
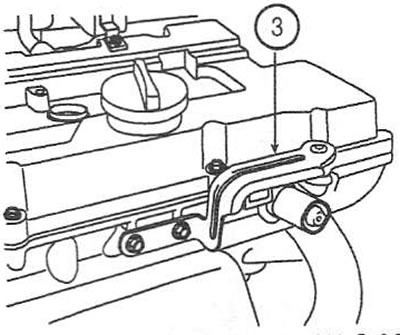
5. Remove bracket (3) cylinder head covers.
6. Loosen the screws (4) in the sequence shown and remove the cylinder head cover (5) with padding.
7. Holding the hex of the camshaft (6), unscrew the screw (7) key (8) and remove the pulley. Tightening torque: 79-98 Nm.
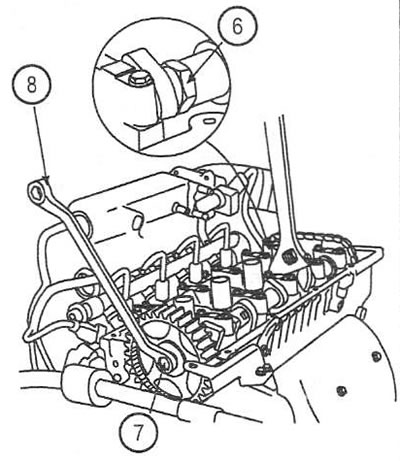
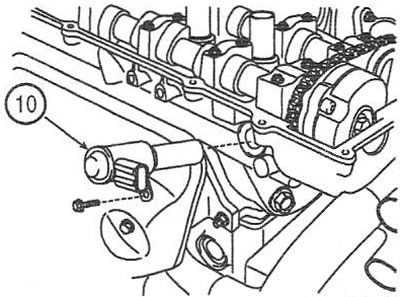
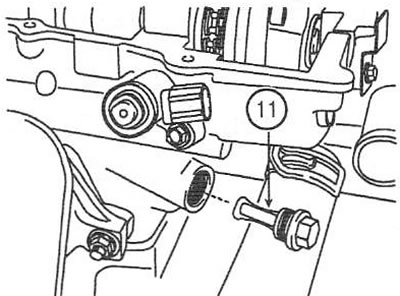
Only for 1.6L engines
8. Remove the chain tensioner (9).
9. Remove the timing oil valve (10).
10. Remove the timing oil valve filter (11).
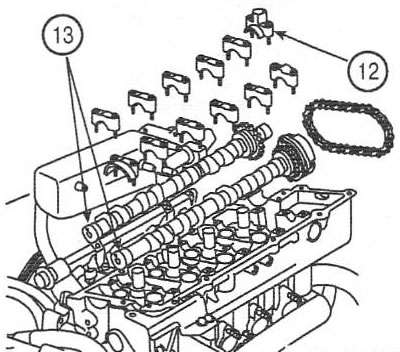
For all models
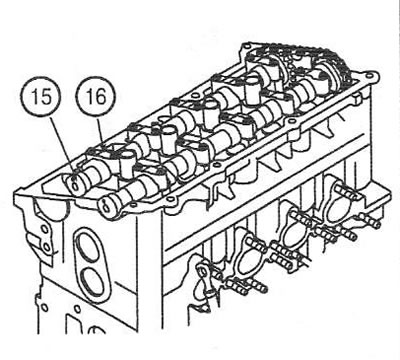
11. Remove bearing caps (12) and camshafts (13).
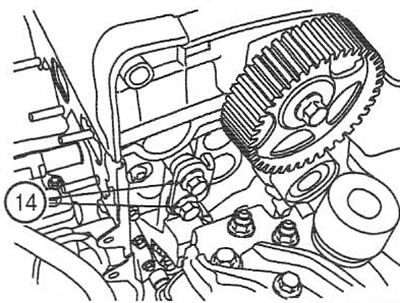
12. Loosen the screws (14) engine mount bracket.
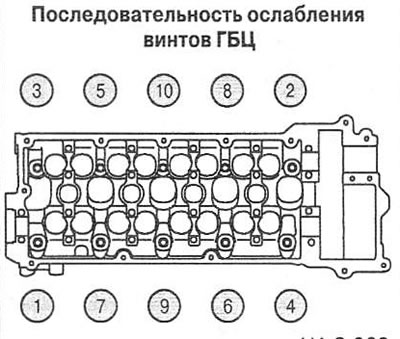
13. Alternately loosening, unscrew the cylinder head screws in the specified sequence
Attention: if the specified order of unscrewing the screws is not observed, damage to the head of the block may occur.
14. Remove the cylinder head.
Installation
Note: Clean and wash all parts before assembly. By turning the crankshaft, set the piston of the 1st cylinder to TDC.
15. Remove engine oil from the surfaces of the head and cylinder block.
Attention: carefully remove all liquid residues from the threaded holes of the cylinder block (coolant and oils). If, when the cylinder head screw is tightened, a certain volume of incompressible fluid appears in the blind threaded hole, then a rupture of the cylinder block wall may occur.
16. Install a new gasket on the cylinder block.
17. Install the cylinder head on the cylinder block, having previously installed the centering sleeves.
18. Apply a light coat of engine oil to the threads and under the screw heads.
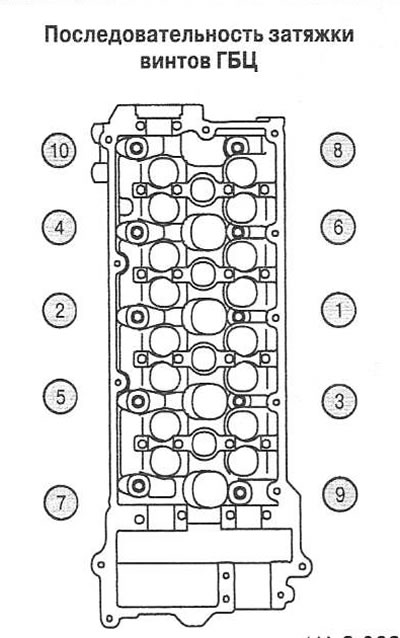
19. Install the washers and tighten the mounting screws in the sequence shown.
Tightening torque: 29 Nm + 90°-> loosen completely -> 29 Nm + 90° (1.6l);
34 Nm + 90°-> fully loosen -> 34 Nm + 90° (1.4 l).
20. Install the engine support bracket. Tightening torque: 44-54 Nm.
Only for 1.6L engines
21. Install the timing oil valve filter. Torque. 40-50 Nm.
22. Install the timing oil valve. Tightening torque: 10-12NM.
Caution: If the oil valve has been subjected to mechanical stress, replace it. During installation, do not hold the valve by the working part.
23. Install the chain tensioner. Tightening torque: 8-10 Nm.
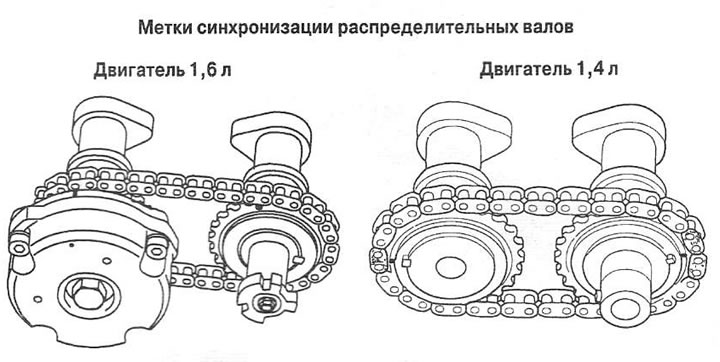
24. Install the chain by aligning the painted chain links with the marks on the camshaft and timing sprockets as shown.
25. Install the camshafts (15) and bearing caps (16). Tightening torque 12-14 Nm
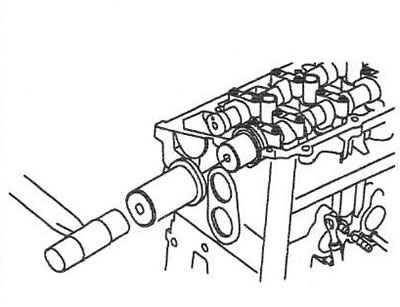
26. Using a mandrel, install the camshaft oil seal.
27. Install gasket (17) on the cylinder head cover (18).
Note: Thoroughly clean the cover surface before installation.
For all models
28. Apply sealant to the cylinder head cover gasket.
Note: Install the cover within 5 minutes of applying the sealant. Do not start the engine for at least 30 minutes after installing the cover.
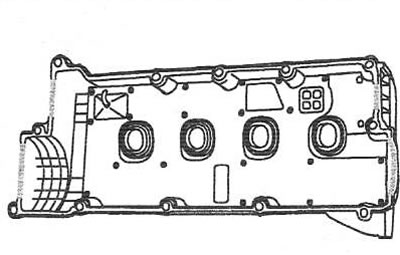
29. Install the cylinder head cover (19) and tighten the fixing screws (20) in the specified sequence. Tightening torque: 8-10 Nm.
30. Further installation is performed in the reverse order of removal.
