


Contents: Disassembly ⇓ Assembly ⇓
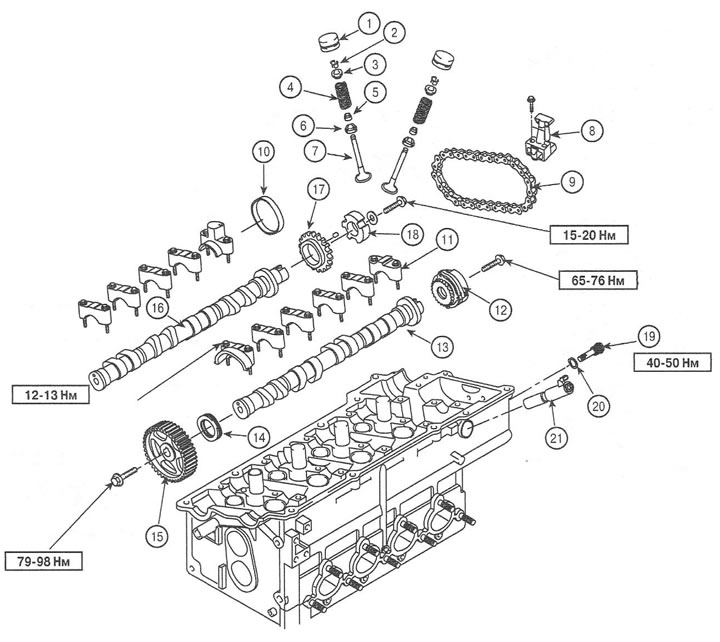
1. Hydraulic pusher
2. Rusks
3. Upper valve spring support
4. Valve spring
5. Oil seal
6. Lower valve spring support
7. Valve
8. Chain tensioner
9. Camshaft drive chain
10. Plug
11. Camshaft bearing cap
12. Timing phase regulator
13. Exhaust camshaft
14. Seal
15. Timing pulley of the camshaft
16. Intake camshaft
17. Camshaft sprocket
18. Camshaft position sensor rotor
19. Oil filter
20. Washer
21. Timing phase adjustment oil valve
Note: the cylinder heads of both engines are practically identical in design. The differences in the cylinder head of the 1.6 L engine are the presence of an oil channel for the valve timing adjustment valve and a modified rear section due to the installation of a valve timing adjuster and chain tensioner.
Disassembly
Note: When disassembling, place the removed parts in the order of removal to avoid confusion during installation.
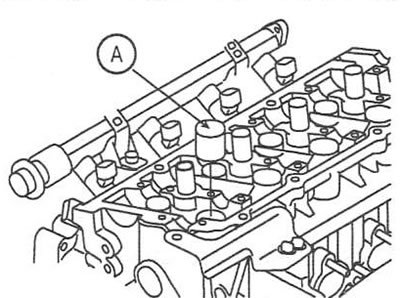
1. Remove the hydraulic tappets (A) and position them so that the tappets can be installed in their proper positions during assembly.
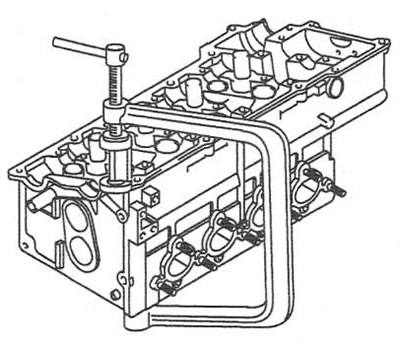
2. Using a suitable tool, compress the valve spring and remove the upper support crackers.
3. Remove the valve spring retainer.
4. Remove the valve spring and valve.
5. Using pliers, remove the oil seal.
6. Using a magnet, remove the valve spring seat.
Repeat operations 2-6 for all valves.
Assembly
Note: Clean all parts thoroughly from oil. Apply engine oil to the working surfaces of the parts before installation.
7. Install the lower valve spring supports.
8. Using a suitable tool, install the new valve stem seal.
Note: Incorrect installation of the valve stem seal may result in oil leakage through the valve guide.
9. Install the valve, valve spring and retainer
Note: Install the valve spring so that the enameled portion of the coil faces upward.
10. Using a suitable tool, compress the valve spring and install the keepers. After installing the valve, check that the keepers are installed correctly before releasing the spring.
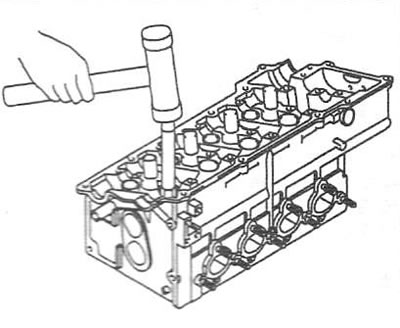
11. Lightly tap the valve 2-3 times with a wooden mallet to ensure the crackers are seated correctly.
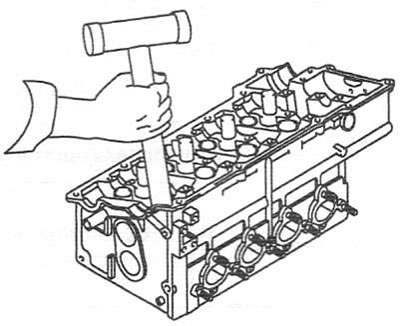
12. Install the hydraulic tappet and check that it rotates smoothly.