
To bleed the entire system, bleed each wheel brake separately in the following sequence:
- 1. Rear right.
- 2. Front left.
- 3. Rear left.
- 4. Front right.
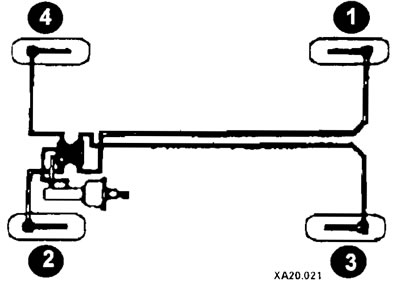
Sequence of bleeding the brake system
If only one caliper or wheel cylinder was replaced or repaired, it is sufficient to bleed the corresponding brake cylinder.
Before removing air, add brake fluid to the MAX mark in the reservoir.
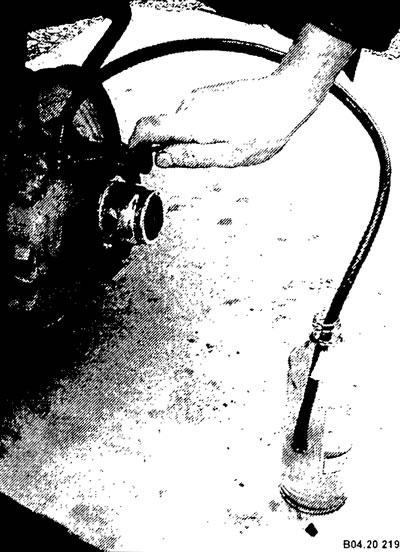
Remove the cap from the brake cylinder bleeder nipple and connect a clean transparent hose, the other end of which is lowered into a bottle half filled with brake fluid. Place the bottle at least 30 cm above the air release valve.
Have the assistant press the brake pedal until pressure builds up in the brake system.
When the pressure is reached, keep the pedal pressed.
Open the brake caliper bleed nipple half a turn with a key. The brake fluid will drain into the container.
When the fluid pressure drops, close the nipple immediately.
Repeat the above steps again.
Continue the air removal process until no more air bubbles are released from the liquid flowing into the container.
After removing the air, tighten the nipple with a force of about 10 Nm.
Remove the hose and place the cap on the fitting.
Also remove air from the cylinders of the remaining wheels, following the sequence of actions.
After removing the air, fill the tank again to the MAX mark and close it with the lid.
Attention: During pumping (air removal), always monitor the fluid level in the brake reservoir.