
Raise the car.
Check the routing and installation of the cable in the holders and guides.
Otherwise, make the correct adjustment of the brake pad clearance.
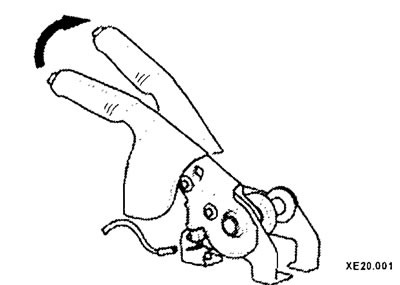
Release the parking brake lever.
Slowly lift the parking brake lever up and count the number of clicks. At a force of 200 N (corresponds to 20 kg on spring scales) the parking brake lever movement should be between 5 and 7 clicks.
Otherwise, make the correct adjustment of the brake pad clearance.
Models with rear drum brakes
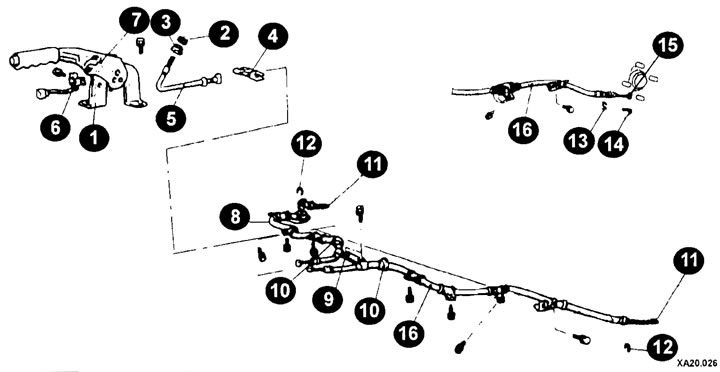
Parking brake components (drum brakes)
1 - lever bracket;
2 - lock nut;
3 - adjusting nut;
4 - cable equalizer;
5 - front cable;
6 - Parking brake engagement signal switch;
7 - lever;
8, 16 - rear cable;
9 - cable holder;
10 - rubber bushing;
11, 15 - end of the cable;
12 - lock washer;
13 - locking clamp;
14 - retaining spring.
Remove the console trim near the parking brake lever.
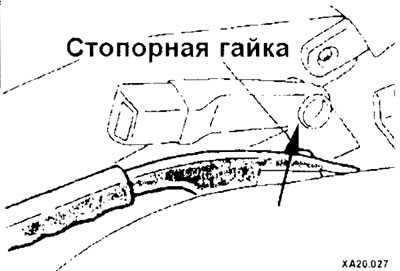
Loosen the lock nut and loosen the adjusting nut to the end of the parking brake cable.
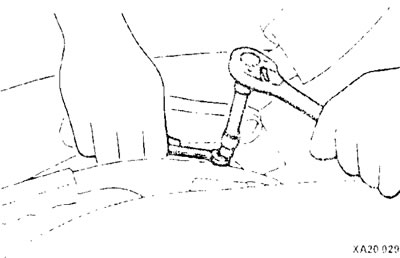
Pull the brake lever several times with a force of approximately 200 N (20 kg) until the lever stroke becomes constant.
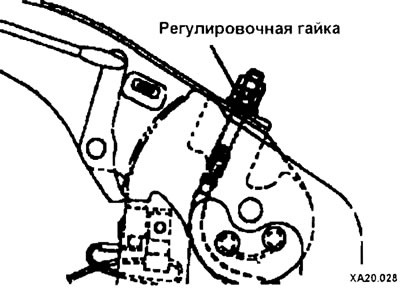
Set the correct travel of the parking brake lever by turning the adjusting nut. There should be no gap between the parking brake lever and the adjusting nut.
If the number of clicks of the brake lever is less than required, this means that the brake cable is too tight. It is necessary to achieve the required number of clicks.
After adjustment, tighten the lock nut while holding the adjusting nut with a wrench.
With the parking brake released, spin the rear wheels. If the brake pads rub, repeat the adjustment.
Lower the car.
Install the console trim.
Models with rear disc brakes
Remove the console trim near the parking brake lever.
Loosen the lock nut and unscrew the adjusting nut to the end of the parking brake cable.
After starting the engine, leave it running at idle speed. By repeatedly pressing the brake pedal hard, the automatic brake pad setting mechanism sets the pads to the correct position.
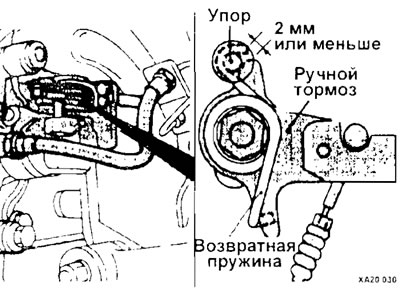
Measure the gap between the parking brake lever and the stop. The required value is 2 mm or less.
Use the adjusting nut to achieve the required travel of the parking brake lever. There should be no gap between the brake lever and the adjusting nut.
If the number of clicks of the parking brake lever is lower than required, the parking brake cable is too tight. It is necessary to achieve the required number of clicks.
After adjustment, tighten the lock nut while holding the adjusting nut with a wrench.
Release the parking brake and spin the rear wheels. If the brake pads rub, repeat the adjustment.
Lower the car.
Install the console trim.