


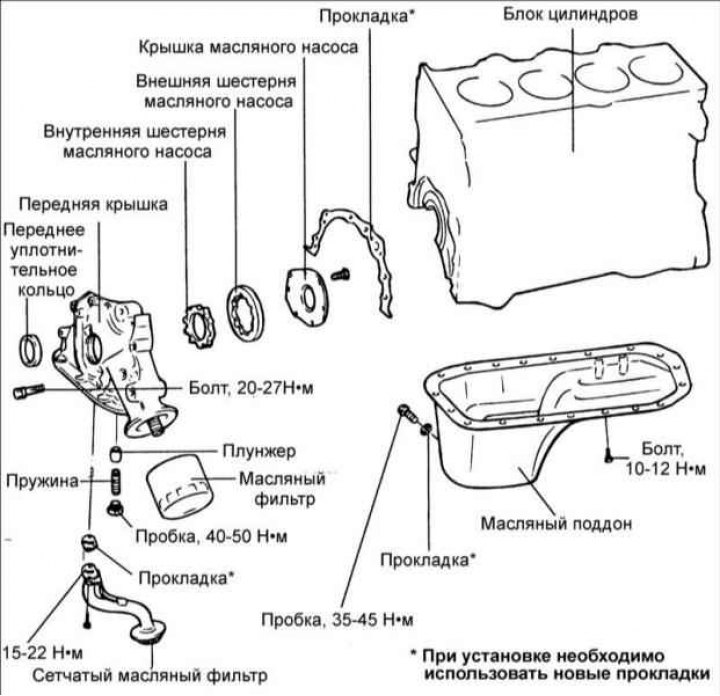
Removal
1. Remove the timing belt.
2. Remove all oil pan mounting bolts.
3. Remove the oil pan.
4. Unscrew 2 bolts and remove the mesh oil filter with the oil intake pipe.
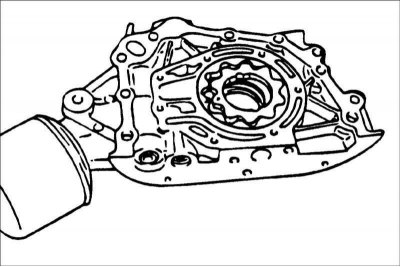
5. Remove the front cover.
6. Remove the oil pump cover.
7. Remove the internal and external gears of the oil pump from the front cover, having first marked their relative positions.
8. Unscrew the plug and remove the spring and plunger.
Examination
1. Check the front oil seal for wear or damage to the sealing lips and replace if necessary.
2. Check the sealing lip for deterioration. Replace the oil seal if necessary.
3. Check the oil pan for cracks or damage and replace it if necessary.
4. Check the oil filter for cracks or damage and replace it if necessary.
5. Check the front cover for wear or damage where it contacts the oil pump gears and replace it if necessary.
6. Check the oil pump gear teeth for wear or damage.
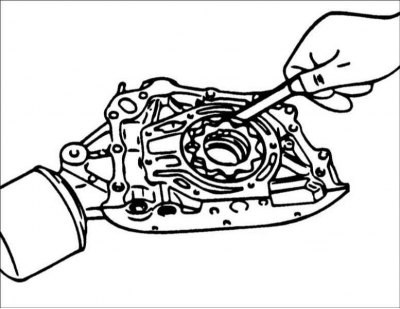
7. Use a feeler gauge to measure the gap between the oil pump gear and the socket in the cover. Maximum permissible clearance of the external gear of the oil pump: 0.12–0.185 mm.
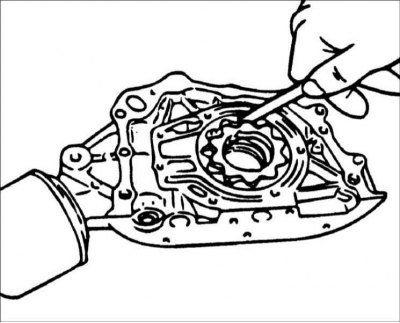
8. Use a feeler gauge to measure the gap between the teeth of the oil pump gears. Maximum permissible clearance between the teeth of the oil pump gears: 0.025–0.069 mm.
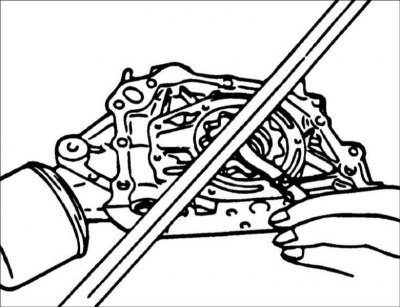
The original can be read on the resource [HyundaiBook]
9. Using a metal ruler and feeler gauge, measure the lateral clearance of the oil pump gears.
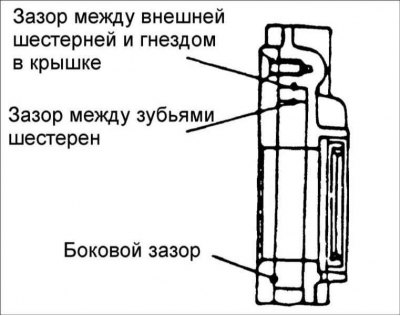
- Maximum permissible lateral clearance of oil pump rotors: 0.04–0.085 mm.
10. Check the condition of the safety valve located in the front cover.
11.. Check the condition of the safety valve spring.
- Spring length in free state: 43.8 mm
- Engines 2.0/1.8 l: 43.8 mm
- 1.6L Engine: 46.6mm
- Spring length under 3.7 kg load:
- Engines 2.0/1.8 l: 40.1 mm
- Spring length under 6.1 kg load:
- 1.6L Engine: 40.1mm
Oil pressure sensor
1. If the engine oil pressure warning light comes on after the ignition is turned on and goes out after the engine starts, then the engine oil pressure sensor is working properly. If the engine oil pressure warning light does not come on after the ignition is turned on, check the condition of the oil pressure sensor, light and wiring.
2. If there is electric current after the ignition is turned on and there is no current after the engine is started, then the engine oil pressure sensor is working properly. If the engine oil pressure sensor is good, check the light bulb and wiring.
3. Using a 24mm deep socket wrench, tighten the sensor to the specified torque.
Checking the oil pressure sensor
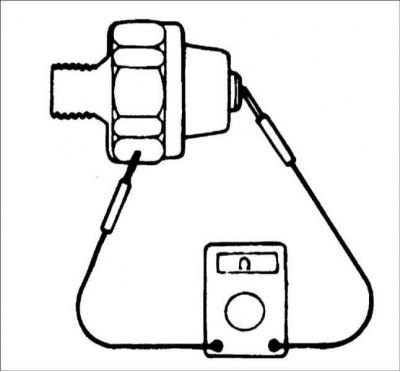
1. Use an ohmmeter to check the conductivity of the connection between the sensor terminal and the cylinder block. If there is no conductivity, replace the sensor.
2. Use an ohmmeter to check the conductivity of the connection between the sensor terminal and the cylinder block with the sensor rod extended. If there is continuity even with the piston rod extended, replace the sensor.
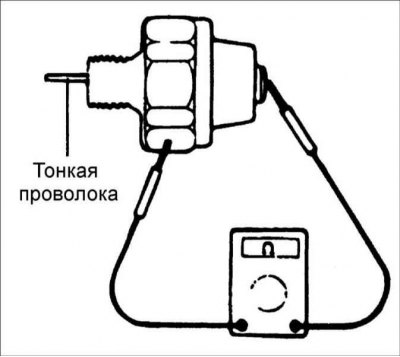
3. However, if there is no conductivity even when a vacuum of 50 kPa is applied to the sensor hole, the sensor is working properly.
4. Check the tightness of the sensor diaphragm and replace it if necessary.
Installation
Oil pump
1. Install the outer and inner gears of the oil pump into the front cover, having first aligned the previously applied marks.
2. Install the oil pump cover and secure it with bolts. After tightening the bolts, make sure the gears turn easily and smoothly. Tightening torque: 6–9 Nm.
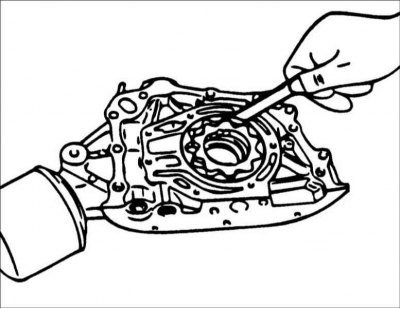
3. Install the safety valve, spring and screw in the plug, tightening it to the required torque. Before installation, lubricate the relief valve with engine oil. Tightening torque: 40–50 Nm.
Front cover
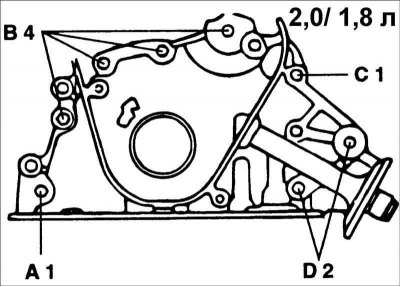
Install the front cover with a new gasket and secure it with bolts.
Bolt length:
- Engines 2.0/1.8 l:
- A - 25 mm
- B - 20 mm
- C - 45 mm
- D - 38 mm
- 1.6L Engine:
- A - 30 mm
- B - 45 mm
- C - 60 mm
- D - 22 mm
Tightening torque: 20–27 Nm.
Oil seal
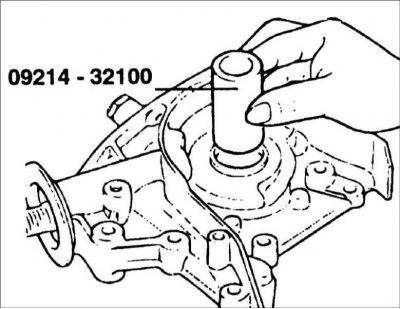
1. Using special tool 09214–32000, install the crankshaft front oil seal into the front cover.
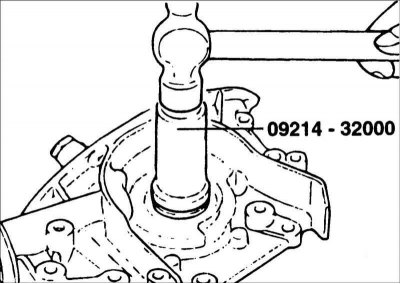
2. Install special tool 09214-32100 to the front end of the crankshaft and apply a thin layer of oil to the outer surface of the special tool to install the front cover.
3. Install the oil filter.
4. Clean the mating surfaces of the oil pan and cylinder block from any remaining old gasket.
5. Apply a continuous bead of sealant to the mating surface of the oil pan. Place the sealant around the bolt holes on the inside.
- 1. The thickness of the sealant layer should be about 4 mm.
- 2. After applying the sealant, install the oil pan within 15 minutes.
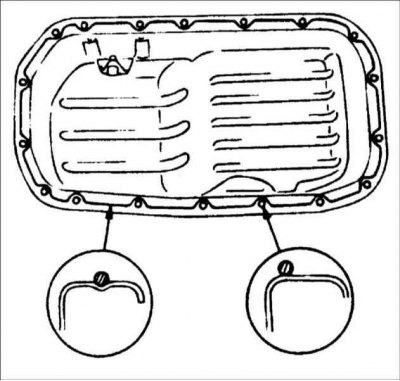
6. Install the oil pan onto the cylinder block and secure with bolts. Tightening torques: 10–12 Nm.