


Remove all rags, old parts, dirty cleaner, wash your hands and lay out clean tools on a clean workbench.
You will need plenty of clean, lint-free rags, a can of clean motor oil, and a set of engine gaskets. Gaskets are sold as a set. It is also necessary to have a torque wrench.
From this point onwards, nuts and bolts must be tightened to the required torque. Use open-end or ring spanners to pre-tighten bolts and nuts, but use a torque wrench for final tightening. We have tried to describe the work by dividing it into separate parts, without being dogmatic. The same applies to assembly. We recommend that you work without interruptions. Place the crankshaft in place, install all main bearings and plan the next steps. So, if you are unsure about something, think about the work again.
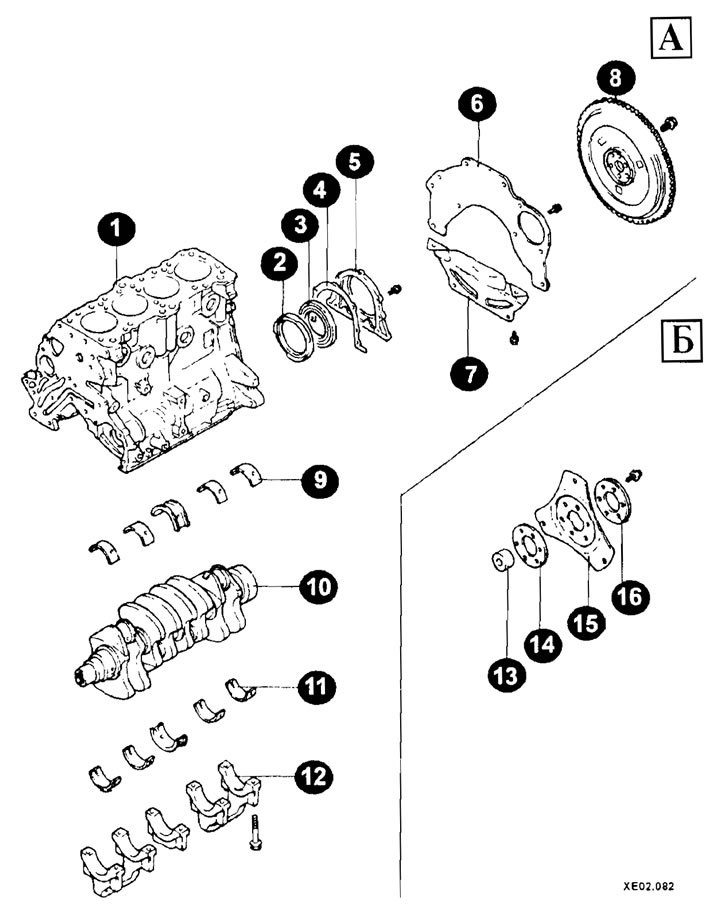
Cylinder block mounting elements (1.6L and 1.8L engines)
1 - cylinder block;
2 - oil seal separator;
3 - oil seal;
4 - gasket;
5 - rear engine cover;
6 - top plate;
7 - bottom plate;
8 - flywheel;
9, 11 - inserts (main bearings);
10 - crankshaft;
12 - main bearing cap;
13 - bushing;
14, 16 - transition washer;
15 - automatic transmission drive disc;
A - manual transmission;
B - automatic transmission.
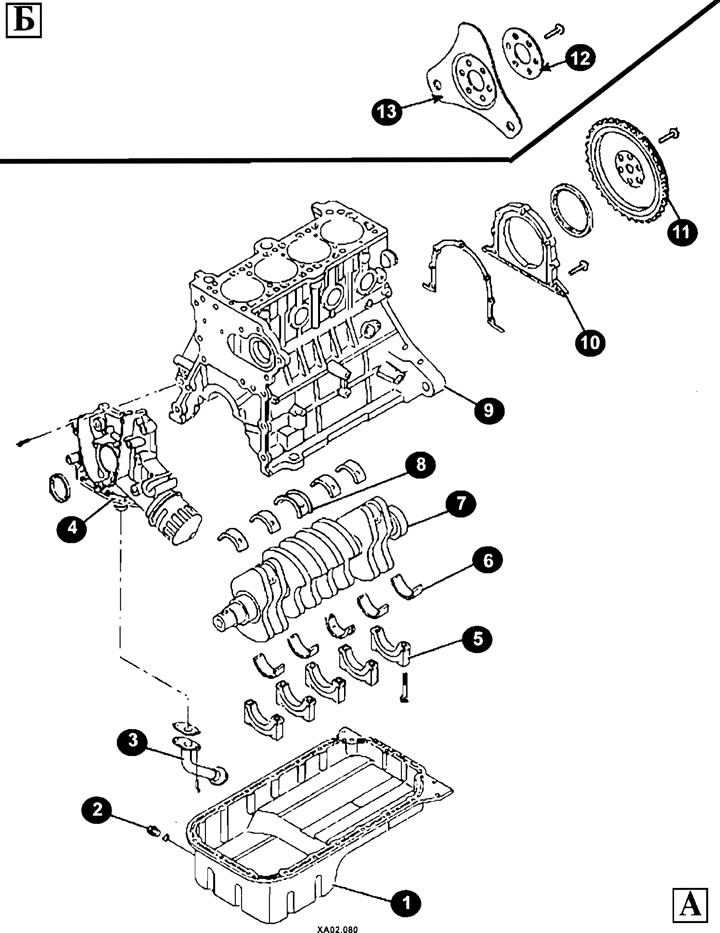
Cylinder block mounting elements (2.0L engines)
1 - oil pan;
2 - drain plug;
3 - oil receiver;
4 - oil pump;
3 - main bearing caps;
6 - inserts (main bearings);
7 - crankshaft;
8 - middle thrust half rings of the main bearing;
9 - cylinder block;
10 - rear engine cover;
11 - flywheel (models with manual transmission);
12 - transition washer;
13 - leading disk;
A - manual transmission;
B - automatic transmission.
Note: The crankshaft and cylinder block usually have marks indicating the size group of parts installed in the engine.
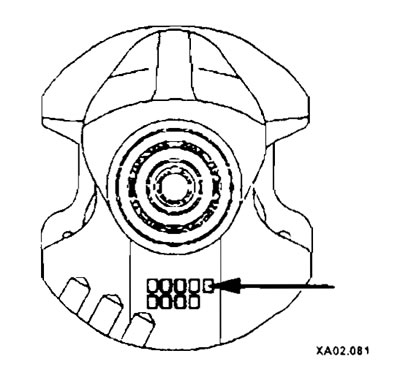
Crankshaft marks (1.6L and 1.8L engines)
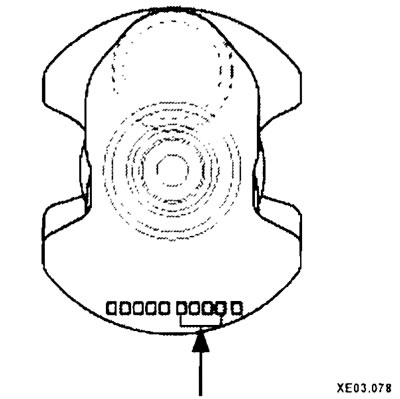
Crankshaft marks (2.0L engines)
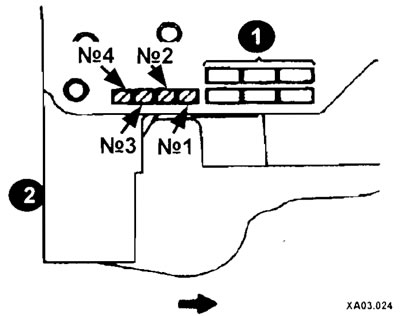
Cylinder Block Marks (1.6L and 1.8L engines)
1 - cylinder marks;
2 - cylinder block marks.
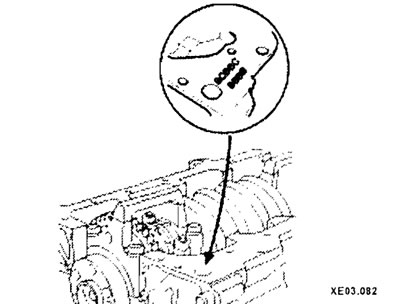
Cylinder Block Marks (2.0L engines)
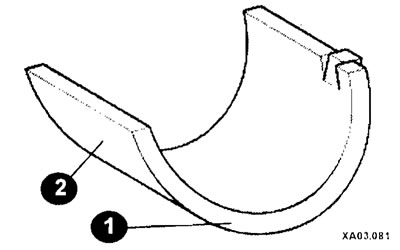
Insert marks
1 - color marking
2 - size group marking