
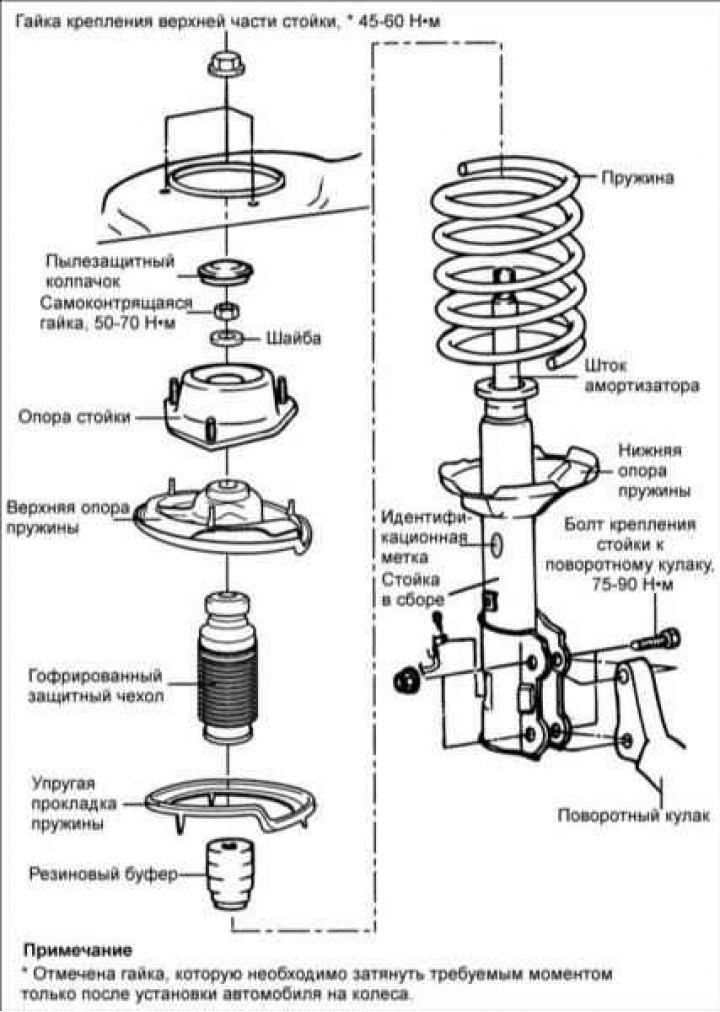
Removal
1. Remove the front wheel.
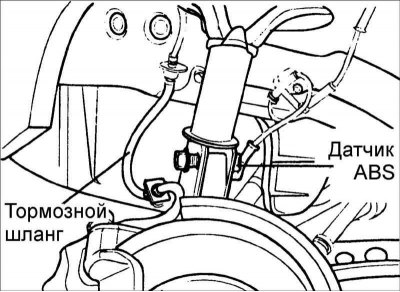
2. Separate the brake hose bracket from the front suspension strut.
Caution: Do not tear or damage the brake pipe.
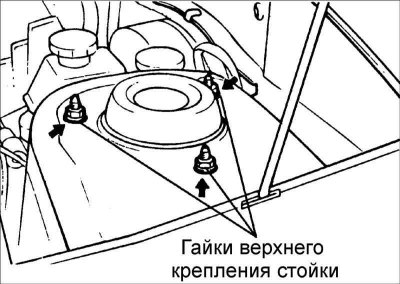
3. Unscrew the nuts of the upper rack mount.
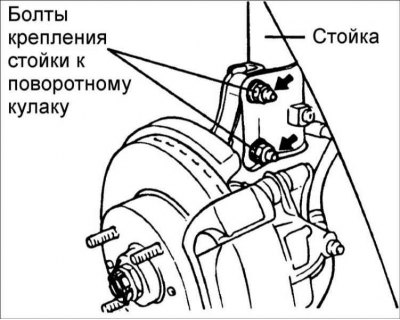
4. Unscrew the nuts, remove the bolts securing the strut to the steering knuckle and remove the strut from under the car wing.
Disassembly
1. Use a flat-head screwdriver to remove the dust cover.
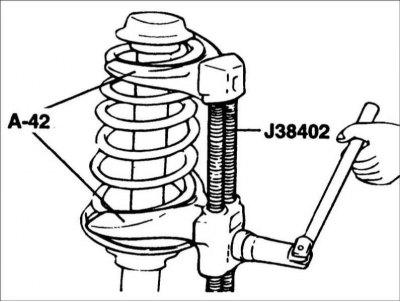
2. Using special tool J38402, – 42, compress the front suspension strut spring.
Caution: Use only a reliable tool to compress the spring.
3. Loosen the lock nut at the top of the shock absorber rod.
4. Remove the strut support, upper spring support, coil spring, dust boot and lower spring support.
Examination
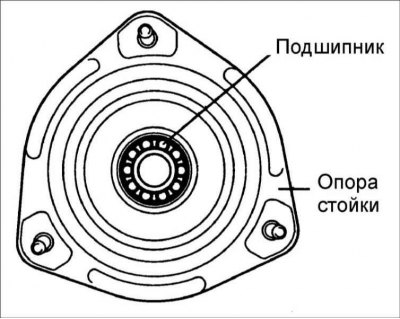
1. Check the strut support bearing for wear or damage.
2. Check rubber parts for damage or deterioration.
3. Check the coil spring for deflection and loss of elasticity.
- 1) Check and adjust tire pressure.
- 2) Load the vehicle with the cargo that is usually carried in it.
- 3) To check the spring, perform a test drive, then perform the following checks step by step.
- 4) Check each shock absorber by successively pressing hard and lifting on the corner of the bumper closest to the shock absorber being checked. With each test, apply the same amount of force and note the resistance when pressing and returning to the original position. Compare the test results with a vehicle that has satisfactory ride quality. Both shock absorbers on the same axle of a vehicle must provide the same resistance. If the resistance is different, perform the following checks.
- 5) Raise the rear axle of the vehicle enough to relieve the load on the suspension struts.
- 6) Unscrew the lower strut mounting bolts. Compress the struts at different rates throughout the shock's travel and in both directions. Compare the results for the two sides of the car when compressed and returned to their original state. The resistance of the rack to return to its original state is usually stronger than the compression (approximately one to two times). The right and left racks should show the same results. The difference in results between the front and rear struts is normal.
4. Check the shock absorber for abnormal resistance or extraneous noise.
- 1) Check the tightening torques of the threaded connections of the rack mount. Incorrect tightening torques may result in abnormal noise.
- 2) If all fastenings are in order, perform the check according to item to isolate the damaged unit. 3 and 4).
- 3) To check, take a test drive.
- 4) If one of the rear suspension struts is working with shocks, raise the rear axle of the car enough to relieve the suspension struts. Remove the lower strut mounting bolts. Check the strut for abnormal noise by quickly and fully compressing it. If you only hear a hissing noise, this is normal.
- 5) Other unwanted noises may be detected by intentionally rocking the vehicle up and down. Any sound other than hissing is abnormal, so such a rack must be replaced.
5. Check the shock absorber for leaks.
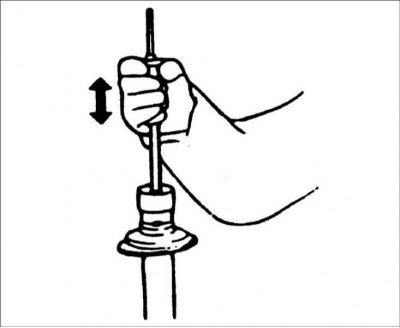
- 1) Extend the shock absorber fully while turning the shock absorber piston rod and check the area around the piston rod seal.
- 2) Check for fluid leaks in the piston rod seal area.
- 3) A slight deposit of liquid is not a reason to replace the shock absorber, since a slight leak provides lubrication to the rod.
- 4) Significant fluid leakage from the shock absorber can be easily detected by traces of fluid, in which case the shock absorber must be replaced.
Shock absorber disposal
1. Pull the shock absorber rod out completely.
2. Drill a hole to remove gas from the cylinder.
Warning: The gas escaping from the shock absorber is safe, but care must be taken to avoid injury from flying chips.
Assembly
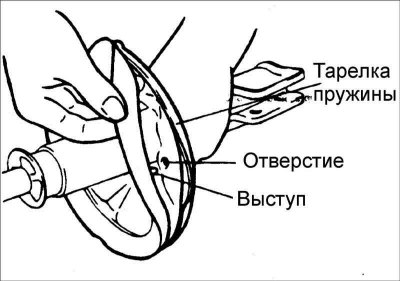
1. Install the lower spring support so that its protrusions enter the holes in the spring plate.
2. Install the dust cover on the shock absorber.
3. Using special tool J38402, – 42, compress the front suspension strut spring. After the spring is fully compressed, install it on the shock absorber.
Caution: Install the coil spring with the marking facing the steering knuckle.
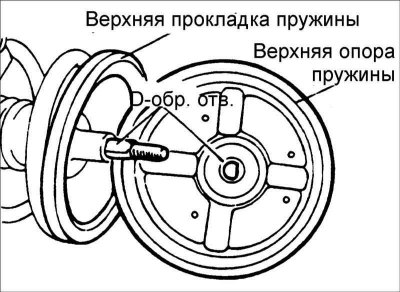
4. Fully extend the shock absorber rod and install the upper spring seat and strut seat.
Caution: Align the D-shaped hole in the upper spring seat with the flat on the shock absorber piston rod.
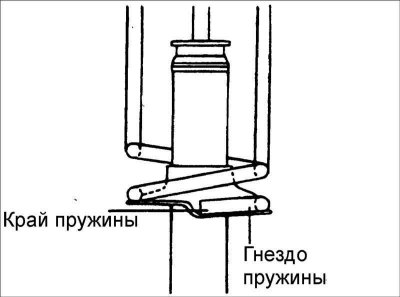
5. Position the upper and lower ends of the coil spring correctly by fitting them into the recesses and screw on the self-locking nut, but do not tighten it completely.
6. Remove the spring compressor.
7. Tighten the self-locking nut to the specified tightening torque. Tightening torque: 50–70 Nm.
8. Lubricate the upper shock absorber bearing and install the dust cap.
Warning: Make sure that no lubricant comes into contact with the rubber parts of the strut support.
Installation
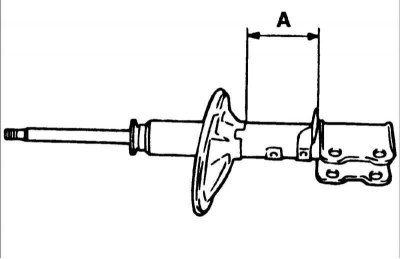
1. When installing the front suspension strut, make sure that the mating surfaces are clean and the identification mark is facing the rear of the vehicle.
2. Tighten all threaded connections to the required torques.
Tightening torque:
- Upper strut mounting nut: 45–60 N·m
- Steering knuckle to strut nut: 130–150 N·m
3. Secure the brake hose and ABS sensor wire to the stand.