
Removal
1. Remove the front wheel.
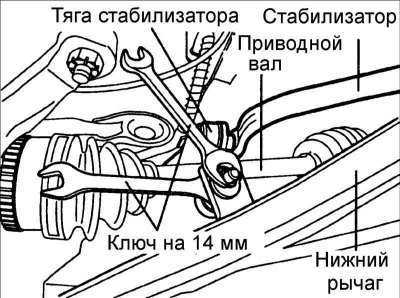
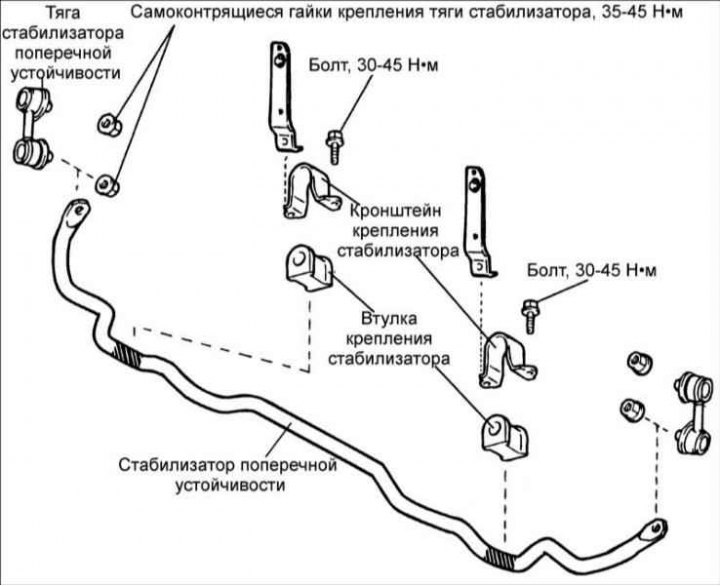
2. Remove the stabilizer link.
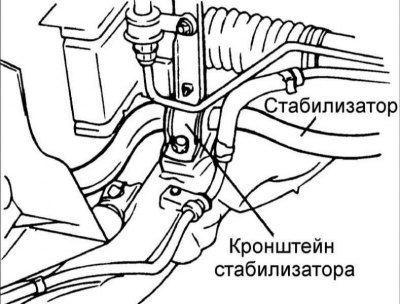
3. Remove the stabilizer bracket and bushing.
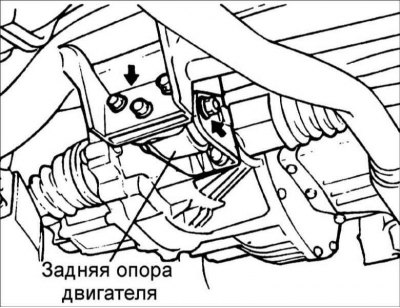
4. Remove the rear engine mount.
5. Remove the anti-roll bar.
Examination
1. Check the anti-roll bar for loss of elasticity and damage.
2. Check the condition of all bolts.
3. Check the stabilizer link protective cover for cracks or damage.
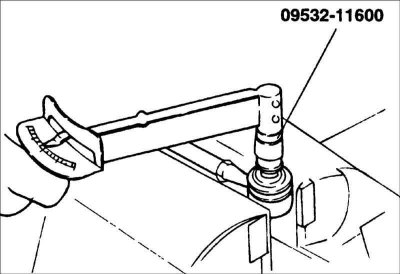
4. Check the torque required to turn the stabilizer link ball joint pin.
- If there are cracks in the protective boot, replace it and add grease to the joint.
- Rock the stabilizer link ball joint pin from side to side several times. Torque: 1.7–3.2 N·m.
- If the torque exceeds the permissible values, replace the stabilizer link.
- If the torque is significantly below the permissible value, the ball joint can be used repeatedly as long as it does not jam or have excessive play.
Installation
1. Install the bushing on the anti-roll bar.
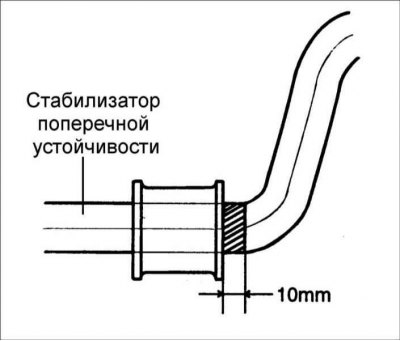
Attention! The distance between the bushing and the mark applied with white paint should be 10 mm and located on the outside of the car.
2. Align the bracket with the bushing. Make sure the bracket fits securely around the bushing.
3. Temporarily secure the bushing bracket and install the bushing on the other side of the stabilizer.