
Removal
1. Fold the rear seat.
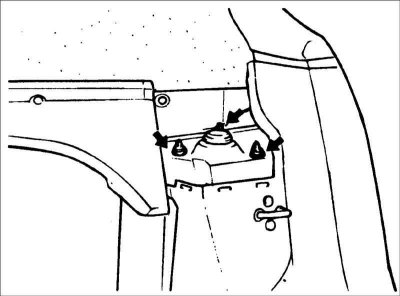
2. Unscrew the three nuts of the upper rear pillar mount.
3. Remove the rear wheel.
4. Disconnect the brake pipe and wheel speed sensor from the rear strut.
5. Disconnect the anti-roll bar link.
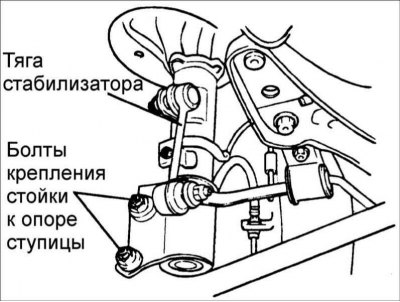
6. Unscrew the nuts and remove the bolts securing the strut to the rear axle mounting element.
Warning: Be careful not to damage the rear suspension strut.
7. Remove the stand from under the car wing.
Disassembly
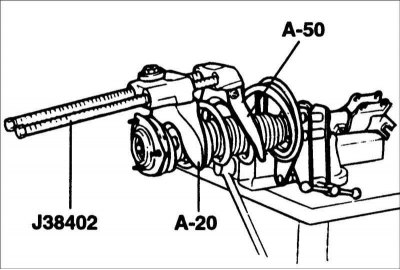
1. Using special tools J38402, – 20 and – 50, compress the rear suspension strut spring.
[The full version is located on the website: HYUNDAIBOOK.ru]
Caution: Use only a reliable tool to compress the spring.
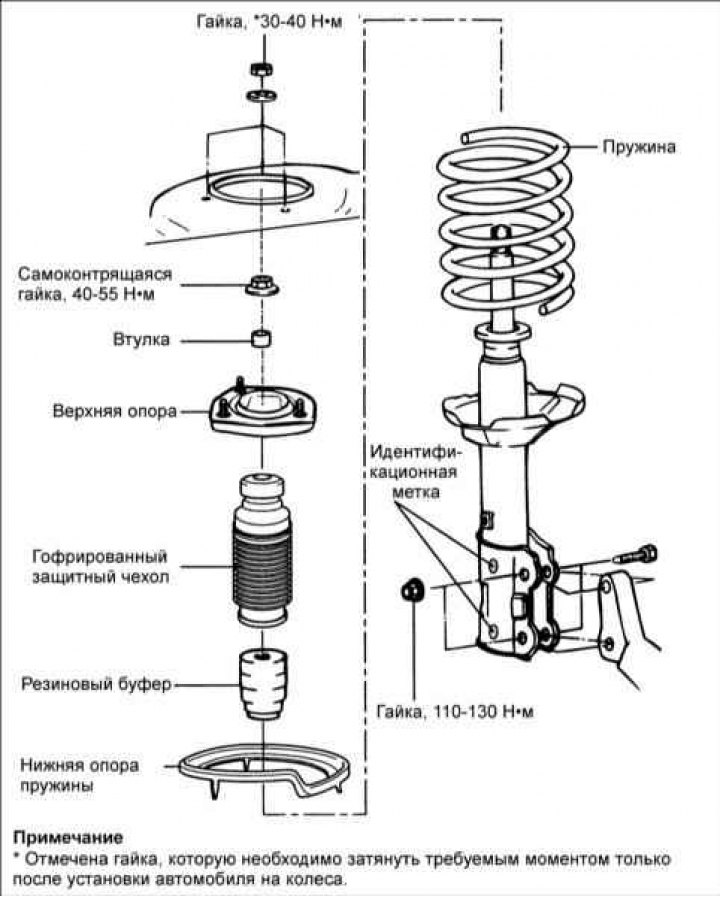
2. Loosen the self-locking nut at the top of the shock absorber rod.
3. Remove the strut support, coil spring and dust cover.
Examination
1. Check the strut support for wear or damage.
2. Check rubber parts for damage or deterioration.
3. Check the coil spring for deflection and loss of elasticity.

4. Check the shock absorber for abnormal resistance or extraneous noise (see Front suspension strut).
Assembly
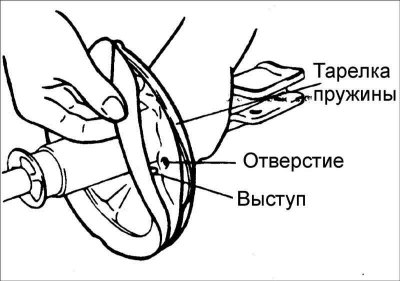
1. Install the lower spring support so that its protrusions enter the holes in the spring plate.
2. Install the dust cover on the shock absorber.
3. Using special tools J38402, -20 and -50, compress the rear suspension strut coil spring.
4. After the spring is fully compressed, install it on the shock absorber.
Caution: Align the D-shaped hole in the upper spring seat with the flat on the shock absorber piston rod.
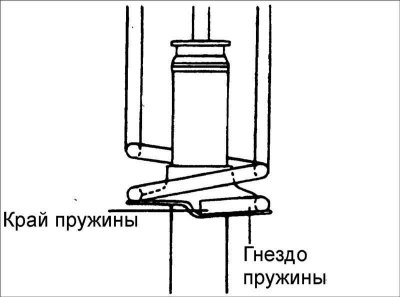
5. Position the upper and lower ends of the coil spring correctly by fitting them into the recesses and screw on the self-locking nut, but do not tighten it completely.
Warning: A new self-locking nut must be used during assembly.

6. Position the spring support mounting bolt so that the projections of the gaskets are aligned as shown in the figure.
Caution: The spring identification mark must be located at the bottom.
7. Remove spring compressor tools J38402, -20 and -40.
8. Tighten the self-locking nut to the specified tightening torque. Tightening torque: 40–55 Nm.
Installation
Installation is carried out in the reverse order of removal.
After installation, check the rear wheel alignment angles.