
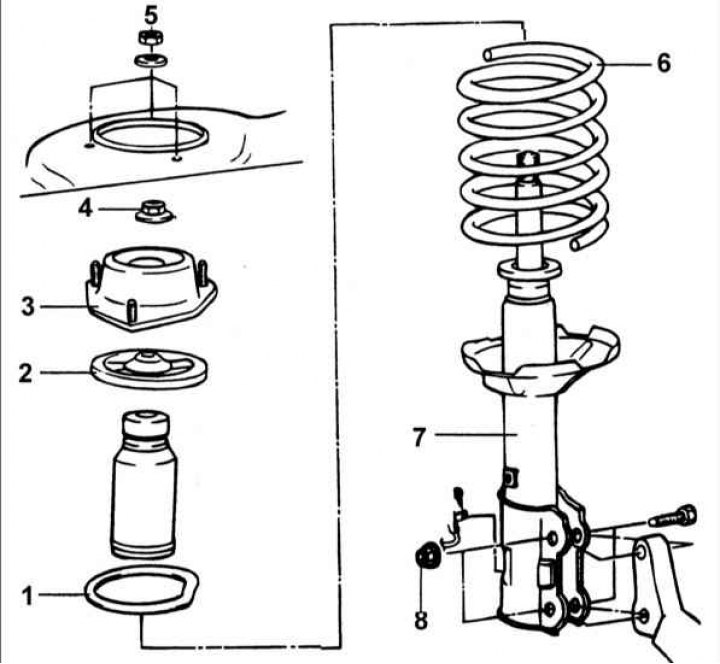
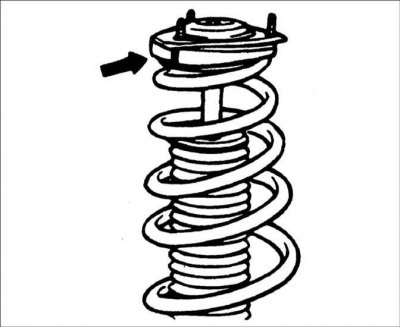
1 - lower spring support; 2 – the top support of a spring; 3 - rack bracket; 4 - self-locking nut, 40–55 Nm; 5 – nut, 20–30 Nm; 6 - spring; 7 – a rack of a back suspension bracket; 8 - nut, 75–90 Nm.
Rear suspension elements
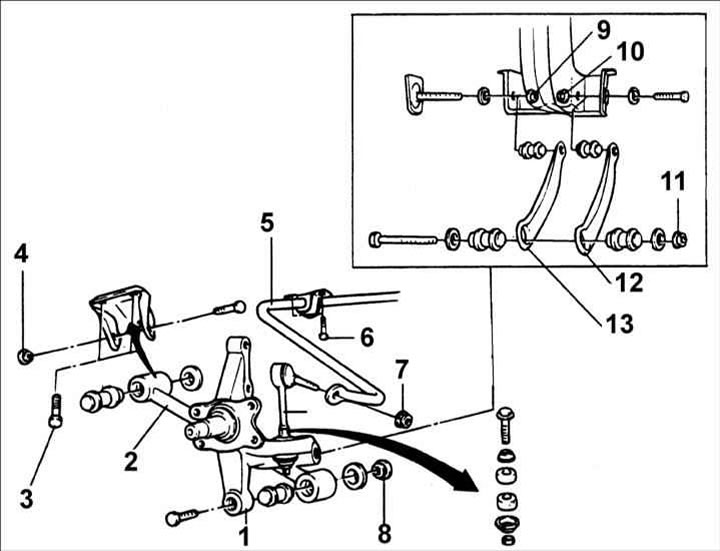
1 – a fastening element of a back axis; 2 – lower trailing arm; 3 - bolt, 40–50 Nm; 4 - nut, 100–120 Nm; 5 - rear anti-roll bar; 6 - bolt, 17–26 Nm; 7 - bolt, 35–45 Nm; 8 – nut*, 130–150 Nm; 9 – nut*, 100–120 Nm; 10 – nut*, 88–100 Nm; 11 – nut*, 130–150 Nm; 12 - lower transverse lever (IN) rear suspension; 13 - lower transverse lever (A) rear suspension.
Warning! * Nuts are marked, which must be tightened to the required torque only after the vehicle is installed on the wheels.
Withdrawal
1. Fold down the rear seat.
2. Remove the rear cover from the wheel arch.
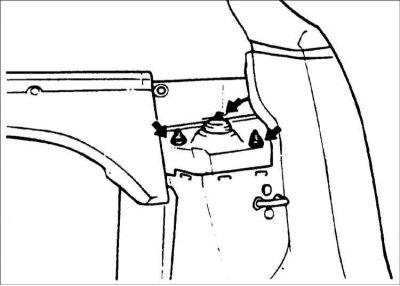
3. Remove the three top rear strut mounting nuts.
4. Remove the rear wheel.
5. Disconnect the brake pipe and the wheel speed sensor from the rear strut.
6. Turn away nuts and get bolts of fastening of a rack to a fastener of a back axis and get a rack from under a wing of the car.
Warning! Be careful not to damage the rear suspension strut.
Disassembly
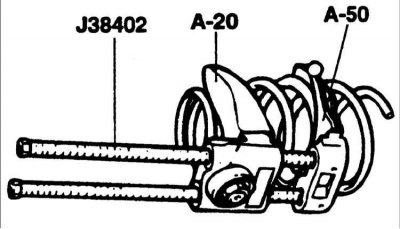
1. Compress the rear suspension strut spring with the special tool.
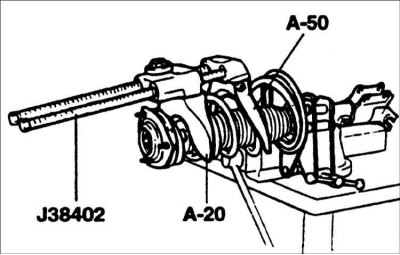
Warning! Use only a reliable tool to compress the spring.
2. Loosen the lock nut at the top of the damper rod.
3. Remove the strut post, upper spring seat, coil spring, dust cover, and lower spring seat.
Examination
1. Check the strut mount for wear or damage.
2. Check rubber parts for damage or deterioration.
3. Check the coil spring for deflection and loss of elasticity.

4. Check the shock absorber as follows:
- a. grab the shock absorber rod with your hand and push and pull it out of the shock absorber several times;
- b. check that the stem moves smoothly, without jamming, and the force applied to the stem does not change with each stroke;
- c. make sure that there are no extraneous noises when moving the rod.
Assembly
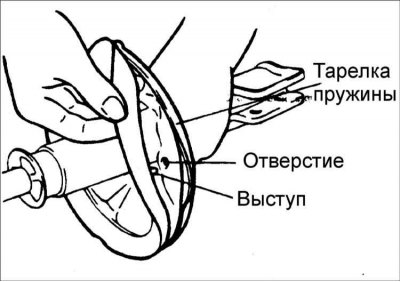
1. Install the lower spring seat so that its protrusions fit into the holes of the spring plate.
2. Install the dust cover on the shock absorber.
3. Compress the front suspension strut spring with the special tool. After the spring is fully compressed, install it on the shock absorber.
4. Fully extend the damper rod and install the upper spring seat and strut seat.
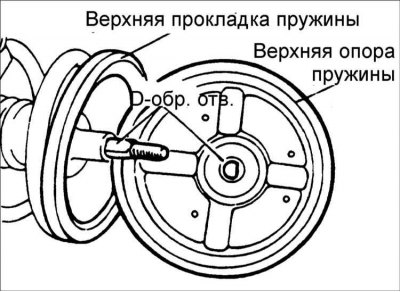
Warning! Align the D-hole in the upper spring seat with the flat on the damper rod.
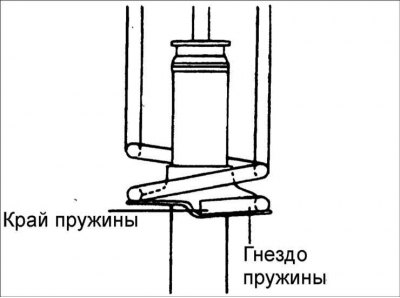
5. Correctly position the upper and lower ends of the coil spring into the recesses and screw on the self-locking nut, but do not fully tighten it.
6. Position the spring seat mounting bolt so that the projections of the gaskets are aligned, as shown in the figure.
7. Remove the spring compressor tool.
8. Tighten the self-locking nut to the correct torque.
Tightening torque: 40–55 Nm