
Caution: Gasoline is extremely flammable, so extreme caution must be exercised when working on any part of the fuel system. Do not smoke or allow open flames in the work area. If gasoline comes into contact with your skin, wash it off immediately with plenty of soap and water. When working with any component of the fuel system, wear safety glasses and have a fire extinguisher handy.
Removal
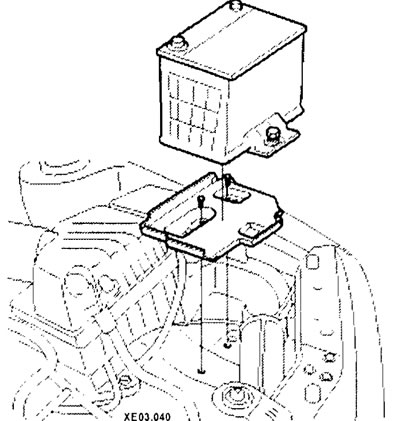
After disconnecting the wires from the battery, remove the battery.
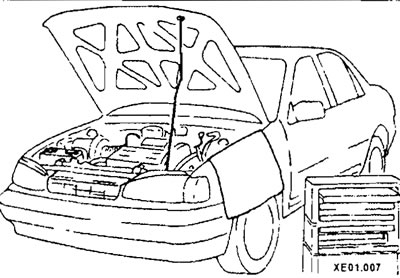
Cover the fenders of your car; there are special covers for this, but regular bedspreads or old blankets will do. Remove the hood.
Remove the air cleaner.
Label all vacuum hoses, electrical wiring, ground wires and fuel lines to ensure proper installation later, then disconnect them. Pieces of electrical tape with numbers on them are suitable for marking. If there is a possibility of hoses and/or wires getting mixed up, you may want to draw a diagram of the engine compartment and clearly label all lines, hoses and wires.
Lift the vehicle and secure it securely to the support posts (trestles). Drain all liquid from the cooling system.
Tag and disconnect all coolant hoses from the engine.
Remove the lower protective cover (if present).
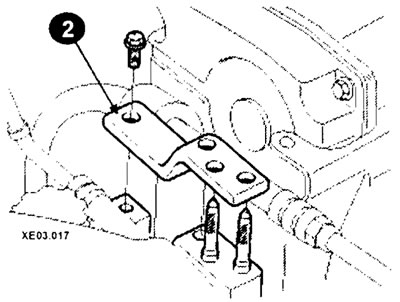
Disconnect the exhaust system from the engine by removing the clamp and bracket (2).
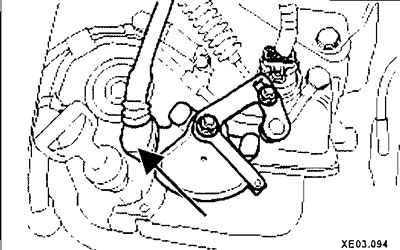
Disconnect the gearshift rod.
Models with manual transmission
- Remove the gearbox control mechanism.
(The material is reprinted from another resource: HyundaiBook)
Models with automatic transmission
- Disconnect the automatic transmission control cable.
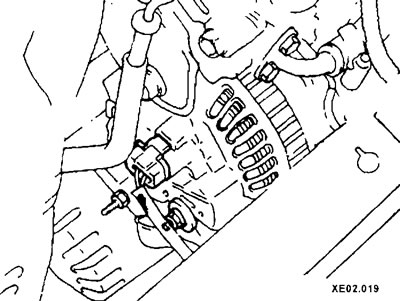
Disconnect the air conditioning compressor plug.
Disconnect the starter wires.
Disconnect the fuel lines from the engine to the chassis. Close or clamp open fittings/hoses.
Disconnect the ground wire from the clutch housing and disconnect the clutch drive.
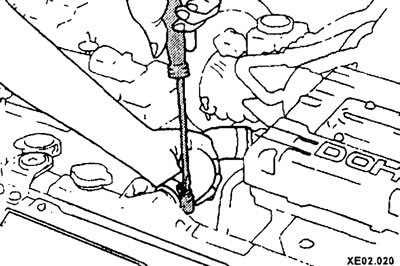
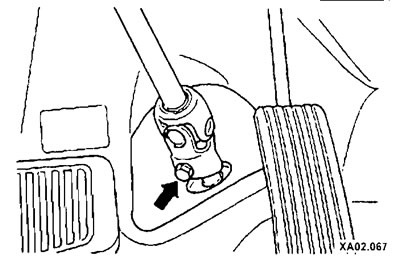
Loosen the steering column bolt.
Raise the front of the vehicle and remove the wheels.
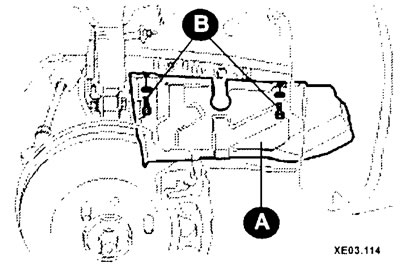
Remove the side shield (A) by unscrewing the bolts (B).
Hang the wheel support on the wire.
Disconnect the steering knuckle from the shock absorber strut.

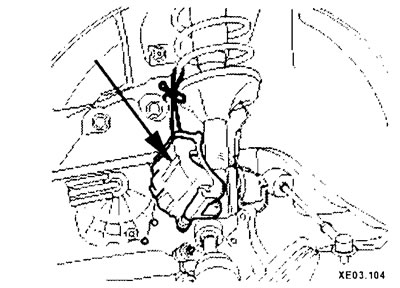
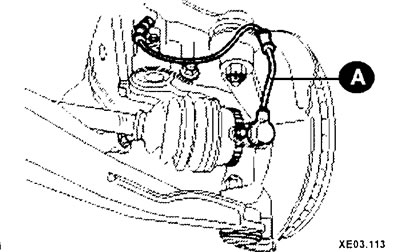
Disconnect the wheel speed sensor (A) (models with ABS).
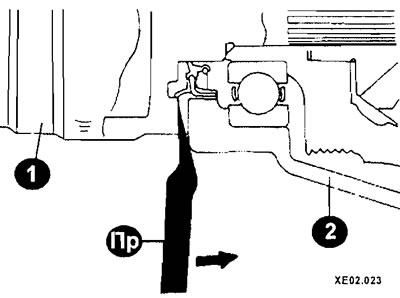
Using a punch or special tool, remove the drive shafts (1) from the gearbox housing (2).
Hang the drive shafts from the body using wire.
Remove the ignition distributor (if equipped).
Drain the oil from the engine and remove the oil filter (if necessary).
You can remove the starter and generator by unscrewing the fasteners.
Disconnect the front anti-roll bar from the front mount and rotate them to a position that does not interfere with removing the engine from the vehicle.
Support the weight of the transmission with a jack. Place a block of wood between the jack and the transmission to prevent damage.
Attach a special cable or chain to the engine and gearbox load elements.
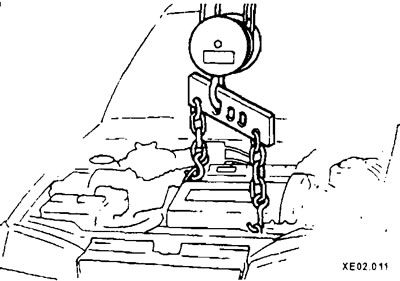
Place the winch in the working position and attach the rope/chain to it. Tighten the rope/chain.
Caution: Do not stand under the engine if its weight is supported only by a jack or winch.
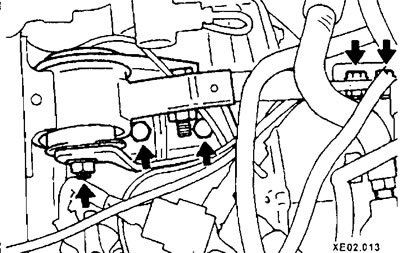
Loosen the support bolts that secure the engine to the body.
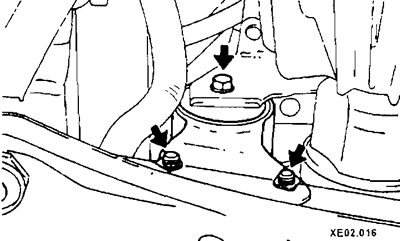
Front support for 1.6 and 1.8 liter engines
Front mount for 2.0 liter engine
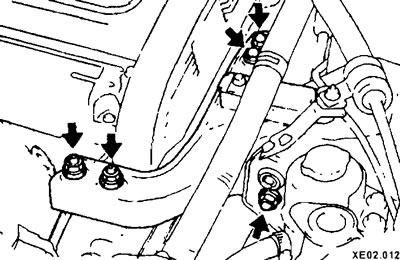
Upper engine mount
Transmission bracket
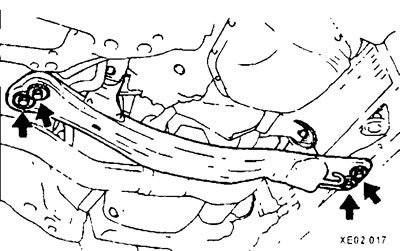
Central beam
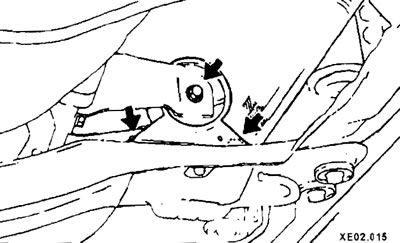
Rear engine mount
Disconnect the gearbox control rods.
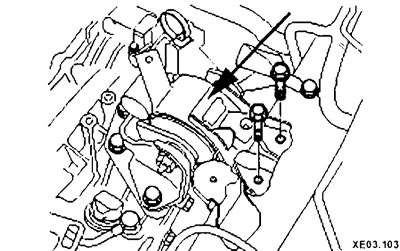
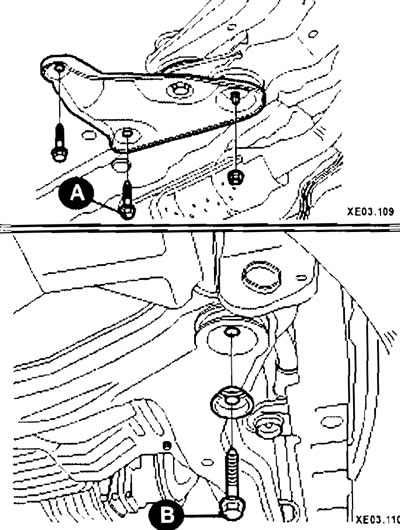
2.0 liter engine: Remove the bolts (A) and (B) securing the lower engine mount (see picture on the right).
Check again that nothing else secures the engine and gearbox to the body. If you find anything, disconnect it.
Lower the engine slightly to disengage the mount brackets.
Move the engine forward if necessary.
Raise the engine slowly. Make sure there is nothing hanging from the engine as you lower the winch.
Lower the engine onto the workbench.
Check engine and gearbox mounts. If they are worn or damaged, replace them.
Install the front (A) and upper (B) engine mounts according to the marks (arrows). Do not mix them up.
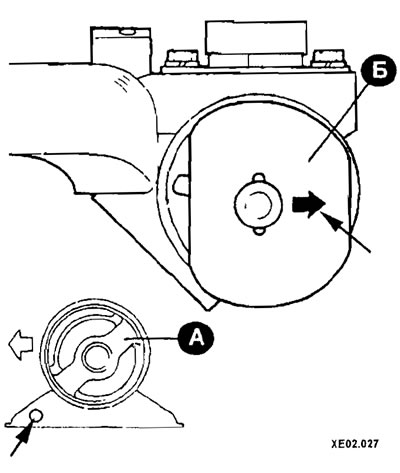
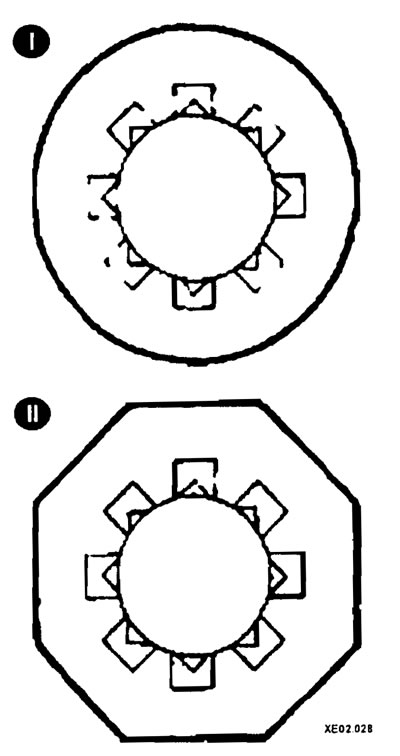
Remember that the front (I) and rear (II) rubber bushings have different designs.
Carefully insert the engine into the engine compartment.
Align the holes in the engine brackets with the holes in the frame, insert the bolts, tightening them securely.
Reconnect all disconnected engine/gearbox components.
Fill the gearbox with coolant and oil. Check the brake fluid level and test the brakes.
Start the engine and check for leaks and that all components are functioning properly. Install the hood and test drive the vehicle.
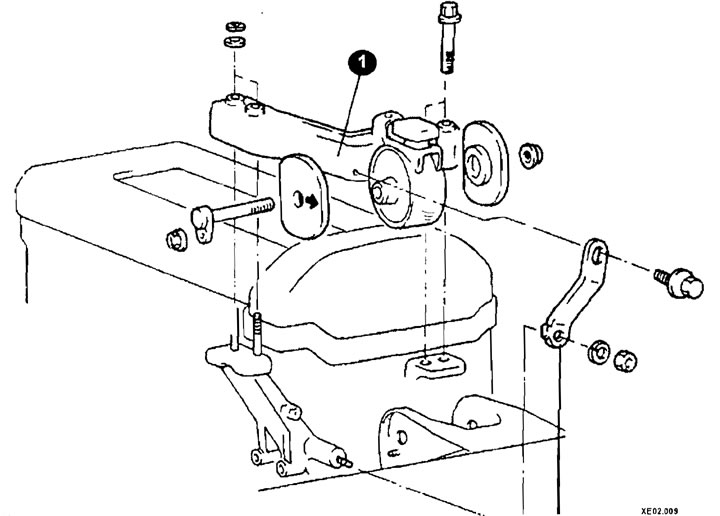
Mounting elements of the upper engine support (1)
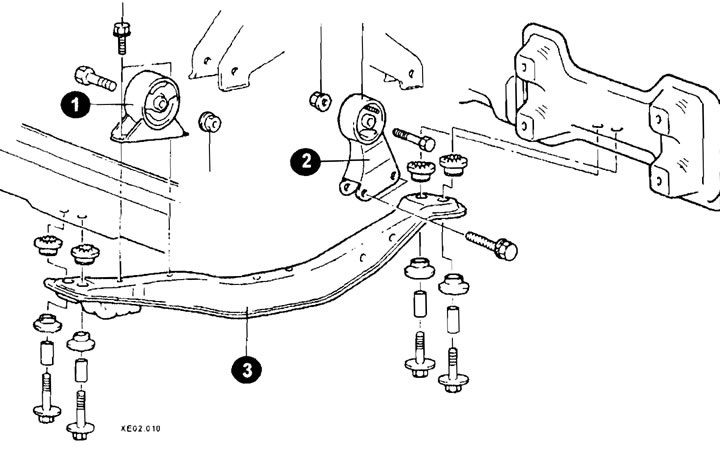
Engine Mounting Elements
1 - front support;
2 - rear support;
3 - central beam.