HyundaiBook.ru
Repair Chevrolet Repair Honda Repair Toyota Repair Land Rover Repair VAZ Repair Renault Repair Nissan
English Русский
Български
Беларускі
Український
Српски
Hrvatski
Română
Polski
Slovenský
Magyar
ArticlesSitemapContacts  


  Accent   Elantra   Getz   Grandeur   Sonata   Santa Fe   Tucson   Others
Elantra 1 (1990-1995, petrol) Elantra 2 (1995-2000, petrol) Elantra 3 (2000-2006)
  • Main
  • Elantra
  • J1 (1990-1995)
  • Power unit
  • Engine overhaul
  • Cylinder head — disassembly (1.6 and 1.8 liter engines)

Cylinder head — disassembly (1.6 and 1.8 liter engines) (Hyundai Elantra J1)

0
Disassembling the cylinder head involves removing all elements.

Label all parts and store them separately so that they can be returned to their original positions when installed.

Place the cylinder head on a table or in a vice.

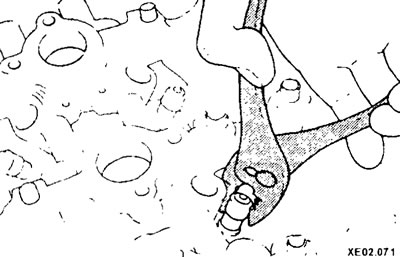
If they have not been removed, then unscrew the coolant temperature gauge sensor and the oil pressure indicator lamp sensor.
If they have not been removed, then unscrew the coolant temperature gauge…


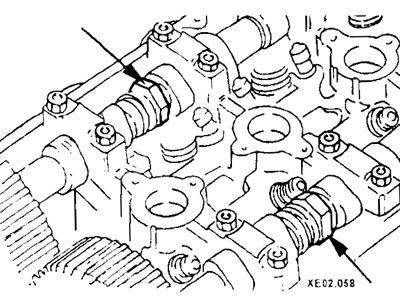
Holding the camshafts in the places indicated in the figure, unscrew the mounting bolts and remove the camshaft gears.
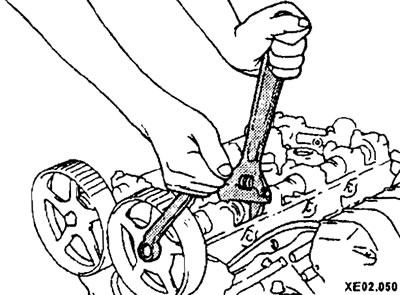
Holding the camshafts in the places indicated in the figure, unscrew the…


Remove the camshaft bearing housings by unscrewing the bolts in the reverse order shown.
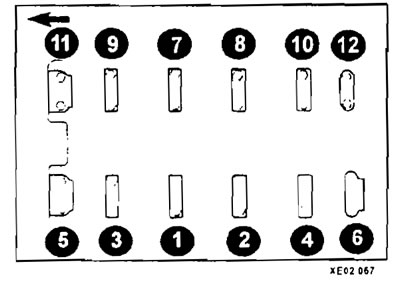
Remove the camshaft bearing housings by unscrewing the bolts in the reverse…


Caution: Do not mix up the removed elements during assembly. The lids have identification marks (L - intake valve side, R - exhaust valve side).


Remove the hydraulic valve lifters (1) from the rocker arm holes.
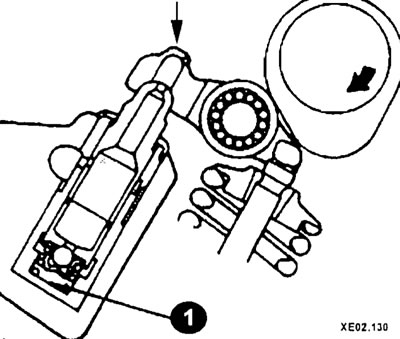
Remove the hydraulic valve lifters (1) from the rocker arm holes.


[Original version of the article on the website: HYUNDAIBOOK]

Before removing the valves, mark them and store them with the associated parts so that they can be returned to their original positions when reinstalled.

Compress the springs on the first valve with a tool and remove the crackers. Carefully release the spring, remove the plate and springs.
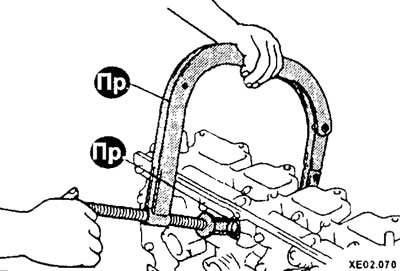
Compress the springs on the first valve with a tool and remove the crackers.…


Remove the seal from the valve.

Remove the seal from the valve.


Remove the valve from the head. If the valve gets stuck in the guide (does not pass through it), push it back into the head and file down the cracker groove and the end of the valve using a file.

Remove the valve from the head. If the valve gets stuck in the guide (does not…


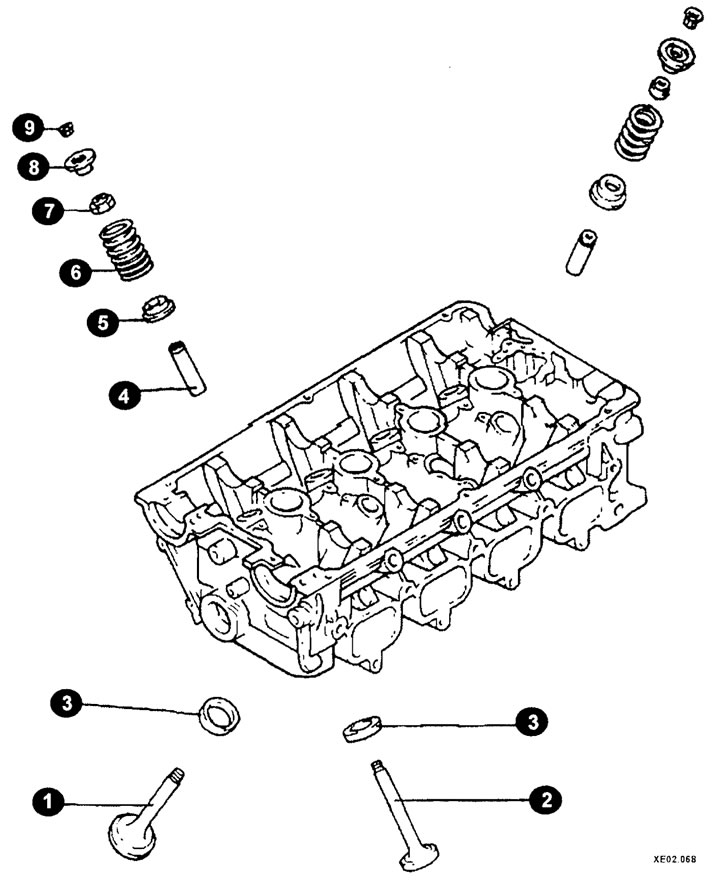
Cylinder head components for 1.6 and 1.8 liter engines

Cylinder head components for 1.6 and 1.8 liter engines
1 - inlet valve;
2 - exhaust valve;
3 - valve seat;
4 - guide bushing;
3 - spring seat;
6 - spring;
7 - oil seal (oil deflector cap);
8 - top plate;
9 - crackers.
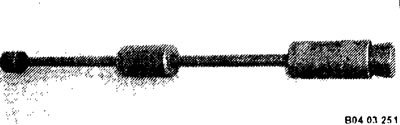

Universal device for removing/installing oil seals (oil deflector caps)

Universal device for removing/installing oil seals (oil deflector caps)


Remove the spring seat.


Repeat the procedure for the remaining valves. Remember to keep all valve parts together so that they can be installed in their original position during assembly.

To quickly disassemble the valves, you can use the following method.

Place an old piston pin on the top valve plate and hit it with a hammer.

Warning: Be careful. In this case, the crackers pop out and the springs can "jump".


Remove the valve components as described above.

Note: A tool is required to install the valves.


After the valves and all associated parts have been removed and stored properly, the head should be thoroughly cleaned and inspected. If a complete engine disassembly is being performed, complete this process completely before working on the cylinder head.
This article is available at russian, bulgarian, belarusian, ukrainian, serbian, croatian, romanian, polish, slovak, hungarian
This article has been reviewed by: Konstantin Smirnov
Add to social network:

Previous
Elantra 1: Engine overhaul
Next

Cylinder Head — Removal (All Engines)
Cylinder head — repair
Engine overhaul — disassembly sequence
Engine Overhaul Options
Engine — removal and installation
Cylinder Head — Disassembly (2.0L Engines)
Cylinder Head Components — Cleaning and Checking
Cylinder head — assembly
Camshaft — Checking and Replacing
Valves, valve seats and guides — inspection and repair
We recommend other articles on the topic of Hyundai manuals:

Cylinder head — removal, inspection and installation Hyundai Accent 1 (1994-1999)
Cylinder head — removal and installation Hyundai Getz (2002-2011)
Cylinder head and valves — components Hyundai Sonata 3 (1993-1998)
Disassembly, inspection and assembly of the cylinder head Hyundai Santa Fe 2 (2007-2012, petrol)
Cylinder head — device Hyundai Tucson 1 (2005-2010)
Disassembly, inspection and assembly of the cylinder head Hyundai Matrix (2001-2010, petrol)

Link in different formats to this article

Visitor comments
No comments yet


How much will 29 + 35 ?


Elantra 3 (2000-2006) 
  • User manual
  • Control devices
  • Audio system
  • Starting the engine and driving
  • Faults en route
  • Maintenance and care
  • Technical information
  • Power unit
  • Gasoline engines
  • Diesel engines
  • Lubrication system
  • Cooling system
  • Fuel system (gasoline)
  • Fuel system (diesel)
  • Decreased toxicity
  • Ignition system
  • Transmission
  • Clutch
  • Mechanical gearbox
  • Automatic gearbox
  • Drive shafts and axles
  • Chassis
  • Car suspension
  • Steering
  • Brake system
  • Body
  • Exterior (external elements)
  • Interior (internal elements)
  • Air conditioning system
  • Electrical equipment
  • Equipment and devices
  • Headlights and lighting
  • Power devices
  • Electrical circuits
Elantra 2 (1995-2000, petrol) 
  • General information
  • Maintenance
  • Power unit
  • Engine repair
  • Cooling system
  • Intake and exhaust system
  • Fuel system
  • Transmission
  • Clutch
  • Manual gearbox
  • Automatic gearbox
  • Drive shafts and axles
  • Chassis
  • Front suspension
  • Rear suspension
  • Steering
  • Brake system
  • Body
  • Body elements
  • Electrical equipment
  • Equipment and devices
  • Electrical diagrams
Elantra 1 (1990-1995, petrol) 
  • General information
  • Introduction to the guide
  • Maintenance
  • Power unit
  • Minor engine repair
  • Engine overhaul
  • Lubrication system
  • Cooling system
  • Fuel injection system
  • Ignition system
  • Exhaust system
  • Transmission
  • Clutch
  • Manual gearbox
  • Automatic gearbox
  • Drive shafts
  • Chassis
  • Front suspension
  • Rear suspension
  • Steering
  • Wheels and tires
  • Troubleshooting
  • Brake system
  • Body
  • Body elements
  • Electrical equipment
  • Equipment and devices
  • Power devices
  • Heating and air conditioning
  • Electrical circuits
HyundaiBook.ru © 2018-2026 · Mobile version · Sitemap: EN BG BY UA RS HR RO PL SK HU · Administration · Site search · Hyundai owners Accent 1 · Accent 2 · Accent 3 · Elantra 1 · Elantra 2 · Elantra 3 · Getz · Sonata 3 · Sonata 4 · Santa Fe 2 · Tucson 1 · Tucson 2 · Matrix ·
This site uses cookies to optimize its functionality. By continuing, you agree to our terms.