


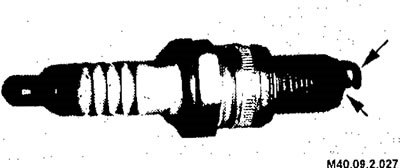
A small sediment of light brown or gray color (or rusty red when using unleaded fuel) on a spark plug that has been running for any period of time is considered normal. Any other color or abnormal amount of sediment indicates that there is something wrong with the engine. The gap between the central and side electrodes may increase by no more than 0.025 mm every 1500 km under normal conditions.
If the spark plug is installed in an engine that is running properly, the spark plugs can be removed, cleaned, adjusted (gap) and reinstalled without any damage to the engine.
If the spark plug is dirty and works intermittently, then you need to investigate the cause and clean or replace the spark plug.
There are several reasons why a spark plug may become fouled, and you can learn to identify them by visually inspecting the spark plug.
Spark plugs suitable for use in an engine come in a wide variety of heat ratings. The amount of heat the spark plug absorbs is determined by the length of the lower insulator. The longer the insulator, the hotter the spark plug will be during operation; the shorter the insulator, the colder it is. Spark plugs that absorb (or save) little heat and remain too cold, will collect lead, oil and carbon residues because they are not hot enough to burn these residues. This leads to pollution and, consequently, interruptions in operation. Candles that absorb too much heat have no residue. But the electrodes quickly burn out and, in some cases, the result may be premature (pre-ignition). This ignition occurs when the tip of the spark plug becomes so hot that it ignites the fuel mixture before true spark ignition occurs. This pre-ignition is usually the cause of detonation knocks at low speed and high load. Under severe conditions, the temperature may become sufficient to ignite the fuel mixture in the combustion chamber before it reaches the tip of the spark plug. In this case, great damage will be caused to the pistons, rings and valves.
In most cases, the heat ratings recommended by the manufacturer are correct and will provide good performance over a wide range of operating conditions. However, if you mostly drive long distances at high speeds, you can install spark plugs that are one unit "colder" than standard. If you mostly do short-distance driving where the engine may not always reach operating temperature, "hotter" plugs can help burn off the deposits that tend to accumulate in these conditions.
Removal
When removing spark plug wires, always hold them by the rubber boot.
Do not mix up the wire numbers when removing and installing.
Remove the wires from the spark plugs by grasping the cap on the wire. If the cap fits tightly on the spark plug, then to remove it you need to shake it while pulling it out. Do not pull the wire by the insulation.
Loosen all spark plugs with a wrench by turning them about two turns.
Please note: The cylinder head is made of aluminum. If possible, remove the spark plugs when the engine is cold to avoid damaging the threads.
If the spark plugs are difficult to remove, apply motor oil or silicone spray around the spark plug seat and wait a few minutes.
If you have compressed air, use it to clean the area around the spark plug holes. On the other hand, you can use a rag or brush for this. Make sure that no foreign objects enter the spark plug hole.
Remove the spark plugs by unscrewing them by hand.
Examination
Check the spark plugs for deposits and wear.
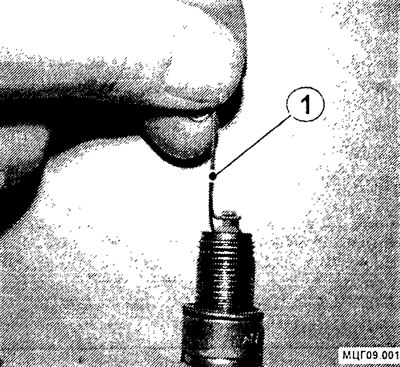
If they are not going to be replaced, clean them thoroughly. Remember that any sediment on the spark plugs reduces their efficiency. The spark plugs can be cleaned in a special spark cleaner, which is sometimes available at service stations, or they can be cleaned with a stiff brush. After cleaning, the electrodes should be processed with a flat file. Do not use sandpaper as it may leave small particles on the electrodes. The electrodes should be processed to a flat state, they should become flat and with sharp corners. Rounding the electrodes reduces the voltage on them by more than 50%. Check the gap between the spark plug electrodes before installation. The ground electrode must be parallel to the central electrode, and the special probe (1) must pass through the gap with a slight pinch.
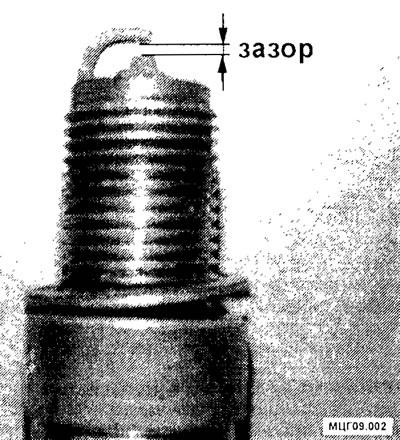
Caution: Never adjust the gap on working spark plugs with platinum-coated electrodes.
Always check the gap, even for new spark plugs. It is not recommended to use a flat feeler gauge to measure the gap, as this can lead to errors in measurements.
The wire probe usually has a device attached to it for bending the electrodes. Use it to set the correct gap. Never bend the center electrode. Be careful not to bend the side electrode too much or too often. It can break off in the engine and cause it to break.
In emergency situations, if you do not have a wire feeler gauge of the required thickness, you can use a hacksaw blade for cutting metal, which is usually 0.75 mm thick.
Installation
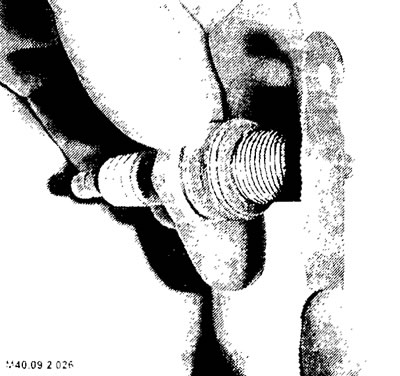
Lubricate the spark plug threads with motor oil. Insert the spark plugs into the holes and tighten them by hand. Make sure they fit exactly onto the threads.
Tighten the spark plugs with a wrench. Don't tighten them too much, just until they feel tight. If you have a torque wrench, tighten to 15-20 Nm.
Place the caps with wires on the spark plugs. Check the tightness of the caps.