


Contents: Removal ⇓ Examination ⇓ Pulleys and roller of the toothed…⇓ Installing the timing belt tensioner…⇓ Installation ⇓
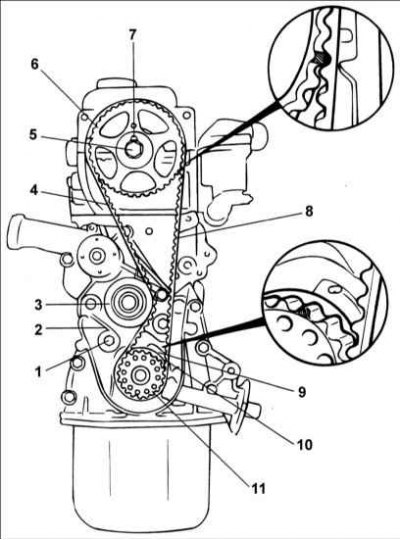
1 – bolt, 20–27 Nm; 2 – tension mechanism spring; 3 – timing belt tension roller; 4 – free side of the toothed belt; 5 – bolt, 80–100 Nm; 6 – camshaft pulley; 7 – mounting pin; 8 – side of toothed belt tension; 9 – installation mark (pointer) on the front cover; 10 – timing mark on the crankshaft pulley; 11 – crankshaft pulley.
Removal
1. Loosen the water pump pulley mounting bolt.
2. Loosen the generator mounting bolt.
3. Remove the water pump pulley and belt.
4. Remove the crankshaft pulley.
5. Remove the timing belt cover.
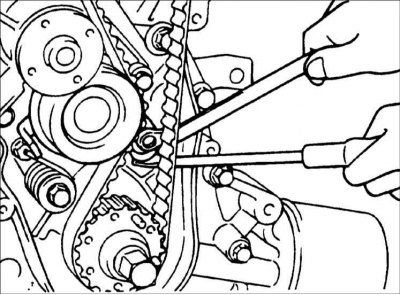
6. Move the timing belt tensioner roller toward the water pump and temporarily secure it in this position.
7. Remove the camshaft pulley mounting bolt.
8. Remove the camshaft pulley.
9. Remove the timing belt.
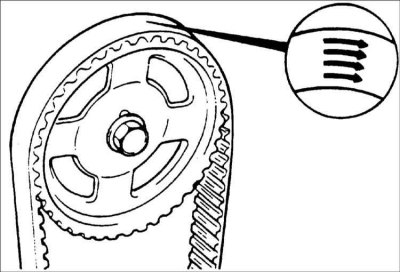
Warning: Mark the direction of rotation of the timing belt to reinstall it in its original position.
10. Unscrew the crankshaft pulley mounting bolt. Remove the crankshaft pulley and bushing.
11. Remove the timing belt tensioner roller.
Examination
Warning! Do not bend the timing belt excessively or change its direction of rotation. Do not allow oil or grease to come into contact with the timing belt, as this will cause it to break.
1. Check the timing belt for damage, wear, delamination, cracks on the teeth and at the base of the teeth, as well as for defects on the ends and back of the belt.
2. If the following defects are present, replace the timing belt.
Description | Defect |
| 1. The hard back surface of the toothed belt. The surface has a glossy appearance. The hardness of the surface is such that the fingernail does not leave marks on the belt | 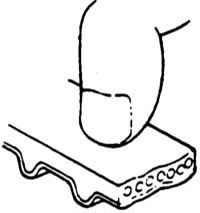 |
| 2. Cracks on the back surface of the timing belt | 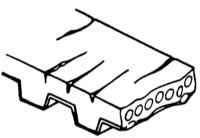 |
| 3. Cracks or delamination of the timing belt | 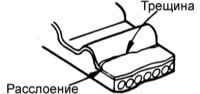 |
| 4. Severely worn teethThe side of the tooth is worn, exposing the fibers, cord and rubber base | 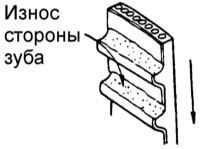 |
| 5. Severely worn teeth (last stage) The side of the tooth is worn, with abrasions becoming visible and the thickness of the tooth is reduced | 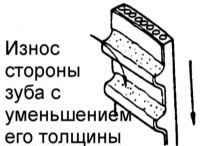 |
| 6. Cracks in the base of the teeth | 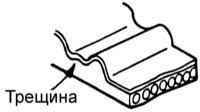 |
| 7. Missing tooth | 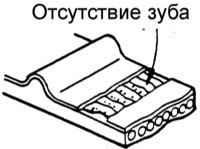 |
| 8. Severe wear on one side of the belt | |
| 9. Cracks on the side of the timing belt |
Pulleys and roller of the toothed belt tensioning mechanism
1. Check the camshaft and crankshaft pulleys, tensioner pulley and idler pulley for uneven wear, cracks and damage.
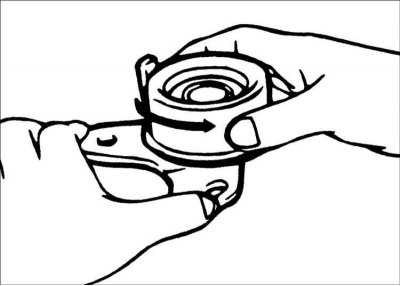
2. Check the ease and smoothness of rotation of the tensioner roller and the idle pulley, as well as the absence of extraneous noise during rotation.
Installing the timing belt tensioner mechanism
1. Temporarily secure the timing belt tensioner in the retracted position, as close to the water pump as possible.
2. After installing the tensioning mechanism, the installation marks on the camshaft and crankshaft pulleys must be aligned with the indicators.
Turn the engine crankshaft so that the piston of the first cylinder is at TDC in the compression stroke.
Execution order
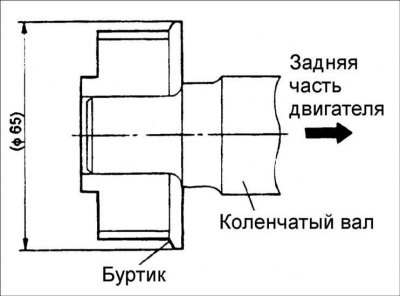
Warning: Make sure the bushing is installed correctly with the chamfer facing the front of the engine.
1. When installing the camshaft pulley, the locating pin must enter the pulley hole.
2. Install the timing belt so as to eliminate sagging on the tension side.
Installation
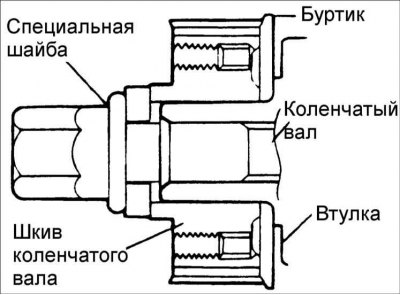
1. Install the bushing and crankshaft pulley as shown in the figure. Pay attention to the installation direction.
Tightening torque: 140–150 Nm
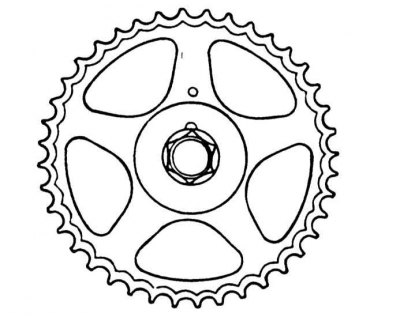
2. Install the camshaft pulley and secure it with the bolt, tightening it to the required torque.
Tightening torque: 80–100 Nm
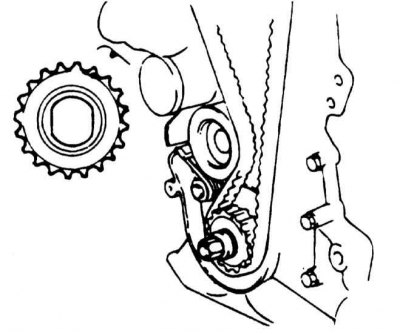
3. Align the timing marks on the camshaft and crankshaft pulleys with the pointers, and the piston of the first cylinder should be set to TDC in the compression stroke.
 |
 |
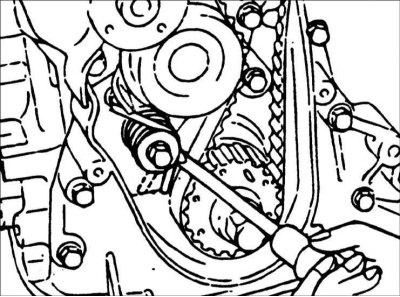
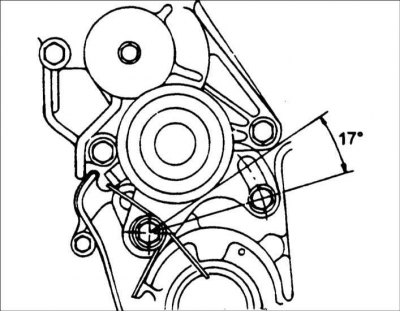
4. When installing the timing belt tensioner, first install the tensioner, spring and spacer sleeve. Temporarily tighten the bolts. Then, temporarily compress the tensioner by inserting the bolt into the elongated hole. Install the rear end of the flat spring against the front cover as shown in the figure.
5. Fix the tensioning mechanism directed to the water pump.
6. Install the timing belt on the crankshaft pulley.
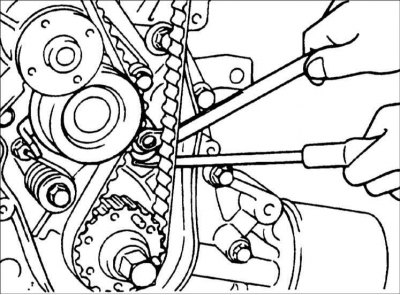
7. Install the timing belt on the camshaft pulley, making sure that there is no sagging on the tension side.
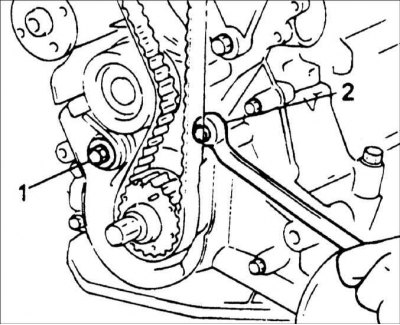
8. Loosen bolts 1 and 2 of the tensioner mechanism in the sequence shown in the figure, this will release the spring of the toothed belt tensioner mechanism.
9. Tighten bolts 1 and 2 of the tensioner mechanism in the same order.
10. Turn the engine crankshaft clockwise two full revolutions and align the mark on the crankshaft timing belt pulley with the pointer on the engine cylinder block. Check that the mark on the camshaft pulley is aligned with the pointer on the cylinder head cover.
Warning! Do not turn the engine crankshaft counterclockwise.
11. In the same order, loosen bolts 1 and 2 securing the toothed belt tensioner mechanism.
12. Tighten tensioner mounting bolts 1 and 2 in the same order.
Tightening torque: 20–27 Nm
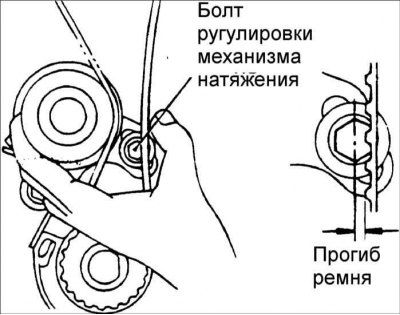
13. Recheck the tension of the toothed belt. When pressing on the tensioned branch of the toothed belt with a force of 49 N, the toothed belt should bend to the center of the head of the tensioner mounting bolt.
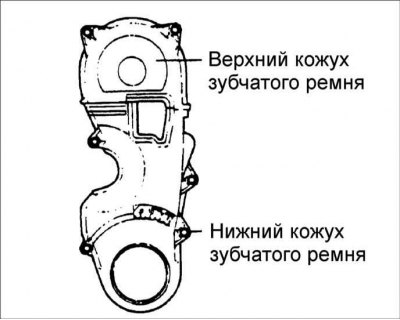
14. Install the timing belt covers.
Tightening torque: 10–12 Nm
15. Install the crankshaft pulley.
16. Install the fan drive poly V-belt and adjust its tension.
17. Install the water pump pulley.
18. Install the poly V-belt and adjust its tension.