


Contents: Removal ⇓ Examination ⇓ Installing the front cover ⇓ Installing the front oil seal ring ⇓ Installing an oil pump ⇓
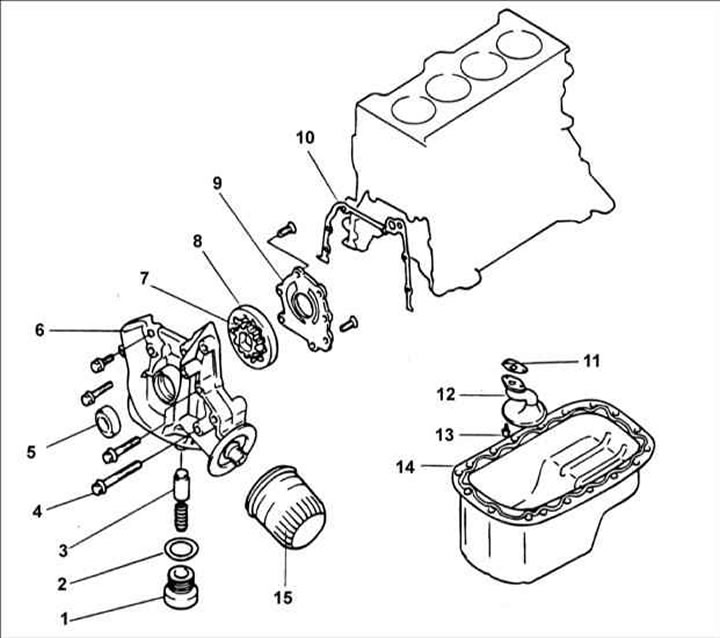
1 – plug, 40–50 Nm; 2 – sealing ring; 3 – plunger; 4 – bolt, 12–15 Nm; 5 – front sealing ring; 6 – front cover; 7 – internal gear of the oil pump; 8 – external gear of the oil pump; 9 – oil pump cover; 10 – gasket; 11 – gasket; 12 – oil intake tube; 13 – bolt, 15–22 Nm; 14 – oil pan; 15 – oil filter.
Warning: When installing the plug, a new sealing ring must be used.
Removal
1. Remove the timing belt.
2. Remove all oil pan mounting bolts.
3. Remove the oil pan.
4. Remove the oil filter.
5. Remove the front cover from the cylinder block.
6. Remove the oil pump cover.
7. Remove the internal and external gears of the oil pump from the front cover, having previously marked their relative positions.
8. Unscrew the plug and remove the spring and plunger.
Examination
1. Check the front cover for cracks or damage and replace it if necessary.
2. Check the front sealing ring for wear or damage to the sealing lips and replace if necessary.
3. Check the condition of the oil pan and replace it if necessary.
4. Check the oil filter mesh for damage and replace it if necessary.
5. Check the front cover for wear or damage where it contacts the oil pump gears and replace if necessary.
6. Check the condition of the safety valve installed in the front cover.
7. Check the shape and absence of damage of the safety valve spring.
- Spring length in free state: 46.6 mm
- Length under load: 6.1 kg / 40.1 mm
8. Check the oil pump gear teeth for wear or damage.
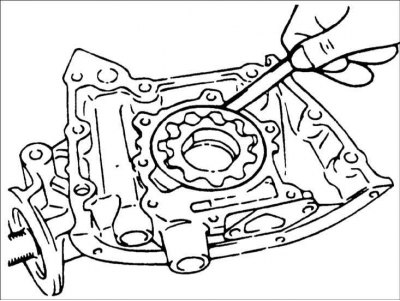
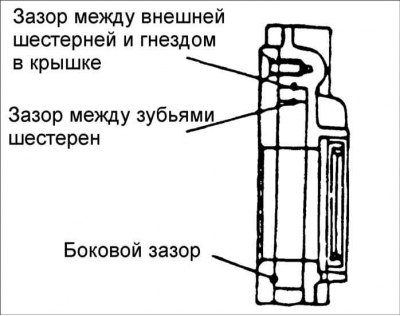
9. Use a feeler gauge to measure the gap between the oil pump gear and the socket in the cover.
Maximum allowable clearance of the external gear of the oil pump: 0.12–0.18 mm
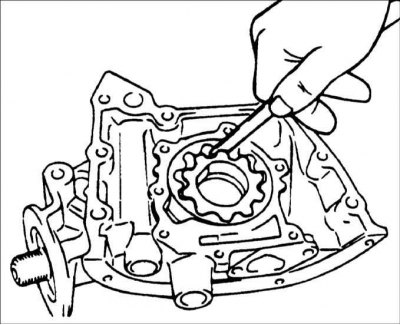
10. Use a feeler gauge to measure the gap between the teeth of the oil pump gears.
Maximum permissible clearance between the teeth of the oil pump gears: 0.001–0.003 mm
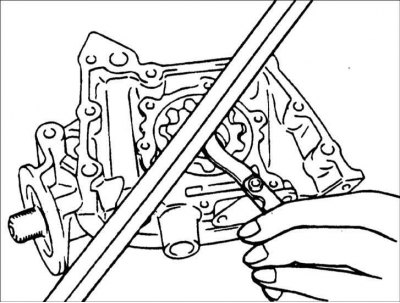
11. Use a metal ruler and feeler gauge to measure the lateral clearance of the oil pump gears.
Maximum permissible lateral clearance of oil pump rotors: 0.04–0.06 mm
Installing the front cover
Execution order
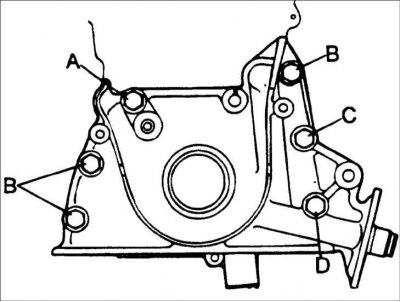
Install the front cover with a new gasket and secure with bolts, tightening them to the specified torque.
Bolt length: A – 25 mm; B – 28 mm; C – 45 mm; D – 60 mm; tightening torque – 12–15 Nm
Installing the front oil seal ring
1. Check the front sealing ring for wear or damage to the sealing lips and replace if necessary.
2. Check the condition of the spring ring that compresses the working edges of the sealing ring.
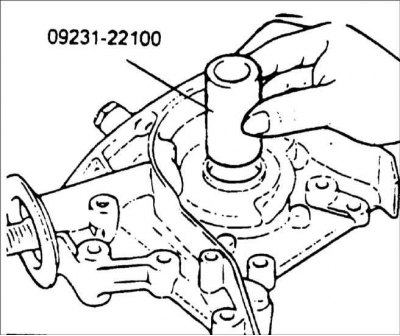
3. Lubricate the outer surface of the new sealing ring with engine oil. Using special tool 09231–22100 or a bushing of the appropriate diameter, install the sealing ring on the crankshaft until it touches the front cover.
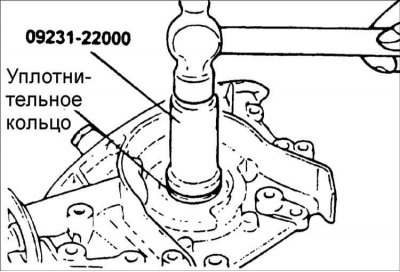
4. Using special tool 09231–22000, install the sealing ring into the front cover socket until it stops.
5. Install the crankshaft pulley, timing belt and crankshaft pulley.
6. Install the oil filter.
7. Clean the mating surfaces of the oil pan and cylinder block from any remaining old gasket.
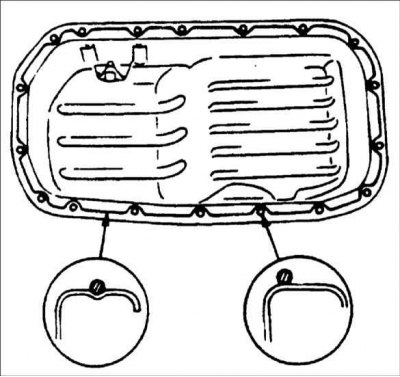
8. Apply a continuous bead of sealant 4 mm in diameter to the mating surface of the oil pan. Around the bolt holes, place the sealant on the inside. After applying the sealant, install the pan no more than 15 minutes later.
9. Install the oil pan onto the cylinder block and secure with bolts.
Tightening torques: 6–8 Nm
Installing an oil pump
1. Install the oil pump outer and inner gears into the front cover.
2. Install the oil pump cover and secure it with bolts. After tightening the bolts, make sure the gears turn easily and smoothly.
Tightening torques: 6–9 Nm
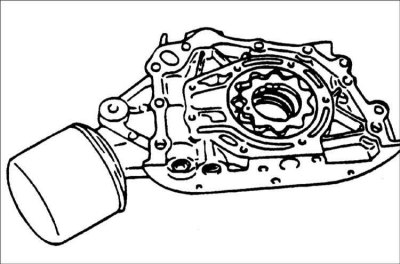
3. Install the relief valve, spring and screw the plug in, tightening it to the required torque. Before installation, lubricate the relief valve with engine oil.
Tightening torques: 40–50 Nm