
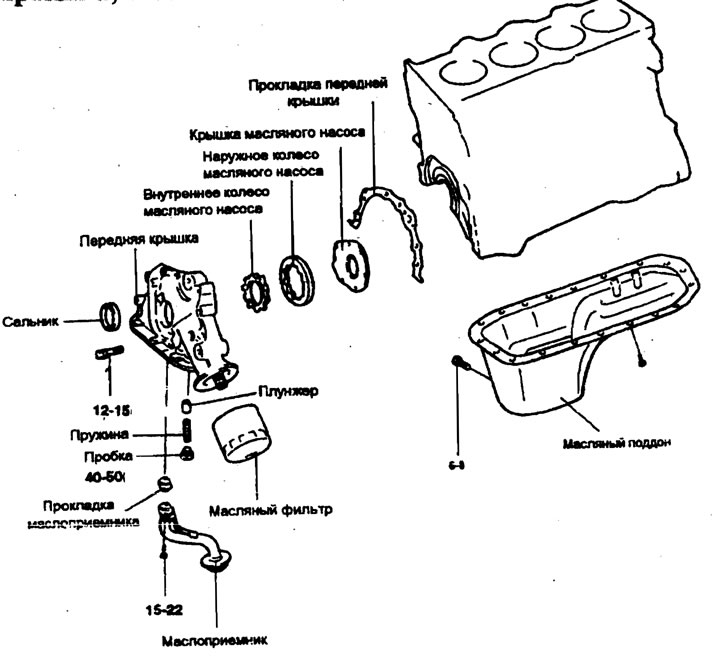
Tightening torque: Nm
Removal
1. Remove the timing belt (please refer to the relevant section).
2. Remove the oil pan bolts.
3. Remove the oil pan.
4. Remove the oil receiver.
5. Remove the front cover assembly.
6. Remove the oil pump cover.
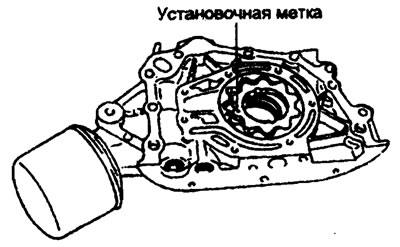
7. Remove the inner and outer gears from the front cover. Matching marks on the gears provide installation direction. Make sure the inner and outer wheels are installed as shown in the illustration.
8. Remove the plug and remove the spring and plunger.
Examination
Front cover
1. Check the front cover for cracks or damage. Replace if necessary.
2. Check the edges of the front cover oil seal for wear and damage. Replace if necessary.
Oil pan and oil receiver
1. Check the oil pan for damage, breakage and cracks. Replace if defective.
2. Check the oil receiver for damage, breakage and cracks. Replace if defective.
Front cover and oil pump cover
Check the surfaces in contact with the gears for wear (especially stepped) and damage.
Oil pump gears
1. Check the surface of the gear teeth for damage and wear.
2. Determine the gap between the outer gear and the front cover.
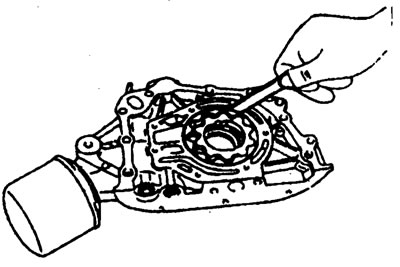
External gear wheel
- The gap between the outer circle and the front cover is 0.12-0.185 mm
3. Check the gap of the teeth tips on the pump impeller
Nominal value - 0.02-0.150 mm
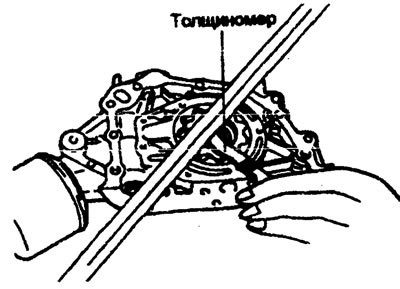
4. Check the axial clearance of the outer impeller of the pump.
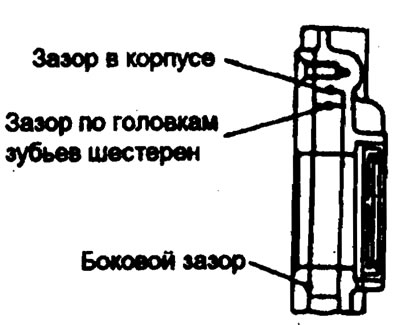
Nominal value - 0.02-0.07 mm
5. Check the axial clearance of the inner impeller of the pump.
Nominal value - 0.02-0.065 mm
Safety valve and spring
1. Check the sliding of the safety valve inserted into the front cover.
2. Check the safety valve spring for deformation or damage.
Nominal value
- Height in free state - 43.8 mm
- Load - height - 3.7 kg / 40.1 mm
Installation
Oil pump
1. Install the inner and outer gears into the front cover. Make sure the wheels are installed correctly.
2. Install the oil pump cover and tighten the bolts to the specified torque. After tightening the bolts, check the smooth rotation of the gears.
Tightening torque
Oil pump cover bolt - 6-9 Nm
3. Install the safety valve and spring. Tighten the plug to the specified torque. Apply engine oil to the relief valve.
Tightening torque
Safety valve plug - 40-50 Nm
Front cover
Install the front cover assembly with a new gasket and tighten the bolts to the specified torque.
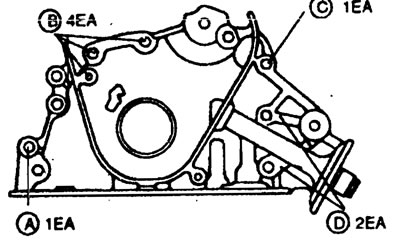
Bolt length
- (A) - 25 mm
- (B) - 20 mm
- (C) - 38 mm
- (D) — 45 mm
Tightening torque: 20-27 Nm
Seal
1. Check the seal edges for wear, deformation or damage.
2. Check the extension of the snap ring.
3. Always use a new oil seal when reassembling.
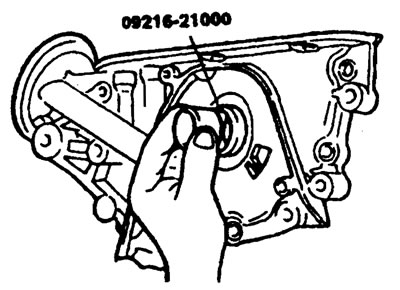
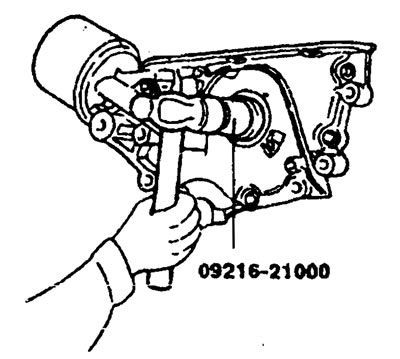
4. Using a special tool to remove the mounting sleeve and install the shaft (09216-21000), install the seal.
5. Install the crankshaft sprocket, timing belt and crankshaft pulley. Refer to the chapter "Toothed belt".
6. Install the oil receiver.
7. Clean both surfaces of the oil pan gasket and cylinder block.
8. Apply grease to the recesses of the oil pan flange as shown.
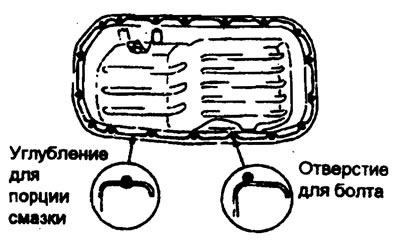
Precaution:
- 1) Apply grease to a thickness of approximately 4 mm.
- 2) The time from the moment of applying the lubricant until the installation of the oil pan should not exceed 15 minutes.
9. Install the oil pan and tighten the bolts to the specified torque.
Tightening torque
Oil pan bolt - 6-8 Nm