Contents: Removal ⇓ Check. Timing belt ⇓ Pulleys and tension roller ⇓ Installation ⇓ Tightening torque of the crankshaft…⇓
Removal
1. Remove the water pump pulley mounting bolt.
2. Remove the generator mounting bolt.
3. Remove the water pump pulley and drive belt.
4. Remove the crankshaft pulley.
5. Remove the timing belt cover.
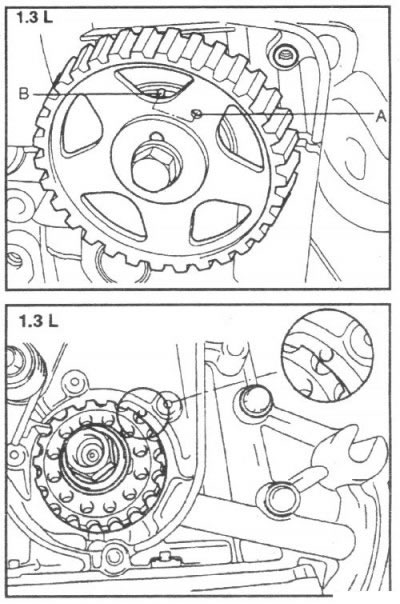
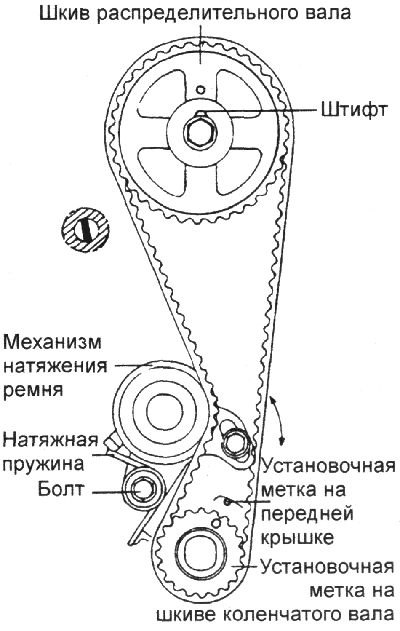
6. By turning the crankshaft, set the piston of the 1st cylinder to the TDC position at the end of the compression stroke, while the marks on the pulleys of the camshaft and crankshaft must be aligned with the installation marks on the engine.
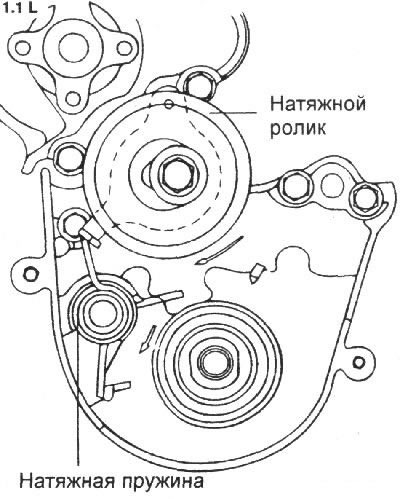
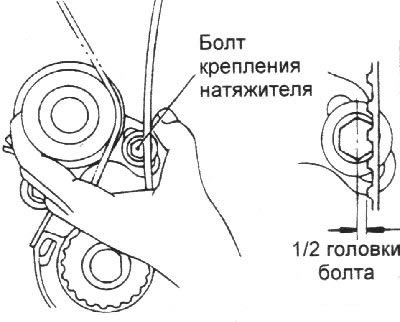
7. Loosen the tension roller mounting bolt, move the roller toward the water pump and tighten the bolt.
8. Remove the timing belt.
 |
 |
|
|
|
Note: Mark the direction of rotation of the timing belt to reinstall it to its original position.
9. Remove the bolt and camshaft pulley.
10. Remove the crankshaft pulley mounting bolt.
11. Remove the timing belt tension roller.
Check. Timing belt
1. Check the timing belt for traces of oil, water or dust. Replace the belt if necessary. Light traces should be wiped off with a dry cloth or paper. Do not clean the timing belt with solvent.
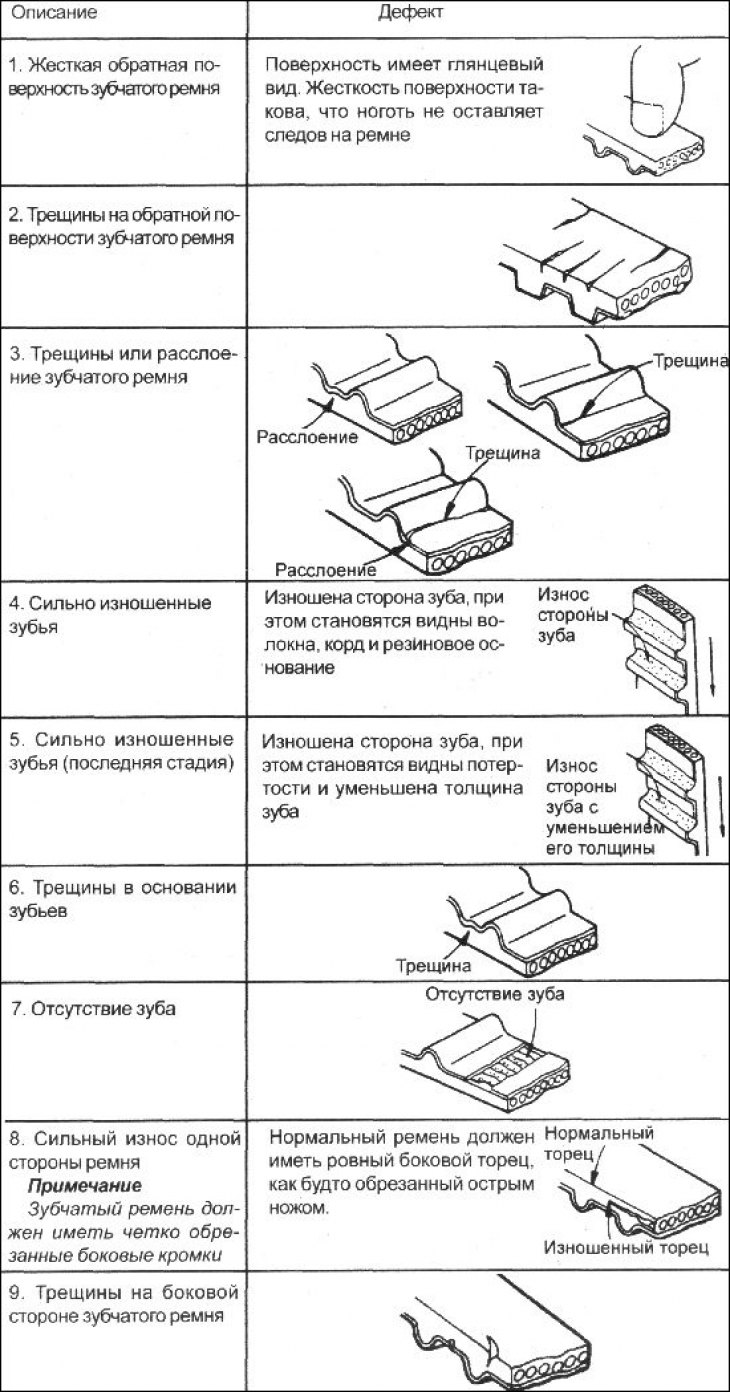
2. After repairing the engine or adjusting the belt tension, check the condition of the belt. If the following defects are present, replace the toothed belt.
Pulleys and tension roller
1. Check the camshaft and crankshaft pulleys and tension roller for uneven wear, cracks and damage.
2. Check the ease and smoothness of rotation of the tension roller, as well as the absence of extraneous noise during rotation.
Installation
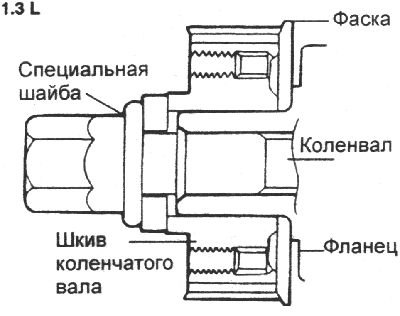
1. Install the flange and crankshaft pulley as shown in the figure. Pay attention to the installation direction.
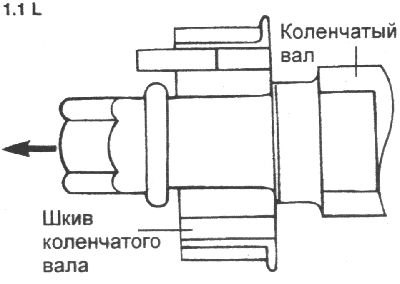
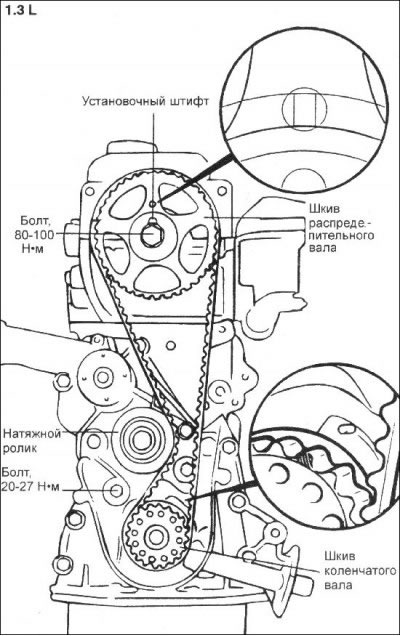
Tightening torque of the crankshaft pulley mounting bolt: - 1.3 l engine: 140–150 N·m - 1.1 l engine: 70–100 N·m
2. Install the camshaft pulley and secure it with the bolt, tightening it to the required torque.
Tightening torque: 100–120 Nm.
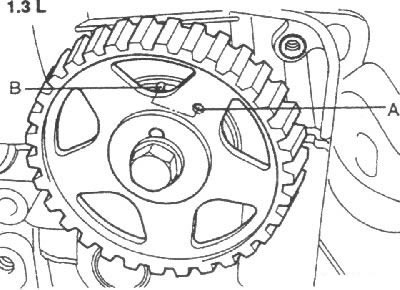
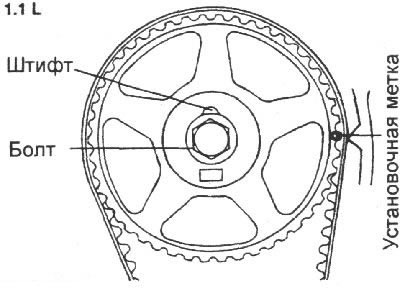
3. Align the timing marks on the camshaft and crankshaft pulleys with the pointers, and the piston of the first cylinder should be set to TDC in the compression stroke.
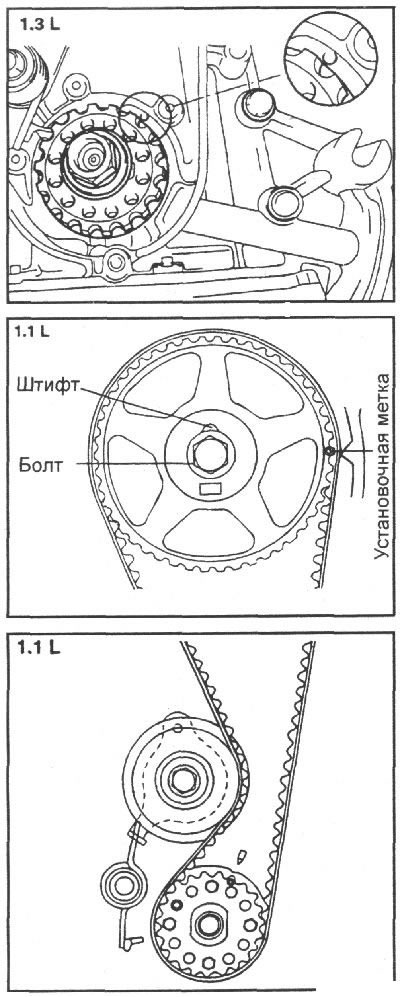
Note: When installing the crankshaft pulley, the pulley pin must fit into the hole in the crankshaft pulley.
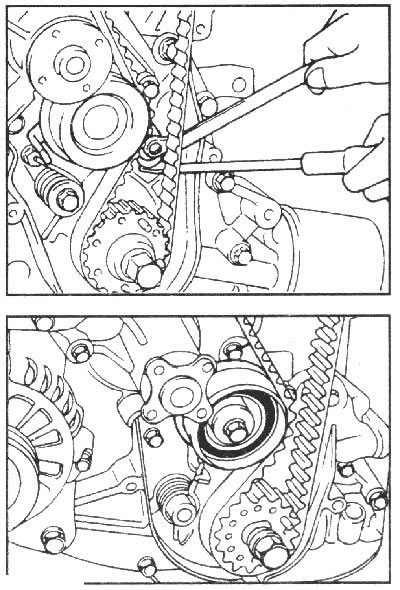
4. Move the timing belt tensioner roller as close to the water pump as possible and tighten its mounting bolt.
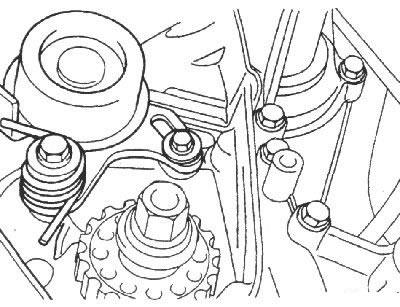
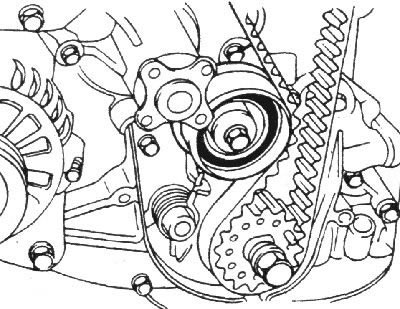
5. Insert the end of the tension roller spring into the hole in the roller bracket and use a screwdriver to guide the other end of the spring behind the front cylinder block cover.
6. Install the timing belt on the pulleys in the following order:
- crankshaft pulley;
- camshaft pulley;
- tension roller.
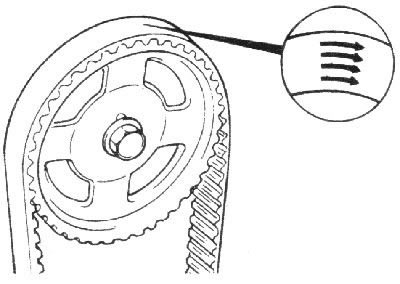
7. Install the toothed belt so that its leading branch has a slight deflection.
Note: Tighten the drive belt by turning the camshaft pulley in the direction opposite to the normal direction of rotation and check that the timing marks are aligned.
8. Loosen the tension roller mounting bolt and release the tension roller spring.
9. Turn the crankshaft clockwise a full 2 teeth on the pulley (15°).
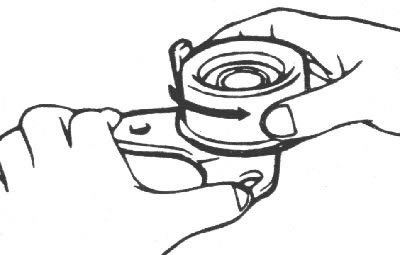
10. Press the tension roller in the direction of the arrow and check that the toothed belt is correctly seated on the pulleys.
11. Make sure that the belt fits tightly and in this position tighten the tension roller mounting bolt so that only its spring has free play.
12. Turn the crankshaft pulley two turns clockwise to properly seat the timing belt on the pulleys.
13. Check the tension of the toothed belt (1.3 l engine). When pressing the tension roller and on the tensioned branch of the toothed belt with a force of 49 N, the toothed belt should bend to the center of the head of the tension roller mounting bolt.
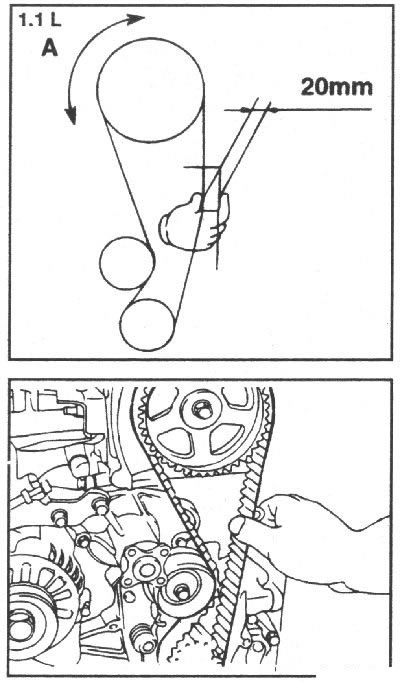
Make sure that when you squeeze the middle section of the drive belt with your thumb and forefinger, the distance between the back of the belt and the center of the hole for the timing belt cover mounting bolt in the cylinder block is approximately 20 mm (1.1L engine).