Adjustment is made as follows:
1. Turn the steering wheel exactly counterclockwise.
2. Place a piece of wood under the engine oil pan and carefully lift it up.
3. Remove the left mounting bracket.
4. Remove the water pump assembly.
5. Remove the crankshaft pulley.
6. Remove the top cover of a gear belt.
7. Check the belt for cracks, splits or other damage. Carefully check the belt along its entire length.
8. Rotate the crankshaft to bring the piston to top dead center. In other words, align the ignition setting mark on the camshaft sprocket with the mark on the cylinder head.
The crankshaft must be turned clockwise, not counterclockwise. By turning the crankshaft counterclockwise, the tension can be incorrectly adjusted!
9. Remove the bottom cover of a gear belt.
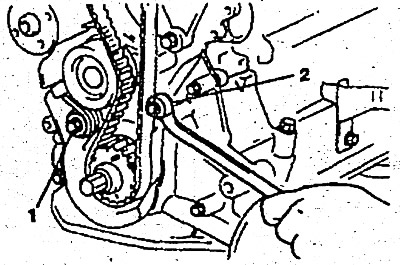
10. Loosen the bolts 1 and 2 of the tensioner mounting in the order shown in the figure - this will ensure the tension of the toothed belt spring.
11. Check the belt overlay to ensure it is securely fastened.
12. Tighten the bolts 2 and 1 of the tensioner, in that order. If bolt 1 is tightened first, the tensioner may move with the bolt, which may cause the belt to be over tightened.
13. Turn the crankshaft once clockwise and set the mark on the crankshaft gear at top dead center.
14. Loosen the bolts 1 and 2 of the tensioner mounting in the specified order.
15. Re-tighten the bolts 2 and 1 of the tensioner fastening in the specified order with the following tightening torque:
Tightening torque 20-27 Nm.
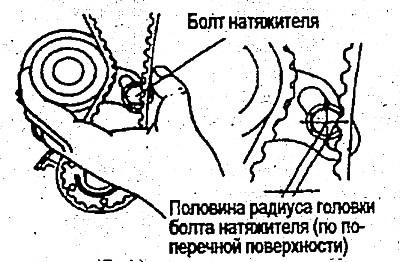
16. Recheck belt tension. Then push the tensioner and the belt from the tensioner side in a horizontal direction with medium force (approximately 49 N), approximately to the tips of the belt teeth.
The end of the belt tooth should be half the radius of the tensioner bolt head from the center of the bolt head as shown.