
Replacement
Attention.
- After replacing the control unit, it is necessary to enter the injector data (7 digits) for each cylinder into the new unit using the diagnostic system (GDS) scanner.
- If the vehicle is equipped with an immobilizer or a "Smart key" system, perform the "Key Learning" procedure at the same time.
1. Turn off the ignition.
2. Disconnect the negative (-) cable from the battery.
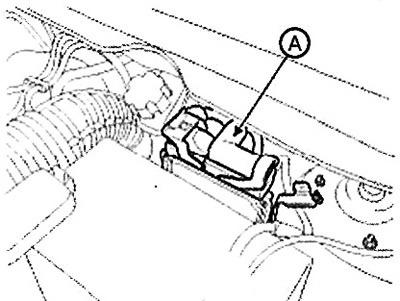
3. Disconnect the engine control unit connector (A).
4. Remove the battery.
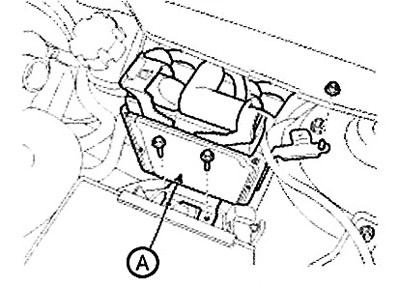
5. Loosen the bolts and nut securing the control unit bracket, then remove the unit (A).
 |
 |
6. Install the new control unit.
Note: Tightening torque:
- Control unit mounting bolts (on bracket): 3.9 -5.9 Nm.
- Control unit bracket mounting nuts: 9.8 - 14.7 Nm.
- Control unit bracket mounting bolt: 21.6 - 32.4 Nm.
7. Connect the negative (-) cable to the battery.
[The original version is stored on the website: HyundaiBook]
8. Perform the "Control Unit Replacement" procedure [with Catalytic Particulate Filter (CPF)].
(1) Turn off the ignition.
(2) Connect the GDS scanner to the data link connector (DLC).
(3) Turn on the ignition.
(4) Select "Vehicle, Model year, Engine, System".
(5) Select "Vehicle S/W Management" (Vehicle Software Management).
(6) Select "Component Change Routine".
(7) Select "ECU CHANGE" (Control Unit (ECU) Replacement).
(8) Enter the odometer value.
(9) Confirm the "Complete" message and turn the ignition switch to the OFF position.
(10) Wait more than 10 seconds and turn the ignition key to the ON position.
9. Perform the "Entering data for individual injectors" procedure.
10. Perform the "Key Training" procedure.
Checking the technical condition
1. Checking the ground circuit of the engine control unit.
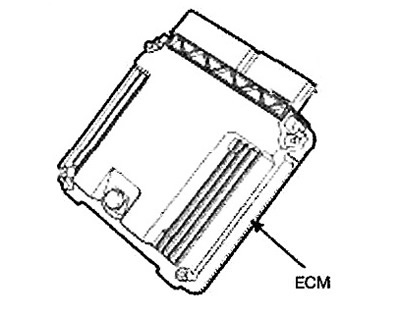
Measure the resistance between the Engine Control Module (ECM) and chassis ground using the rear side of the ECM harness connector as a reference point. If a fault is found, repair it.
2. Checking the engine control unit connector.
Disconnect the Engine Control Module (ECM) connector and visually inspect the ground terminals on the ECM and harness sides for bent contacts and poor contact pressure. If a fault is found, repair it.
3. If no fault is found after performing steps 1 and 2, the ECM itself may be faulty. In this case, replace the ECM and retest the vehicle. If the vehicle operates normally, the ECM was probably the cause of the fault.
4. Recheck the original engine control unit.
Install the original (presumably defective) engine control unit in a known good vehicle and perform a vehicle inspection. If the problem occurs again, replace the original engine control unit. If the problem does not occur, then there is a periodic malfunction.