


Checking the technical condition
1. Turn off the ignition.
2. Disconnect connectors 1 or 2 of the sensor.
3. Measure the resistance between the IATS sensor signal terminal and the sensor ground terminal.
4. Check that the resistance matches the specification.
Removal
Intake Air Temperature Sensor 1 (IATS)
1. Turn the ignition key to the "OFF" position and disconnect the negative (-) cable from the battery.
2. Disconnect the connector (A) of the intake air temperature sensor 1 and remove the clamp (B).
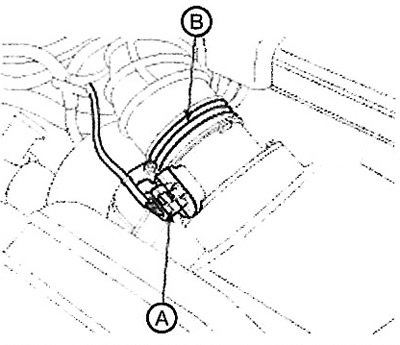
3. Loosen the mounting bolts and remove the intake air temperature sensor 1.
Intake Air Temperature Sensor 2 (IATS)
1. Turn the ignition key to the "OFF" position and disconnect the negative (-) cable from the battery.
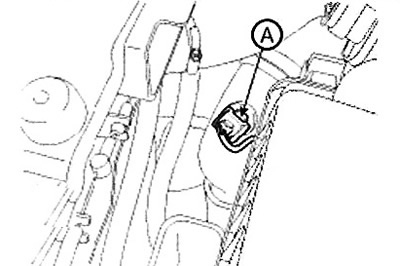
2. Disconnect the connector and remove the intake air temperature sensor 2 (A).
Installation
Attention.
- Tighten the component mounting bolts to the specified torque.
- Be careful not to drop the component. If dropped, the component must be carefully checked before installation.
Installation is performed in the reverse order of removal.
Note:
- Intake Air Temperature Sensor 1 (IATS) mounting bolt: 3.9 - 5.9 Nm.
- Intake Air Temperature Sensor 1 (IATS) Clamp Fastening Screw: 2.9-4.9Nm.
- Intake Air Temperature Sensor 2 (IATS) mount: 19.6-29.4 Nm.
Replacement
Attention. After replacing the intake air temperature sensor 1, perform the "Component Change Routine" procedure. Otherwise, a malfunction related to engine performance or exhaust control may occur and persist until data about the new component is registered in the engine control unit.
1. Turn off the ignition.
2. Connect the GDS scanner to the data link connector (DLC).
3. Turn on the ignition.
4. Select "Vehicle, Model year, Engine, System".
5. Select "Vehicle S/W Management" (Vehicle Software Management).
6. Select Component Change Routine.
7. Select "INTAKE AIR TEMPERATURE SENSOR CHANGE" (Intake Air Temperature Sensor Replacement).
8. Follow the procedure according to the instructions on the screen.