


Interior (internal elements) of the car Hyundai Tucson 2

Central console
1. Floor console 2. Upper console cover (automatic transmission) 3. Upper console cover (manual transmission) 4. Floor console shelf 5. Floor console front panel 6....
1. Floor console 2. Upper console cover (automatic transmission) 3. Upper console cover (manual transmission) 4. Floor console shelf 5. Floor console front panel 6....

Instrument panel — device
1. Instrument panel 2. Upper trim of the central panel 3. Instrument cluster trim 4. Lower instrument cluster trim 5. Dashboard side cover 6. Upper panel of the casing...
1. Instrument panel 2. Upper trim of the central panel 3. Instrument cluster trim 4. Lower instrument cluster trim 5. Dashboard side cover 6. Upper panel of the casing...

Replacing the instrument cluster
Note: To avoid damaging the lining when using a flat-blade screwdriver as a lever, wrap the screwdriver with insulating tape. Also tape adjacent parts that require...
Note: To avoid damaging the lining when using a flat-blade screwdriver as a lever, wrap the screwdriver with insulating tape. Also tape adjacent parts that require...

Replacing the bottom panel
1. Remove the side cover (A) of the instrument panel using a screwdriver or a special puller. 2. Loosen the mounting screws and remove the lower part (A) of the...
1. Remove the side cover (A) of the instrument panel using a screwdriver or a special puller. 2. Loosen the mounting screws and remove the lower part (A) of the...

Replacing the audio system
Note: To avoid damaging the lining when using a flat-head screwdriver as a lever, wrap the screwdriver with insulating tape. Also tape adjacent parts that require...
Note: To avoid damaging the lining when using a flat-head screwdriver as a lever, wrap the screwdriver with insulating tape. Also tape adjacent parts that require...

Replacing the glove box
1. Remove the side cover (A) of the instrument panel using a screwdriver or a special puller. 2. Disconnect the guide (B) from the glove box (A). 3. Disconnect the...
1. Remove the side cover (A) of the instrument panel using a screwdriver or a special puller. 2. Disconnect the guide (B) from the glove box (A). 3. Disconnect the...

Replacing the heater control panel
See the relevant section of the chapter " Air conditioning and heating ".
See the relevant section of the chapter " Air conditioning and heating ".

Replacing the casing
1. Loosen the mounting screws and remove the casing (A). 2. Installation is carried out in reverse order.
1. Loosen the mounting screws and remove the casing (A). 2. Installation is carried out in reverse order.
Replacing parts of the dashboard
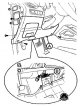
Replacing the dashboard part on the driver's side (left) 1. Remove the side cover of the instrument panel 2. Loosen the mounting screws and remove the bottom panel (A)....
Replacing the dashboard part on the driver's side (left) 1. Remove the side cover of the instrument panel 2. Loosen the mounting screws and remove the bottom panel (A)....

Replacing the dashboard cross member
1. Remove the following parts: A. Front seat. B. Floor console. C. Instrument panel. D. Crossbar cover. 2. Disconnect the fan connectors (A). 3. Disconnect the...
1. Remove the following parts: A. Front seat. B. Floor console. C. Instrument panel. D. Crossbar cover. 2. Disconnect the fan connectors (A). 3. Disconnect the...

Ceiling panel
Without hatch 1. Ceiling lining 2. Sun visor 3. Holder With a hatch 1. Ceiling lining 2. Sun visor 3. Holder Replacing the sun visor 1. Loosen the mounting screws and...
Without hatch 1. Ceiling lining 2. Sun visor 3. Holder With a hatch 1. Ceiling lining 2. Sun visor 3. Holder Replacing the sun visor 1. Loosen the mounting screws and...

Interior trim
1. Front pillar trim 2. Upper element of the central pillar trim 3. Lower element of the central pillar trim 4. Rear pillar trim 5. Luggage compartment curtain 6. Engine...
1. Front pillar trim 2. Upper element of the central pillar trim 3. Lower element of the central pillar trim 4. Rear pillar trim 5. Luggage compartment curtain 6. Engine...

Windshield
1. Windshield molding 2. Windshield Removal Note: To avoid damaging the lining when using a flat-head screwdriver as a lever, wrap the screwdriver with insulating tape....
1. Windshield molding 2. Windshield Removal Note: To avoid damaging the lining when using a flat-head screwdriver as a lever, wrap the screwdriver with insulating tape....

Fixed side windows
Removal Note: To protect your hands from injury, wear gloves. Be careful not to bend or scratch trim panels or body parts. 1. Remove the following parts A. Rear seat...
Removal Note: To protect your hands from injury, wear gloves. Be careful not to bend or scratch trim panels or body parts. 1. Remove the following parts A. Rear seat...

Front seats
1. Headrest 2. Headrest guide 3. Seat back cover 4. Seat back heater 5. Seat back 6. Seat support with drive 7. Seat cushion cover 8. Seat cushion heater 9. Seat cushion...
1. Headrest 2. Headrest guide 3. Seat back cover 4. Seat back heater 5. Seat back 6. Seat support with drive 7. Seat cushion cover 8. Seat cushion heater 9. Seat cushion...

Back seat — device
1. Headrest 2. Headrest guide 3. Top panel 4. Decorative cover for fastening the safety rope 5. Armrest cover 6. Seat back cover 7. Armrest 8. Seat cushion cover 9. Seat...
1. Headrest 2. Headrest guide 3. Top panel 4. Decorative cover for fastening the safety rope 5. Armrest cover 6. Seat back cover 7. Armrest 8. Seat cushion cover 9. Seat...
Replacing seats
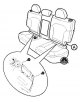
Seat replacement 1. Loosen the mounting bolts and remove the rear seat back (A). Note: Tightening torque: 44.1-58.8 Nm 2. Disconnect the connector (A) and remove the...
Seat replacement 1. Loosen the mounting bolts and remove the rear seat back (A). Note: Tightening torque: 44.1-58.8 Nm 2. Disconnect the connector (A) and remove the...

Interior rear view mirror
Replacing the standard interior rearview mirror 1. Pull the support (A) of the inside rearview mirror downward to remove the mirror (B). 2. Installation is carried out...
Replacing the standard interior rearview mirror 1. Pull the support (A) of the inside rearview mirror downward to remove the mirror (B). 2. Installation is carried out...
Replacing front door elements
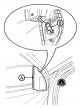
Replacing the door trim Note: To avoid damaging the lining when using a flat-head screwdriver as a lever, wrap the screwdriver with insulating tape. Also tape the...
Replacing the door trim Note: To avoid damaging the lining when using a flat-head screwdriver as a lever, wrap the screwdriver with insulating tape. Also tape the...
This section is available on russian, bulgarian, belarusian, ukrainian, serbian, croatian, romanian, polish, slovak, hungarian
We recommend other sections on the topic of Hyundai manuals:
Body: Interior (internal elements) Hyundai Accent 2 (1999-2005)
Body: Interior (internal elements) Hyundai Elantra 3 (2000-2006)
Body: Interior (internal elements) Hyundai Getz (2002-2011)
Body: Interior Hyundai Sonata 4 (2001-2012, petrol)
Link in different formats to this section
TextHTMLBB Code
- General information
- Faults en route
- User manual
- Maintenance
- Power unit
- Gasoline engines
- Diesel engines
- Engine cooling system
- Engine lubrication system
- Engine power system
- Control system
- Intake and exhaust systems
- Engine electrical equipment
- Transmission
- Clutch
- Mechanical gearbox
- Automatic gearbox
- Drive shafts
- Chassis
- Suspension and wheels
- Brake system
- Steering
- Body
- Exterior (external elements)
- Interior (internal elements)
- Security systems
- Air conditioning and heater
- Electrical equipment
- Electrical circuits
- General information
- User manual
- Maintenance
- Power unit
- Gasoline engine G6BA
- Gasoline engine G4GC
- Diesel engine D4EA
- Fuel system (gasoline)
- Fuel system (diesel)
- Engine lubrication system
- Engine cooling system
- Engine electrical equipment
- Transmission
- Clutch
- Car gearbox
- Drive shafts and cardan
- Chassis
- Car suspension
- Steering
- Brake system
- Body
- Exterior (external elements)
- Interior (internal elements)
- Air conditioning and heater
- Airbags
- Electrical equipment
- Equipment and devices
- Electrical circuits