
Contents: Replacing the door anti-scuff strip ⇓ Replacing the front pillar trim ⇓ Replacing the trim from the hood side ⇓ Replacement of the central pillar…⇓ Replacement of the center pillar…⇓ Replacing the rear pillar trim ⇓ Replacement of the side trim of the…⇓
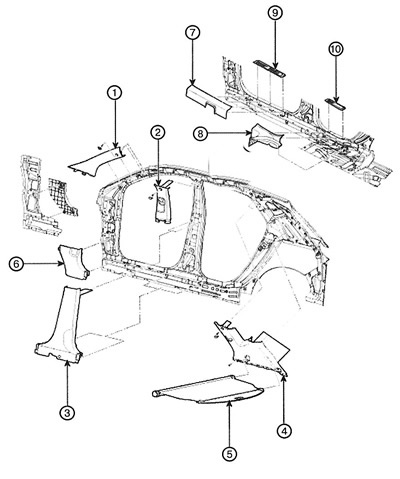
1. Front pillar trim
2. Upper element of the central pillar trim
3. Lower element of the central pillar trim
4. Rear pillar trim
5. Luggage compartment curtain
6. Engine compartment side trim
7. Front door anti-scuff strip
8. Rear door anti-scuff strip
9. Front threshold trim
10. Rear threshold trim
Note:
To avoid damaging the lining when using a flat-blade screwdriver as a lever, wrap the screwdriver with insulating tape. Also tape the adjacent parts that require protection. Wear gloves to protect your hands from injury.
Be careful not to bend or scratch trim panels or body parts.
When installing, replace any damaged fasteners.
Replacing the door anti-scuff strip
1. Remove the door anti-seize strip (A).
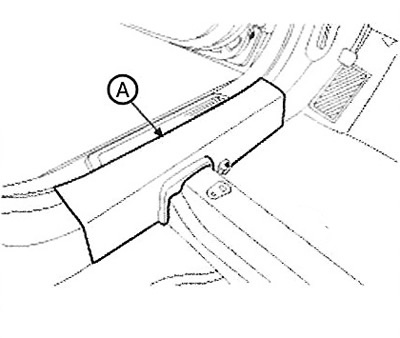
Front

Back
2. Installation is carried out in reverse order.
Replacing the front pillar trim
1. Loosen the fastening screw and remove the front pillar trim (A).
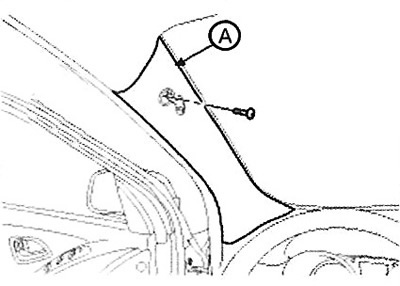
2. Installation is carried out in reverse order.
Replacing the trim from the hood side
1. Remove the front door anti-scuff plate.
2. Remove the hood release handle.
3. Remove the side trim (A).
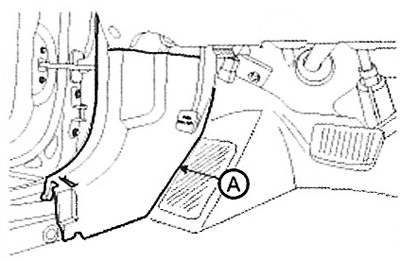
4. Installation is carried out in reverse order.
Replacement of the central pillar trim (main export)
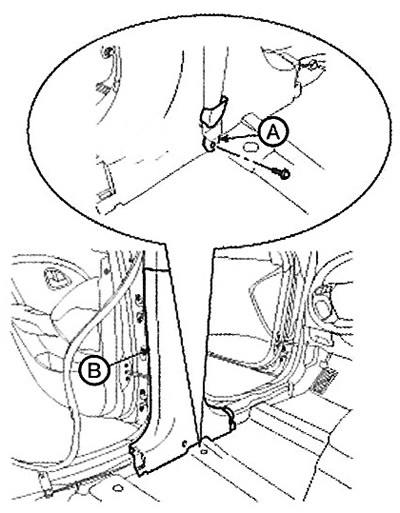
1. Remove the front and rear door anti-scuff pads.
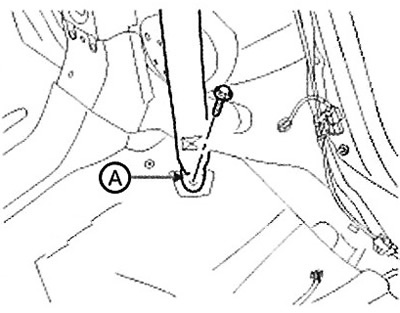
2. Loosen the bolt and remove the lower anchor (A) of the front seat belt.
3. Remove the lower part of the center pillar trim (B).
Note: Tightening torque: 39.2-53.9 Nm
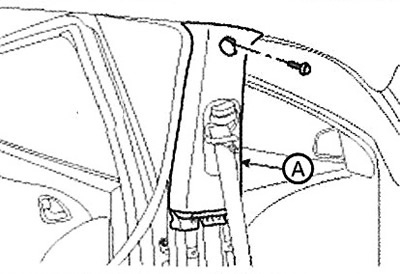
4. Remove the cover and unscrew the mounting bolts.
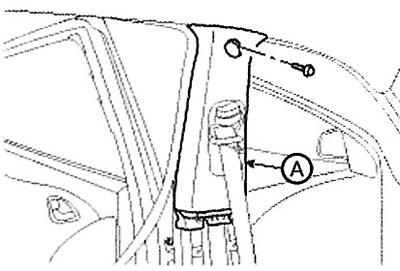
5. Remove the upper part of the center pillar trim (A).
6. Installation is carried out in reverse order.
Replacement of the center pillar trim (for Europe)
1. Remove the front and rear door anti-scuff pads.
2. Remove the lower mount (A) using a screwdriver or a special puller (B).
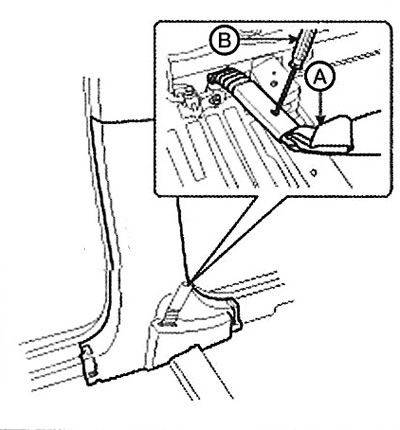
3. Remove the lower part of the center pillar trim (A).
4. Remove the cover and unscrew the mounting bolts.
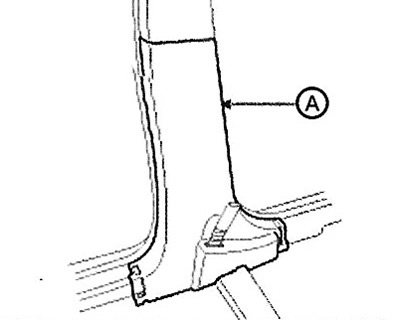
5. Remove the upper part of the center pillar trim (A).
6. Installation is carried out in reverse order.
Replacing the rear pillar trim
1. Remove the rear seat.
2. Remove the rear door anti-scuff plate.
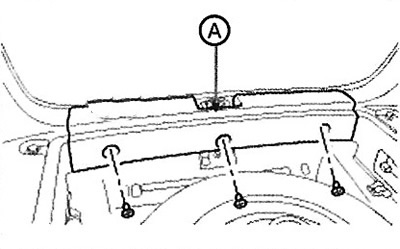
3. Disconnect the clips and remove the cross bulkhead trim (A).
4. Loosen the bolt and remove the lower anchor (A) of the rear seat belt.
Note: Tightening torque: 39.2-53.9 Nm
5. Loosen the mounting bolts and remove the rear seat bracket (A).
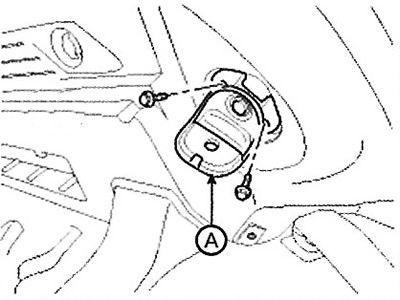
6. Remove the light shade (A) using a screwdriver.
7. Disconnect the connector (B).
8. Loosen the mounting screws, then remove the luggage compartment side trim (C).
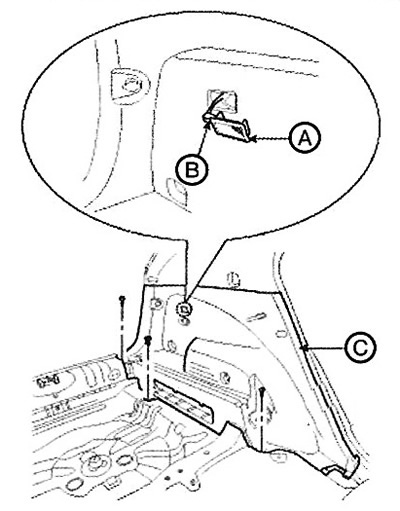
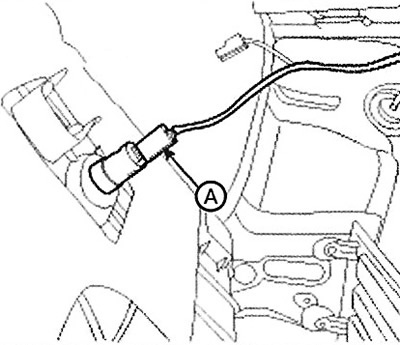
9. Disconnect the connector (A).
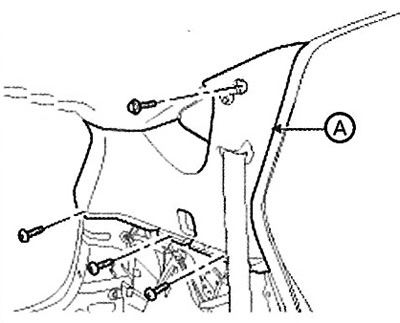
10. Remove the mounting bolt and screws, then remove the rear pillar trim (A).
11. Installation is carried out in reverse order.
Replacement of the side trim of the luggage compartment
1. Remove the rear seat.
2. Remove the cross partition lining.
3. Loosen the mounting screws and remove the side trim of the luggage compartment.
4. Installation is carried out in reverse order.
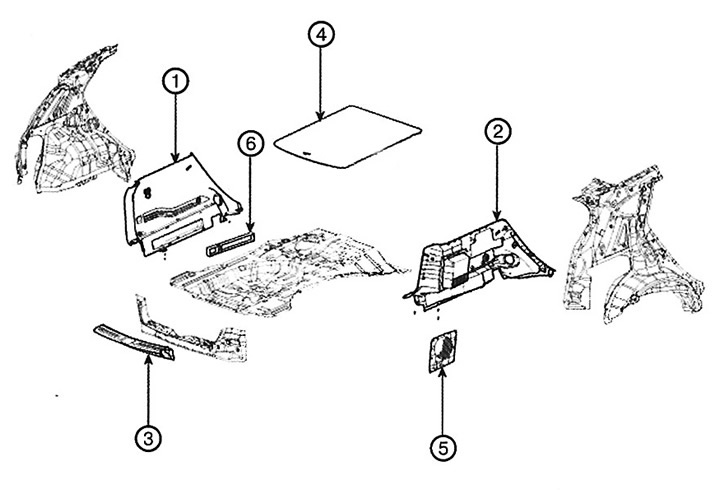
1. Side trim of the luggage compartment (left)
2. Side trim of the luggage compartment (right)
3. Facing of the transverse partition
4. Luggage compartment panel
5. Speaker cover trim
6. Plug