
Contents: Replacing the seat assembly ⇓ Replacing the protective cover ⇓ Replacing the seat back ⇓ Replacing the seat cushion trim ⇓ Seat frame replacement ⇓
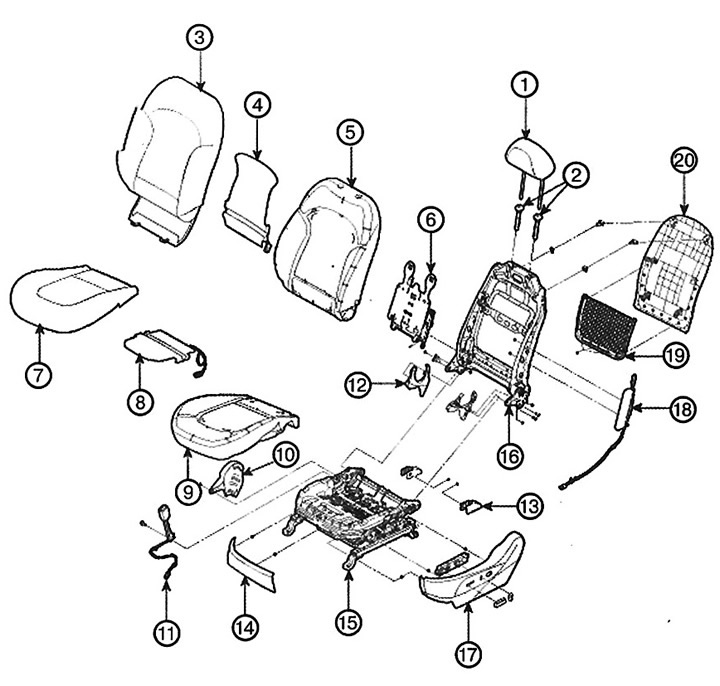
1. Headrest
2. Headrest guide
3. Seat back cover
4. Seat back heater
5. Seat back
6. Seat support with drive
7. Seat cushion cover
8. Seat cushion heater
9. Seat cushion
10. Inner protective cover
11. Front seat belt buckle
12. Inner cover
13. Seat mounting cover
14. Front protective cover
15. Seat cushion frame
16. Seat back frame
17. Protective cover
18. Side airbag module
19. Rear seat pocket
20. Seat back cover
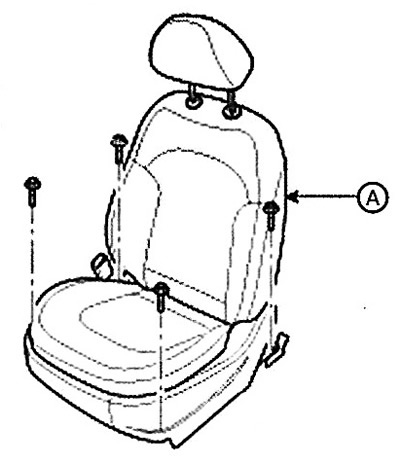
Replacing the seat assembly
1. Remove the cushion mounting cover.
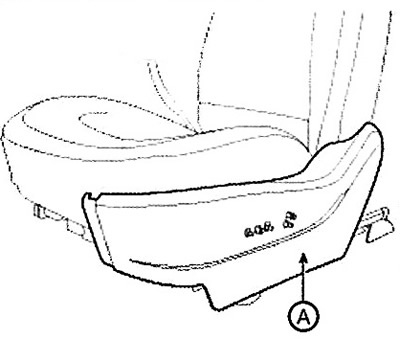
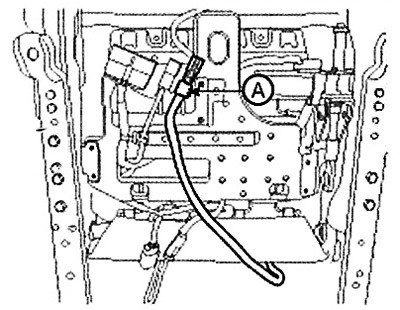
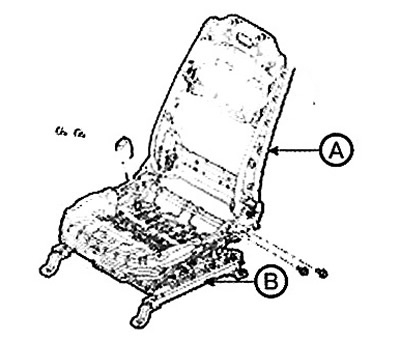
2. Loosen the mounting bolts and remove the seat (A) assembly.
Note: Tightening torque: 44.1-58.8 Nm.
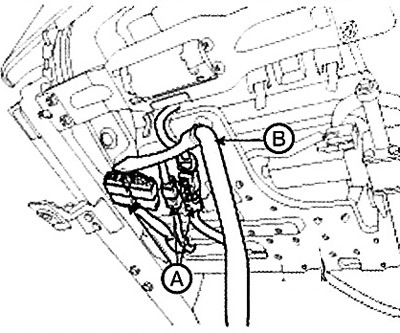
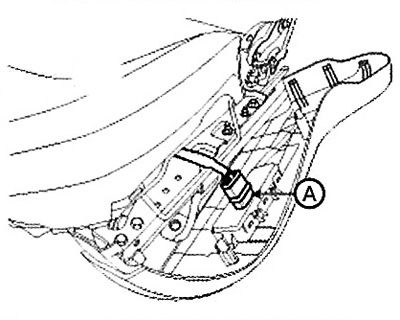
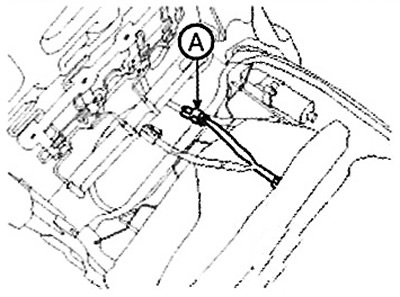
3. Disconnect the connector (A) and wiring (B).
4. Installation is carried out in reverse order.
Attention.
Seat mounting bolt installation procedure:
Set the seat to its rearmost position, check that all runners are securely fastened and temporarily tighten the front mounting bolt.
Set the seat to the forwardmost position, check that all runners are securely fastened and fully tighten the rear mounting bolt.
Move the seat to its rearmost position and fully tighten the front mounting bolt.
Make sure the seat moves forward and backward without binding and is properly locked.
Replacing the protective cover
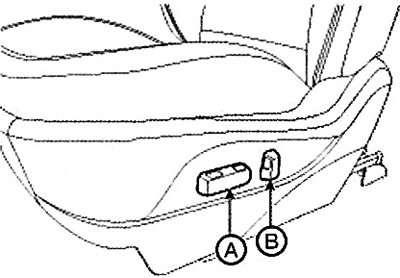
1. Remove the longitudinal movement switch (A) and the tilt switch (B).
2. Remove the front protective cover (A) using a screwdriver.

3. Remove the protective cover (A) using a screwdriver.
4. Disconnect the connector (A).
5. Installation is carried out in reverse order.
Replacing the seat back
Caution: Replace the seatback assembly if equipped with an active head restraint system.
1. Remove the front seat assembly.
2. Remove the headrest.
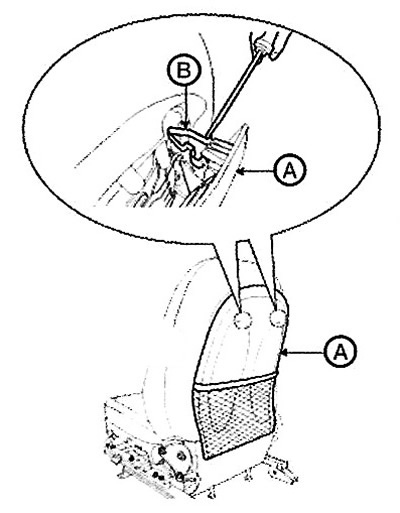
3. Disconnect the fasteners (B) of the seat back cover (A).
Attention.
Push the middle part of the retainer with a flat-head screwdriver.
Be careful not to damage the retainer.
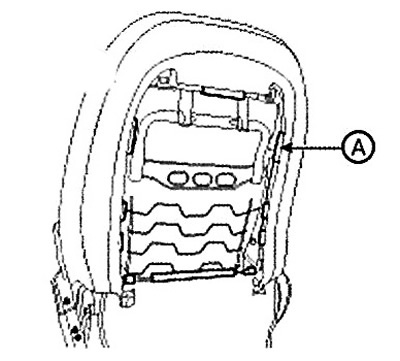
4. Press the hooks (A) of the seat back frame.
5. Disconnect the connector fastening clip (A).
6. Remove the headrest guides (A) by squeezing the edges of the guides.

7. Remove the seat back from the frame.
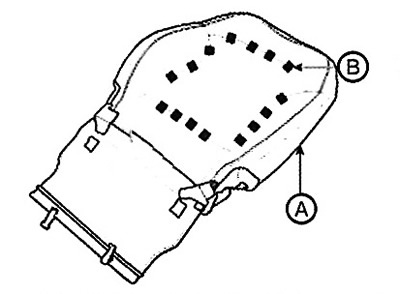
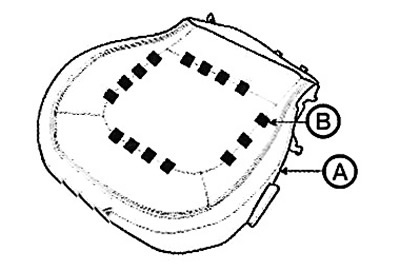
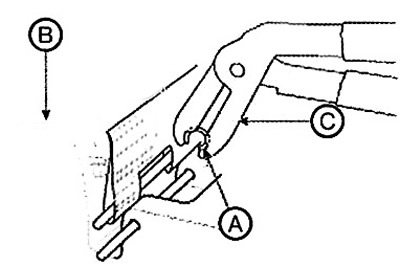
8. Remove the wire rings (B) at the front of the backrest and remove the backrest cover (A).
9. Installation is carried out in reverse order.
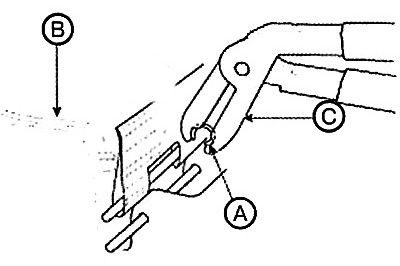
Note: To avoid creases, stretch the lining over the cover (B) before fixing the wire rings (A). Replace the wire rings with new ones using the special tool (C) (09880-4F000).
Replacing the seat cushion trim
1. Remove the front seat assembly.
2. Remove the protective cover.
3. Press the hook (A) and remove the seat cushion (C).
4. Disconnect the connector (A).
5. Remove the wire rings (B) at the front of the seat cushion and remove the cushion cover (A).
Caution: When removing wire rings, press on the wire so that it does not separate from the spongy material.
6. Installation is carried out in reverse order.
Note:
To avoid creases, stretch the lining over the cover (B) before securing the wire rings (A).
Replace the wire rings with new ones using a special tool (C) (09880-4F000).
Seat frame replacement
1. Remove the following parts:
A. Front seat assembly.
B. Seat back.
C. Seat cushion.
D. Headrest.
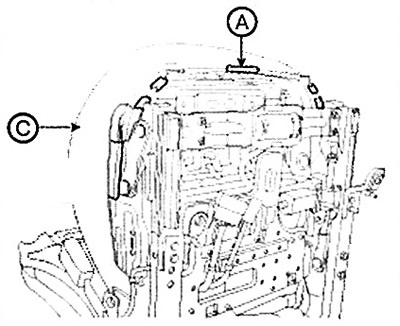
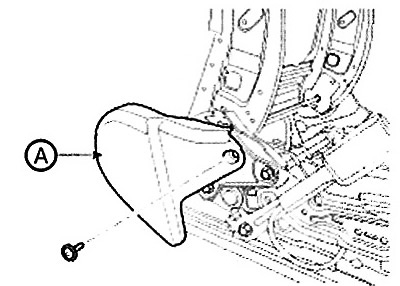
2. Loosen the fastening screw and remove the front inner protective cover (A).
3. Loosen the mounting bolts and detach the backrest frame (A) and the cushion frame (B).
Note:
Remove the side airbag when replacing a seat equipped with a side airbag.
Before servicing, read the warnings and instructions regarding the operation of the passive restraint system.
Tightening torque: 44.1 - 58.8 Nm.
4. Installation is carried out in reverse order.