
Contents: Removal ⇓ Installation ⇓
Removal
Note:
To protect your hands from injury, wear gloves.
Be careful not to bend or scratch trim panels or body parts.
1. Remove the following parts
A. Rear seat assembly.
B. Rear door anti-scuff plate.
C. Facing of the transverse partition.
D. Side trim of the luggage compartment.
E. Rear pillar trim.
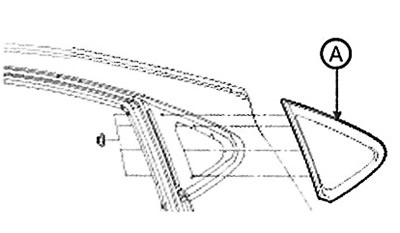
2. Unscrew the fixed side glass mounting nut (A).
3. Cut off the sealant using a special tool (A) (09801-311000).
Attention.
- It is not allowed to cut the glue down to the painted surface of the body; damage to the paintwork will interfere with normal gluing.
- Remove the rubber seal with fasteners from the body.
- Cover all surrounding surfaces before applying the compound.
4. Remove the fixed side glass.
Installation
1. Using a knife, cut off the old glue evenly so that its thickness is about 2 mm on the contact surface along the entire perimeter of the opening of the side fixed glass:
Attention.
It is not allowed to cut the glue down to the painted surface of the body; damage to the paintwork will interfere with normal gluing.
Cover all surrounding surfaces before applying the compound.
Remove the retainers from the body.
2. Clean the contact surface of the body with a sponge soaked in alcohol. After cleaning, avoid contact of oil, grease and water with the surface.
3. Using a sponge, apply glass primer to the edge of the stationary glass, then wipe it off lightly with a rag:
Attention.
Do not apply body primer to fixed side glass, be careful not to mix up sponges with different primers.
Never touch the primed surface with your hands. Otherwise, the adhesive may not ensure normal adhesion of the side fixed glass, which will lead to water leaks after its installation.
Avoid exposure of the primed surface to water, dust and abrasive materials.
4. Using a sponge, apply a thin layer of body primer to the old adhesive remaining around the glass opening. Leave it to dry for at least 10 minutes.
Attention.
Do not apply glass primer to the body, be careful not to mix up sponges with different primers.
Never touch the primed surface with your hands.
5. Fill the cartridge with glue, avoiding air pockets that could disrupt the uniform distribution of the glue. Insert the cartridge into the glue syringe and apply a strip of glue along the edges of the stationary glass. Apply the glue no later than 30 minutes after priming the glass. In the corners, the strip of glue should be made slightly thicker.
6. Install the fixed side glass.
7. Wait for the glue to dry (at least one hour), then pour water over the stationary glass and check for leaks. If a leak is detected, the damaged area must be thoroughly dried and then sealed with sealant:
After installing a fixed window, do not use the car for at least four hours. If you must use the car during this time, drive at low speed.
8. Install all remaining removed parts in reverse order.