
Contents: Removal ⇓ Installation ⇓
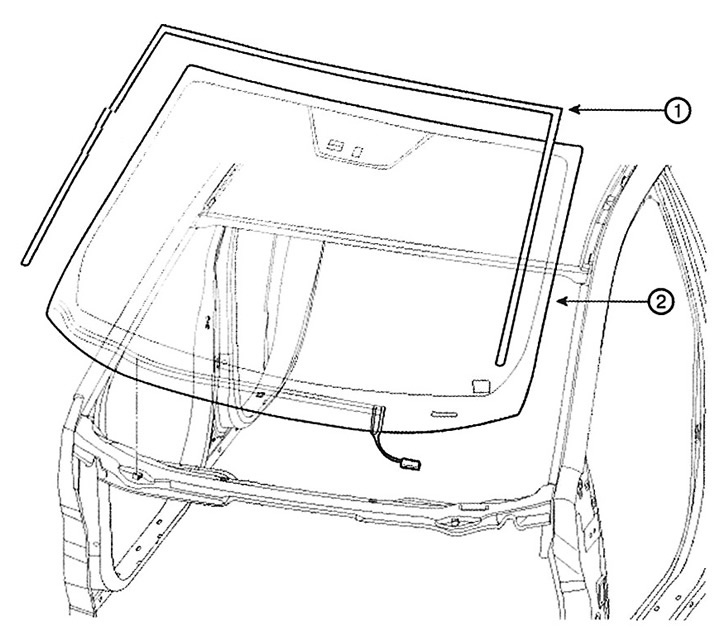
1. Windshield molding
2. Windshield
Removal
Note: To avoid damaging the lining when using a flat-head screwdriver as a lever, wrap the screwdriver with insulating tape. Also tape adjacent parts that require protection. Wear gloves to protect your hands from injury.
1. Remove the following parts:
A. Front pillar trim.
B. Interior rearview mirror.
C. Rain sensor.
D. Windscreen wiper arm.
E. Upper bonnet cross member cover.
F. Windshield heater connector.
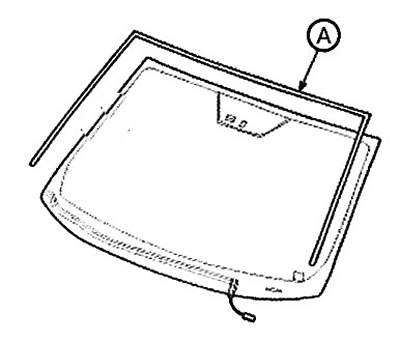
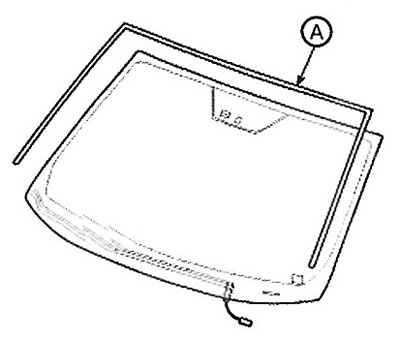
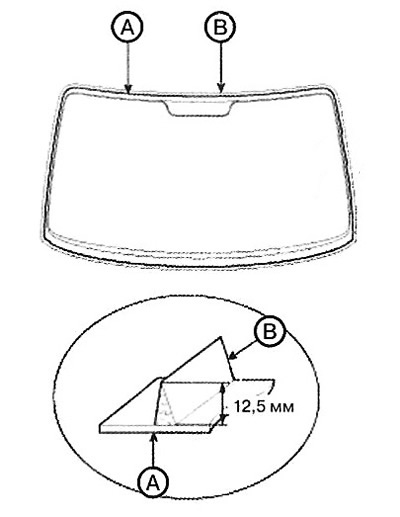
2. Remove the windshield molding (A) using a screwdriver or a special puller.
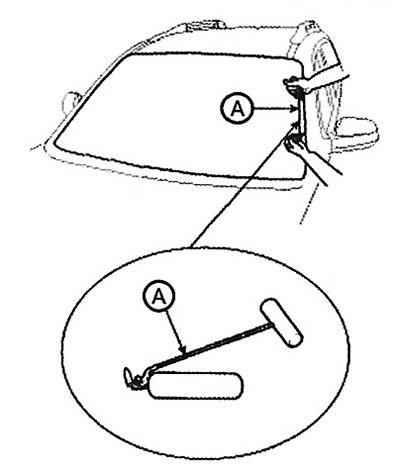
3. Cut off the sealant using a special tool (A) (09861-31100).
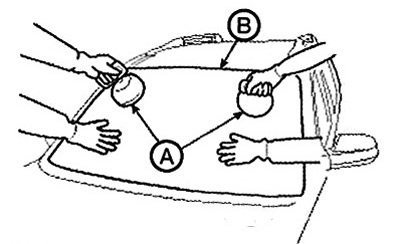
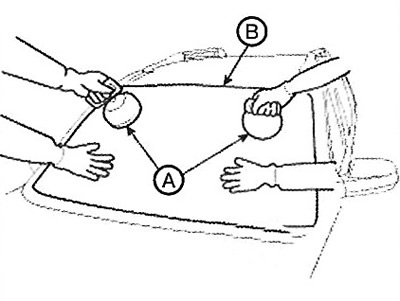
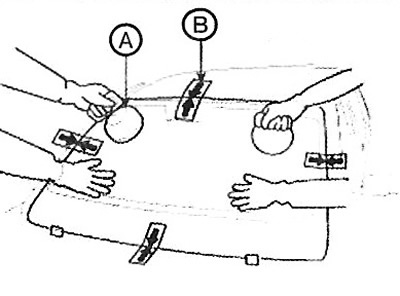
4. Carefully remove the windshield (B) using the glass holders (A).
Installation
1. Using a knife, level the layer of old glue on the seating surface of the entire windshield to a thickness of approximately 2 mm.
Attention.
It is not allowed to cut the glue down to the painted surface of the body; damage to the paintwork will interfere with normal gluing.
Remove the rubber seal with fasteners from the body.
Cover all surrounding surfaces before applying the compound.
2. Clean the seating surface with a sponge soaked in alcohol. After that, do not allow oil, grease or water to come into contact with the cleaned surface.
3. Install the upper part of the windshield seal (A) with the fasteners. Do not allow any gaps to form.
4. Install the spacer and temporarily attach the windshield (B). Align the glass with the center of the opening and apply a marking line.
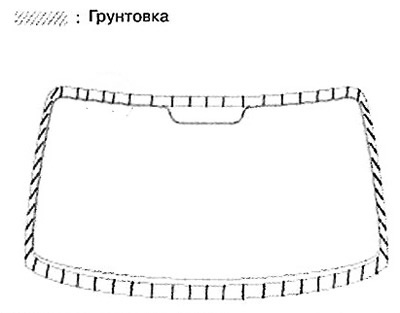
5. Using a sponge, apply a thin layer of body primer to the old adhesive remaining around the windshield opening. Leave it for at least 10 minutes to dry:
Attention.
Do not apply glass primer to the body, be careful not to mix up sponges with different primers.
Never touch the primed surface with your hands.
Before applying the compositions to the window opening, close the dashboard.
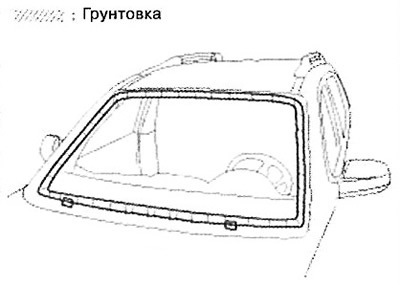
6. Apply a thin coat of glass primer to the outer surface of the clips.
Note:
Do not touch the primed surface with your hand. Otherwise, the adhesive may not ensure normal glass adhesion, which will lead to water leakage after installing the windshield.
Do not apply body primer to glass.
Avoid contact of water, dust and abrasive materials with the primer.
7. Fill the cartridge with glue, avoiding air pockets that could disrupt the uniform distribution of the glue. Insert the cartridge into the glue syringe and apply a strip (A) of glue along the edges of the glass (B) between the fasteners and the molding, as shown in the figure. Apply the glue no later than 30 minutes after applying the glass primer. In the corners, the strip of glue should be slightly thicker.
8. Holding the glass over the opening with glass holders (A), align it with the marking line (B) made in step 4 and place it on the adhesive. Press lightly on the glass until its edges press the adhesive around the entire circumference. Do not open or close the doors until the adhesive has dried.
9. Remove excess adhesive with a spatula or wipe off with a cloth. To remove adhesive from a painted surface or windshield, use a soft cloth dampened with alcohol.
[The material was obtained from a web resource hyundaibook.ru]
10. Wait for the glue to dry (at least one hour), then pour water over the windshield and check for leaks. If a leak is detected, the damaged area must be thoroughly dried and then sealed with sealant:
A. After installing the windshield, do not use the vehicle for at least four hours. If you must use the vehicle during this time, drive at low speed.
B. The windshield must remain dry for the first hour after installation.
11. Reinstall all removed parts. After the adhesive has dried thoroughly, install the rearview mirror. Advise the customer not to do the following for three days:
A. Slamming the doors when all the car windows are closed.
B. Subject the vehicle body to strong shaking (for example, when the vehicle is tilted or driven on an uneven road).
12. Install the following items:
A. Front pillar trim.
B. Interior rearview mirror.
C. Rain sensor.
D. Windscreen wiper arm.
E. Upper bonnet cross member cover.
F. Windshield heater connector.