
Contents: Removal ⇓ Installation ⇓
Removal
Remove the front body pillar trims.
Remove the interior rearview mirror.
Remove the wiper arms.
Remove the seal and the air intake niche cover.
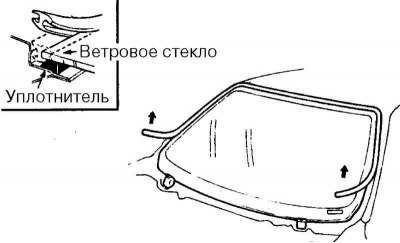
Fig. 8.27. Removing the windshield seal
Remove the windshield seal (Fig. 8.27).

Fig. 8.28. Removing adhesive residue
Cut off any remaining adhesive using tool 09861-31100 (Fig. 8.28).
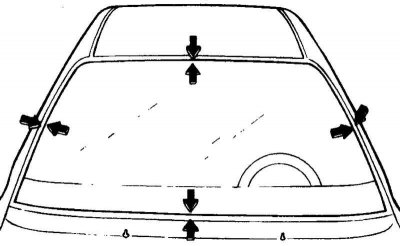
Fig. 8.29. Applying marks to the glass and opening
If you are reusing glass, apply alignment marks to the glass and the opening (Fig. 8.29).
Remove the windshield.
Installation
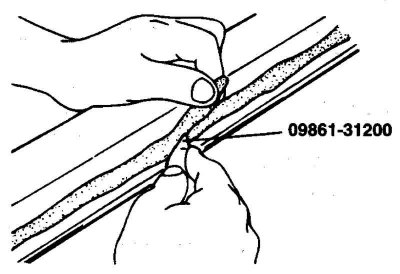
Fig. 8.30. Leveling the adhesive layer
Using a cutter or the 09861-31200 tool, evenly cut the adhesive bead to a thickness of approximately 2 mm from the surface of the glass to be glued along the entire perimeter of the opening flange (Fig. 8.30).
Caution! Do not cut the adhesive bead to a thickness less than specified, and take precautions not to damage the body paint with the cutter. If damaged, restore the layer by applying finishing paint.
Clean the windshield opening flange with a sponge soaked in alcohol or a mastic and degreaser remover.
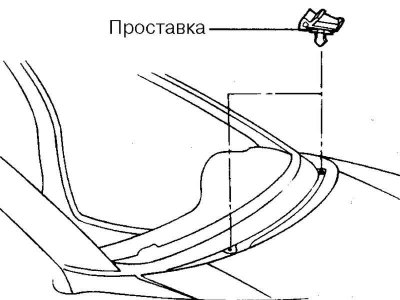
Fig. 8.31. Installing spacers
Install the spacers into the windshield opening (Fig. 8.31).
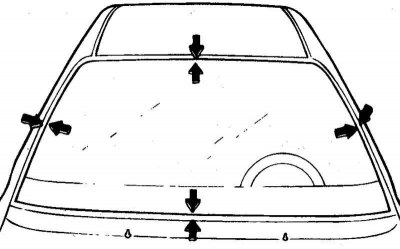
Fig. 8.32. Applying marks to glass and body
Install the new windshield into the opening and use a soft pencil to make marks on the glass and body in four places, as shown in Figure 8.32.
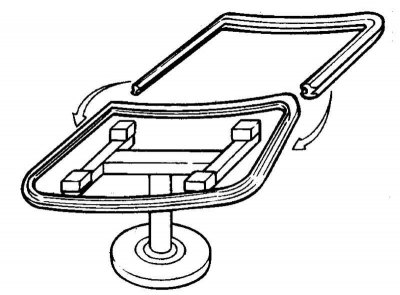
Fig. 8.33. Installing the windshield trim
Install the windshield trim, ensuring that there are no gaps (Fig. 8.33).
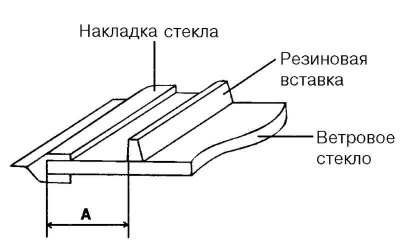
Fig. 8.34. Rubber insert gluing diagram
Glue a rubber insert onto the inner surface of the glass along the entire perimeter of the edge, which serves to hold the glue when installing the glass (Fig. 8.34).
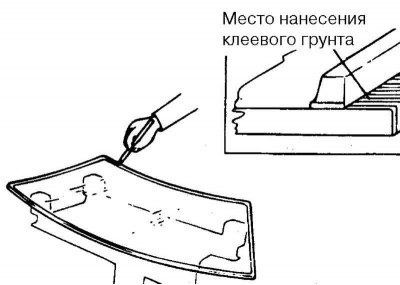
Fig. 8.35. Place of application of adhesive primer
Apply a thin layer of glass adhesive primer to the outer surface of the rubber insert (8.35).
Note: Do not touch the glass with your hands, as this may impair the bonding quality and cause leakage after the windshield is installed.
Note: Do not apply body adhesive primer to glass.
Note: Do not allow water, dust or abrasive particles to come into contact with the applied adhesive layer.
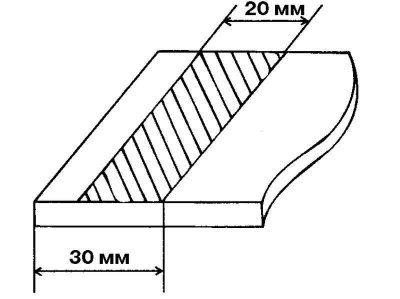
Fig. 8.36. Scheme of applying adhesive primer to the lower edge of glass
Apply adhesive primer to the bottom edge of the glass as shown in Figure 8.36.
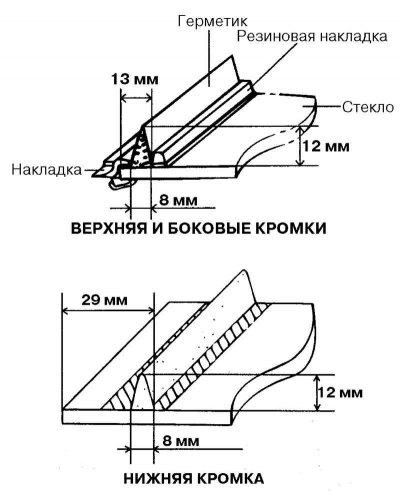
Fig. 8.37. Scheme for applying sealant to glass edges
Apply sealant to the glass edges along the entire perimeter (Fig. 8.37).
Note: Apply a layer of glue no more than 5 minutes after applying the adhesive primer.
Apply a thin layer of adhesive primer for body parts to the layer of sealant left on the glass opening flange. After applying the adhesive primer, install the glass no later than 5 minutes later.
Using suction cups 09861-31400, place the windshield on the opening, aligning the marks applied and press the glass onto the sealant layer.
Remove excess glue with a spatula or wipe it off with gauze. Fill all the voids around the perimeter of the glass with glue.
Make sure the windshield is sealed by pouring cold water over it, being careful not to damage the fresh adhesive layer with a strong stream. Water so that the water runs down the edges of the glass.
If leaks are detected, dry the leak area and apply sealant.
Install the previously removed parts.
Note: Do not allow water to come into contact with the windshield for the first hour after installation.
Note: Do not drive the vehicle for the first four hours after installing the windshield. If you must drive, drive at low speed for the first 8 hours. Do not slam the doors.
Note: Avoid exposing the vehicle body to high torsional loads that occur when driving off or onto the roadway or when driving on uneven roads.