
Contents: Removal the upholstery ⇓ Removal glass and window regulator ⇓ Installation ⇓ Removal ⇓ Installation ⇓
Removal the upholstery
Loosen the screw securing the inner door handle and remove it.
Loosen the screws securing the side door panel.
Use a puller to remove the side panel.
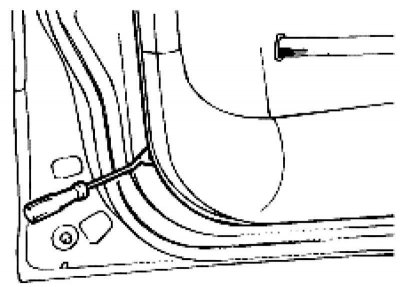
Fig. 8.16. Removing the door trim
Using a screwdriver, remove the front door trim (Fig. 8.16).
Removal glass and window regulator
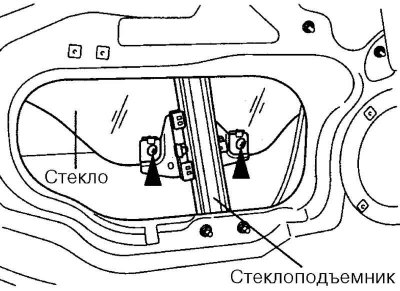
Fig. 8.17. Lowering the glass
By pressing the window lift switch, carefully lower the glass so that the 2 glass mounting bolts are in the door frame opening, and unscrew the bolts.
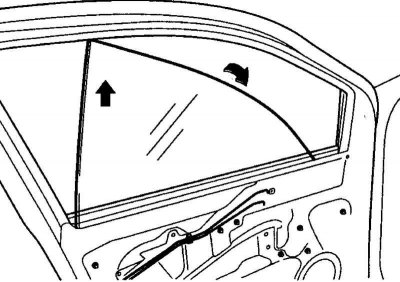
Fig. 8.18. Removing glass
Remove the glass from the seal and carefully remove it from the opening (Fig. 8.18).
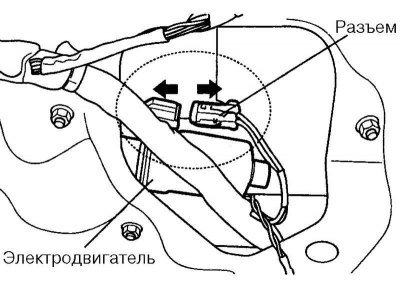
Fig. 8.19. Window lifter motor connector
Disconnect the window lift motor connector (Fig. 8.19).
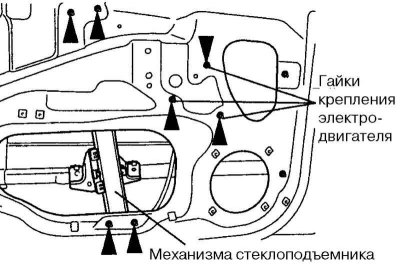
Fig. 8.20. Window lifter mounting
Remove the window regulator assembly by unscrewing the window regulator mechanism mounting nuts (4EA) and the electric motor mounting nuts (ZEA) (Fig. 8.20).
Remove the front groove by unscrewing the mounting nuts (2EA).
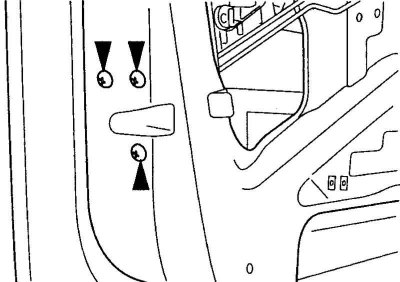
Fig. 8.21. Lock mounting bolts
Loosen the lock mounting screws (Fig. 8.21).
Remove the front door opening limiter mounting bolts (2EA).
Remove the front door hinge mounting bolts and disconnect the connector.
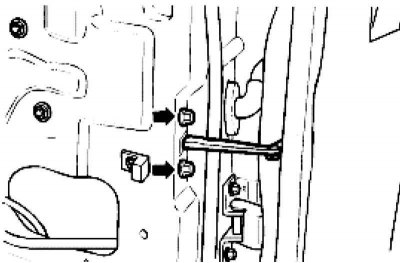
Fig. 8.22. Removing the front door
Remove the front door (Fig. 8.22).
Installation
Installation is carried out in the reverse order of removal.
Removing and installing the outside rearview mirror
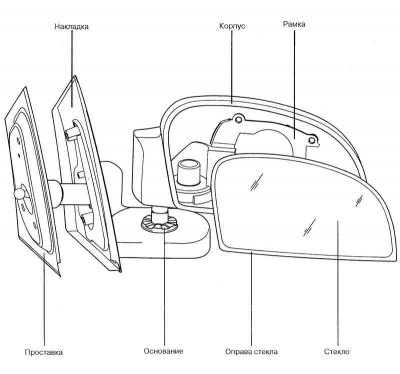
Fig. 8.23. Outside rearview mirror
Removal
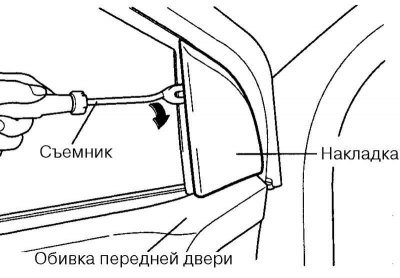
Fig. 8.24. Removing the overlay
Remove the cover (Fig. 8.24).
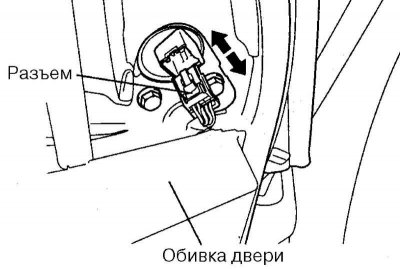
Fig. 8.25. Wire connector
Disconnect the wire connector (Fig. 8.25).
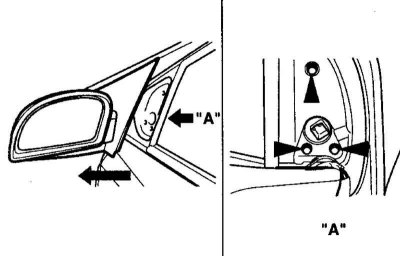
Fig. 8.26. Removing the mirror
Remove the outside rearview mirror by unscrewing the mounting bolts (Fig. 8.26).
Installation
Installation is carried out in the reverse order of removal.