
Contents: Removal ⇓ Installation ⇓
Removal

Fig. 8.11. Screw holding the inner door handle trim
Remove the screw holding the inner door handle trim (Fig. 8.11).
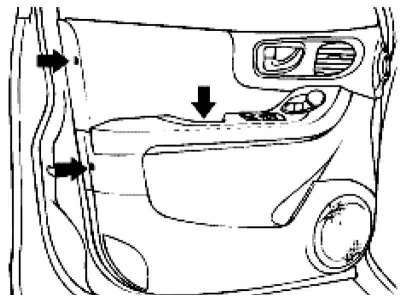
Fig. 8.12. Screws holding the inner door trim
Remove the screws holding the door panel (Fig. 8.12).
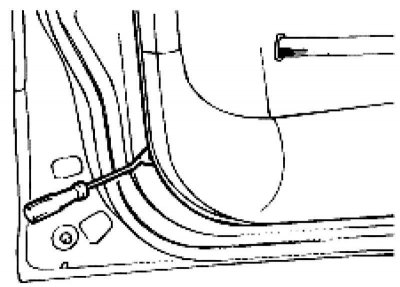
Fig. 8.13. Removing the door trim
Install the shield puller between the trim fasteners and the door shield. Disconnect the wire connectors from the front door (Fig. 8.13).
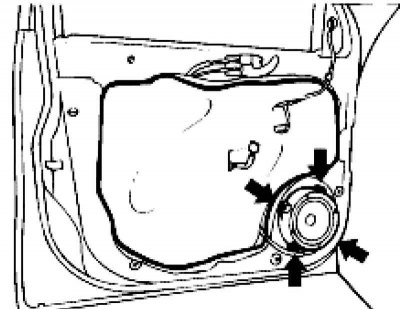
Fig. 8.14. Speaker mounting bolts
Remove the front speaker and door vapor barrier (Fig. 8.14).
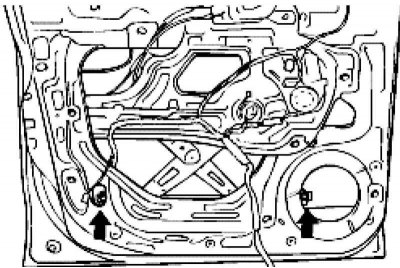
Fig. 8.15. Bolts holding the front door glass
Lower the door glass and remove the bolts holding the front door glass (Fig. 8.15).
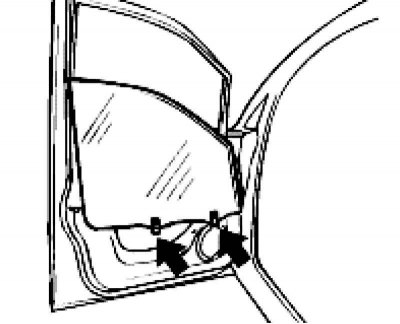
Fig. 8.16. Removing the front door glass
Remove the front door glass from the front door module (Fig. 8.16).
Remove the front door window glass.
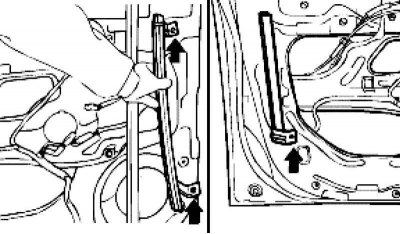
Fig. 8.17. Removing the front and rear guide channels of the front door glass
Remove the front and rear guide channels of the front door glass (Fig. 8.17).
Disconnect the stem from the outer handle.
Remove the bolts holding the latch and door lock actuator.
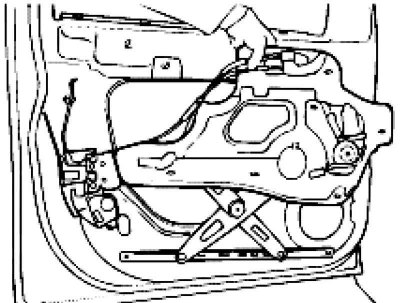
Fig. 8.18. Removing the wiring and the front door module
Remove the wiring and the front door module (Fig. 8.18).
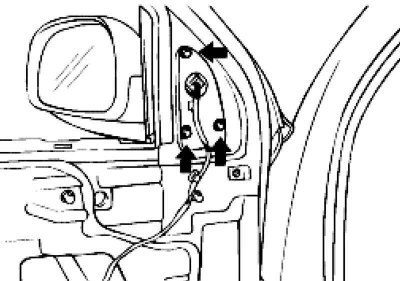
Fig. 8.19. Bolts for fastening the outside rearview mirror
Remove the outside rearview mirror (Fig. 8.19).
Installation
Installation is carried out in the reverse order of removal.
(The full version is located on the website HYUNDAIBOOK.RU)
When installing door vapor barrier, butyl tape should not block the door trim mounting holes.