
Contents: Removal ⇓ Installation ⇓
Removal
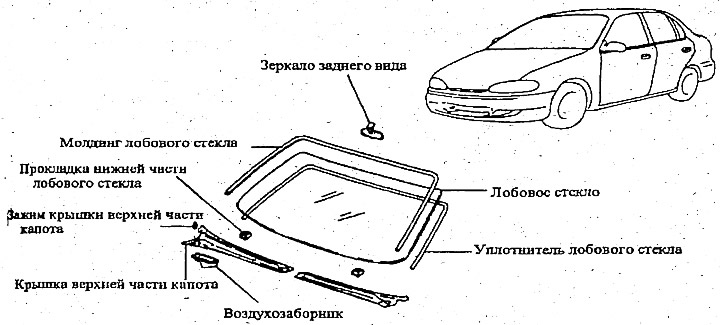
1. To remove the windshield, first remove the following parts:
- 1) Front pillar trim.
- 2) Windshield wipers.
- 3) The hood cover.
- 4) Windshield moldings.
2. Use a special tool to cut the seal.

3. If you are installing the same glass again, make marks on the glass and the housing. You will use them to adjust the glass during installation.
Note: Use chalk or something similar for this.
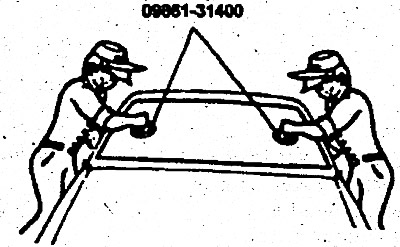
4. Remove the windshield using a special tool (09861-31400).
Installation
1. Using a knife or special tool, scrape off all of the old sealant approximately 2 mm from the mounting surface around the periphery of the windshield.
Warning: Be careful not to cut too much glue or damage the paint with the knife. Touch up the damaged area if necessary.
2. Wipe the glass contact surface with a sponge soaked in alcohol or degreaser.
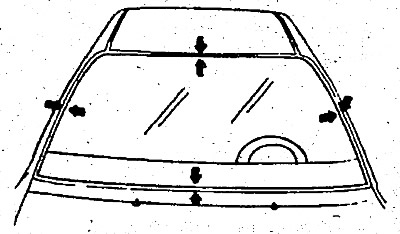
3. Center the glass in the opening. Mark its position by making marks across the glass and the body in four places, as shown in the figure.
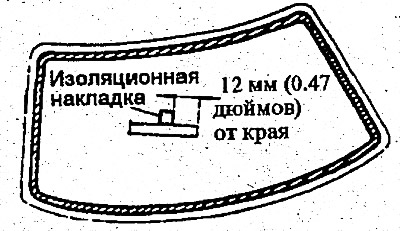
4. Glue the rubber strip along the entire edge of the inside of the glass (as shown in the picture) to hold the seal during installation.
5. Insert the glass.
6. Apply a thin coat of glass primer to the outside of the insulation gasket.

Notes:
- 1. Do not apply body primer to glass, use glass primer.
- 2. Do not touch the primer surface with your hands. Otherwise, the glue may not adhere well to the glass, which will cause water leakage after installation.
- 3. Do not allow dust, water, or abrasives to enter the primer.
7. Apply a thin coat of body primer over the old remaining caulk around the entire edge of the window opening.
The glass should be inserted 10 minutes after applying the primer.
8. Mix the sealant and hardener thoroughly with a spatula on a glass or metal plate.
Notes:
- 1. Wipe the plate with a sponge and alcohol before mixing.
- 2. Follow the instructions included with the sealant.
9. Fill the cartridge with glue, fill the grease gun with glue (09861-31400) and moving it along the edge of the glass, apply glue as shown in the picture.
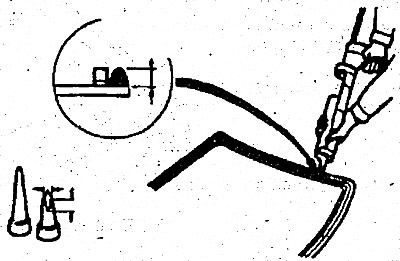
Note: Apply the adhesive 5 minutes after applying the primer to the glass.
10. Using suction cups or a special tool, lower the glass into place near the opening, align the marks, and only then lower the glass onto the seal. Install two supports at the bottom of the windshield to prevent the glass from sliding down.
11. Scrape or wipe off excess glue with a spatula. Fill all air pockets and voids around the glass with glue.
12. Check the glass for water leaks. Direct a gentle stream of cold water at the lid so that the water runs down the glass. Be careful that the stream of water does not hit the newly glued surface directly, it should only run down it.
13. If water leaks, apply sealant to the leaking areas.
14. Install the upper part of the fairing. Put the front pillar trim and windshield wipers in place.
Warning: Make sure the sealant has hardened sufficiently before using the machine.