HyundaiBook.ru
Repair Chevrolet Repair Honda Repair Toyota Repair Land Rover Repair VAZ Repair Renault Repair Nissan
English Русский
Български
Беларускі
Український
Српски
Hrvatski
Română
Polski
Slovenský
Magyar
ArticlesSitemapContacts  


  Accent   Elantra   Getz   Grandeur   Sonata   Santa Fe   Tucson   Others
Sonata 3 (1993-1998) Sonata 4 (2001-2012, petrol)
  • Main
  • Sonata
  • Y3 (1993-1998)
  • Body
  • Body elements
  • Windshield — Removal, Inspection and Installation

Windshield — Removal, Inspection and Installation (Hyundai Sonata Y3)

0
Contents: Removal ⇓ Examination ⇓ Installation ⇓
Windshield — Removal, Inspection and…


Windshield — Removal, Inspection and…

Windshield — Removal, Inspection and…

Windshield — Removal, Inspection and…

Windshield — Removal, Inspection and…


Removal


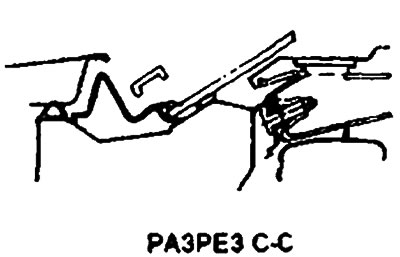
1. Before removing the windshield, remove the upper seat belt mounting bracket bolt and the B-pillar trim.

2. Delete:
  • 1) interior rear view mirror;
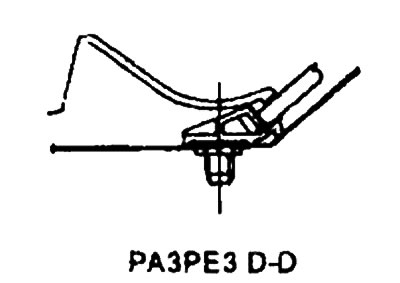
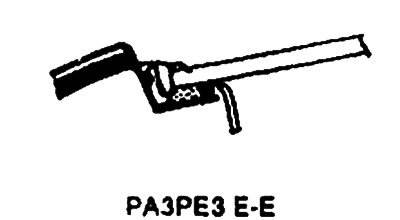
  • 2) windshield wiper arms;
  • 3) the upper cover of the fairing.

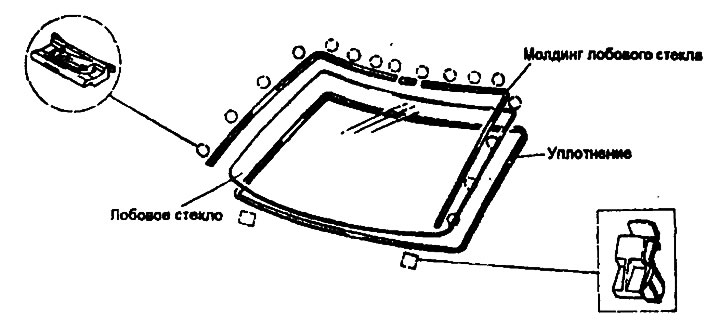
3. Remove the windshield trim using a special tool (09861-31000).

Note: Edging that has changed shape should not be reused.


4. Using a sharp drill, make a hole where the windshield is glued.

5. Pass the string through the hole from inside the car.

6. Pull the string in and out around the perimeter of the windshield to separate the adhesive layer.

Warning: Do not allow the string to touch the edges of the windshield.


Warning: Do not allow the string to…


7. Mark the glass and body with chalk if the glass is to be reinstalled.

8. Remove the windshield using a special tool (suction cup).

8. Remove the windshield using a…


Examination


1. Check the flange surface of the body where the windshield is installed for deformations.

2. Check for damage to the glass seal clamps and studs.

Installation


1. Using a knife or special tool, carefully scrape off the old filler to a thickness of about 2 mm on the surface around the entire perimeter of the windshield installation.

Warning: Do not damage the paintwork of the body surface with the knife.

2. Clean the contact surface of the body with the windshield with a sponge soaked in alcohol or grease remover.

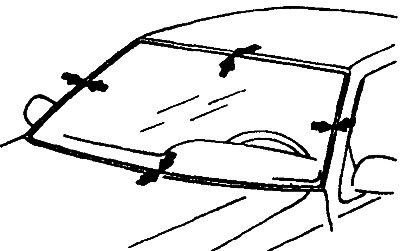
3. Install the windshield gasket.

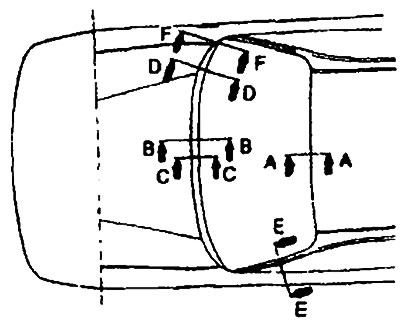
4. Center the new windshield in the installation location on the body. Mark the position of the glass with transverse lines at four points.

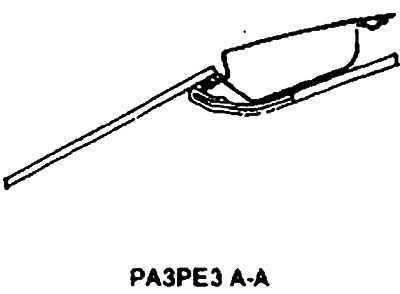
5. Stick the rubber seal to the inner surface of the windshield along the entire perimeter.

5. Stick the rubber seal to the inner…

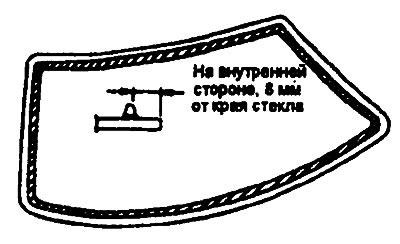
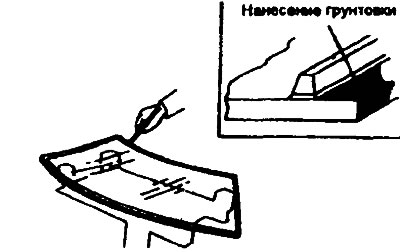
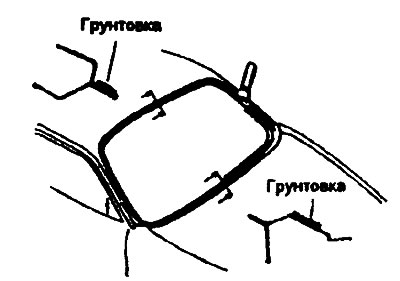
6. Apply a thin layer of primer (for glass) to the outer surface of the seal.


Note:
  • 1) Do not use primer on the body.
  • 2) Do not touch the primed surface with your hand.
  • The adhesive may not fully adhere to the glass, causing water to leak through the glass.


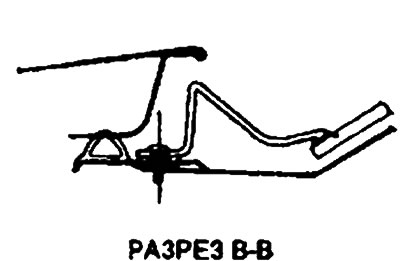
7. Apply a thin coat of body primer to the area where the windshield will be installed. The glass should be installed within 10 minutes after applying the primer.

7. Apply a thin coat of body primer to…

8. Mix all the sealant together thoroughly on the glass or metal plate with a spatula. Before that, clean the glass or plate with a sponge and alcohol.

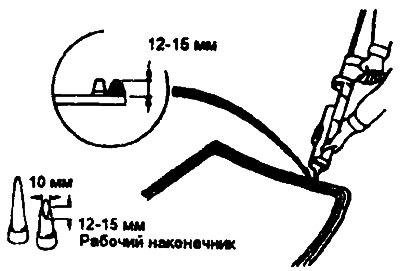
9. Place the glue in the cartridge. Install it in the gun and apply a layer of glue around the perimeter of the glass.

Note: Apply the adhesive 5 minutes after applying the glass primer.


Note: Apply the adhesive 5 minutes…


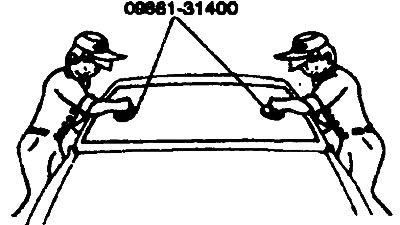
10. Using suction cups or a special device (09861-31400), lower the glass into place, align the marks made, and press it against the filler, installing two lower spacers to prevent the glass from sliding down.


11. Scrape off or wipe off excess glue with a spatula or thin metal mesh.

Fill all cavities and voids around the windshield.

12. Check the windshield for water leaks. Use a stream of cold water, but be careful not to direct a powerful stream of water onto the fresh layer of glue. Let the water run down the edges of the glass.

13. If there are leaks, apply filler to these areas.

14. Install the windshield frame. Reinstall the interior rearview mirror, upper fairing cover and wiper arms.
This article is available at russian, bulgarian, belarusian, ukrainian, serbian, croatian, romanian, polish, slovak, hungarian
This article has been reviewed by: Konstantin Smirnov
Add to social network:

Previous
Sonata 3: Body elements
Next

Body components and dimensions
Tightening torque of threaded connections
Inflatable airbag
Rear glass — removal and installation
Front door — adjusting the position of the door, glass and handle
Front seat
Sliding roof
We recommend other articles on the topic of Hyundai manuals:

Windshield — Removal and Installation Hyundai Accent 1 (1994-1999)
Diagnosing Windshield Wiper Problems Hyundai Elantra 1 (1990-1995, petrol)
Windshield wiper blades Hyundai Getz (2002-2011)
Windshield de-icer Hyundai Santa Fe 2 (2007-2012, petrol)
Windshield Heating System Timer — Schematic Diagram Hyundai Tucson 1 (2005-2010)
Removal and installation the windshield Hyundai Matrix (2001-2010, petrol)

Link in different formats to this article

Visitor comments
No comments yet


How much will 37 + 46 ?


Sonata 4 (2001-2012, petrol) 
  • General information
  • User manual
  • Maintenance
  • Power unit
  • 2.0 and 2.4 liter engines
  • 2.7 liter engines
  • Engine overhaul
  • Cooling system
  • Intake and exhaust systems
  • Lubrication system
  • MFI fuel injection system
  • Engine electrical equipment
  • Transmission
  • Clutch
  • Mechanical gearbox
  • Automatic gearbox
  • Drive shafts
  • Chassis
  • Front suspension
  • Rear suspension
  • Steering
  • Brake system
  • Body
  • Exterior
  • Interior
  • Heater and air conditioner
  • Security systems
  • Electrical equipment
  • Troubleshooting
  • Electrical circuits
Sonata 3 (1993-1998) 
  • General information
  • Maintenance
  • Power unit
  • Engine repair I4 DOHC
  • Engine repair I4 SOHC
  • Engine repair V6 SOHC
  • Cooling system
  • Intake and exhaust system
  • Exhaust gas treatment
  • Fuel system
  • Transmission
  • Clutch
  • Mechanical gearbox
  • Automatic transmission KM-175
  • Automatic transmission F4A33
  • Chassis
  • Front suspension
  • Rear suspension
  • Steering
  • Brake system
  • Body
  • Body elements
  • Electrical equipment
  • Equipment and devices
HyundaiBook.ru © 2018-2026 · Mobile version · Sitemap: EN BG BY UA RS HR RO PL SK HU · Administration · Site search · Hyundai owners Accent 1 · Accent 2 · Accent 3 · Elantra 1 · Elantra 2 · Elantra 3 · Getz · Sonata 3 · Sonata 4 · Santa Fe 2 · Tucson 1 · Tucson 2 · Matrix ·
This site uses cookies to optimize its functionality. By continuing, you agree to our terms.