
Contents: Replacing the door trim ⇓ Replacing the inner handle ⇓ Glass replacement ⇓ Replacing the speaker ⇓ Replacing the window lifter motor ⇓ Replacing the door module ⇓ Replacing the outer handle ⇓
Replacing the door trim
Note:
To avoid damaging the lining when using a flat-head screwdriver as a lever, wrap the screwdriver with insulating tape. Also tape the adjacent parts that require protection.
To protect your hands from injury, wear gloves.
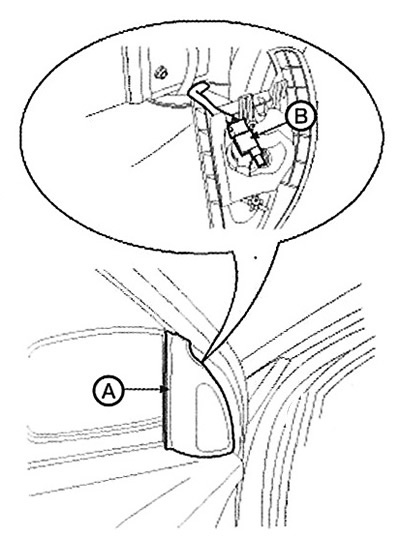
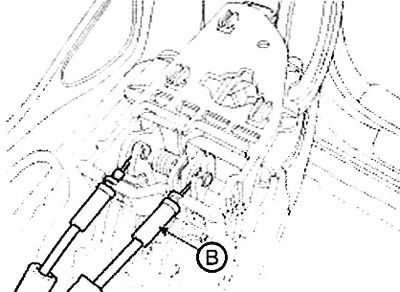
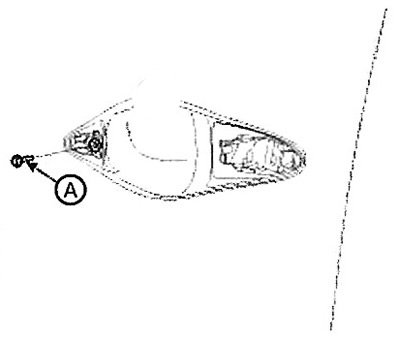
1. Remove the inner corner sector (A) of the door using a screwdriver or a special puller.
2. Disconnect the tweeter connector (B).
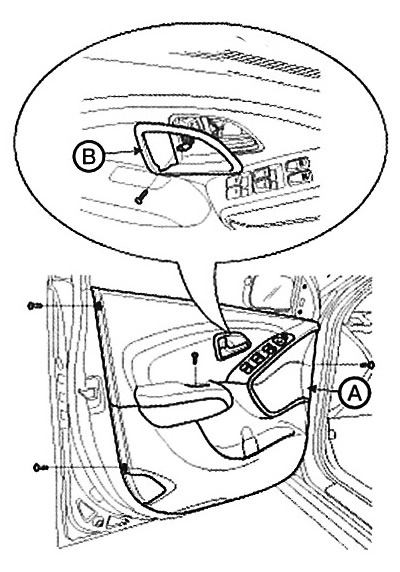
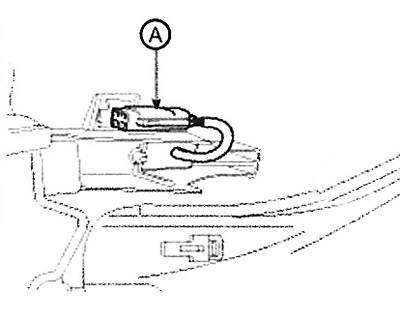
3. Loosen the mounting screws and remove the housing (B) of the inner door handle.
4. Loosen the mounting screws and remove the door trim (A).
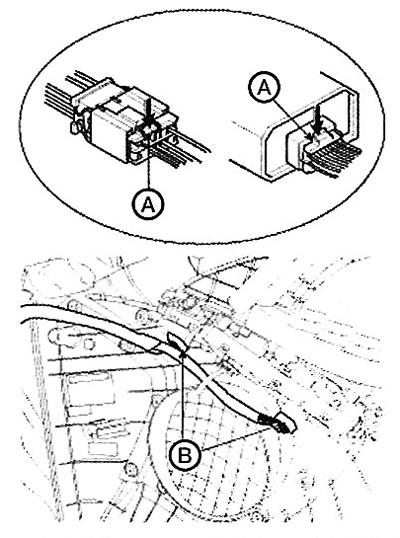
5. Press the locking pin (A) and disconnect the connectors (B).
6. Installation is carried out in reverse order.
Note:
Check that the connector is connected correctly and that all rods are securely connected.
Make sure the door locks/unlocks and opens/closes correctly.
Replace any damaged fasteners.
Replacing the inner handle
1. Remove the door trim.
2. Remove the door gasket (A).
Note: Replace damaged gasket.

3. Loosen the mounting screws and remove the inner handle (A).
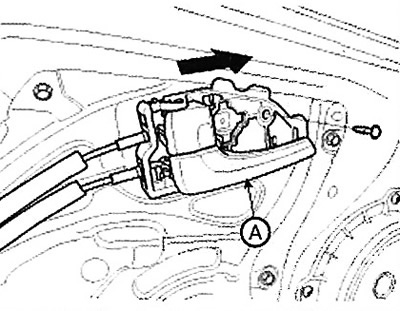
4. Disconnect the cable (B) of the inner handle.
5. Installation is carried out in reverse order.
Note:
Make sure the door locks/unlocks and opens/closes correctly.
Replace any damaged fasteners.
Glass replacement
1. Remove the door trim.
2. Remove the door gasket.
3. Remove the plug from the glass mounting hole.
Caution: Be careful not to drop the glass or scratch its surface.
4. Carefully move the glass (B) until the bolts appear, then unscrew them. Remove the glass from the guide and from the window opening.
Note: Tightening torque: 6.9 - 10.8 Nm.
5. Installation is carried out in reverse order.
Note:
Make sure the glass moves up and down without sticking.
Adjust the position of the glass if necessary.
Replace damaged fasteners.
Make sure the door locks/unlocks and opens/closes correctly.
Replacing the speaker
1. Remove the door trim.
2. Remove the door gasket.
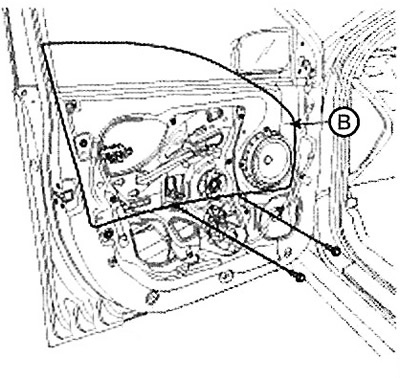
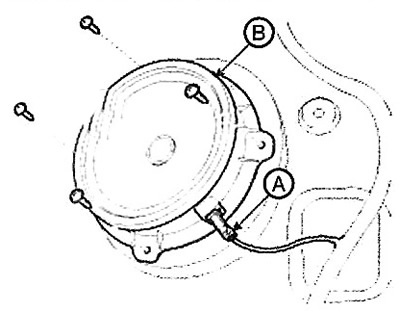
3. Loosen the mounting bolts and remove the speaker (B).
4. Disconnect the speaker connector (A).
5. Installation is carried out in reverse order.
Note:
Secure the speaker with sheet metal screws.
Replace damaged fasteners.
Make sure the door locks/unlocks and opens/closes correctly.
Check that the connector is connected correctly and that all rods are securely connected.
Replacing the window lifter motor
1. Remove the door trim.
2. Remove the door gasket.
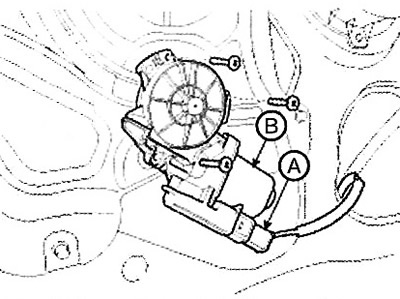
3. Disconnect the connector (A), then remove the mounting screws.
4. Remove the window lift motor (B).
5. Installation is carried out in reverse order.
Note:
Lubrication must be applied to rotating parts and springs.
Make sure the glass moves up and down without sticking.
Replace damaged fasteners.
Make sure the door locks/unlocks and opens/closes correctly.
Replacing the door module
1. Remove the following parts:
A. Door trim.
B. Door gasket.
C. Glass.
D. External handle.
2. Loosen the screw (A) securing the base of the outer handle.
3. Disconnect the connector (A) of the outer handle.

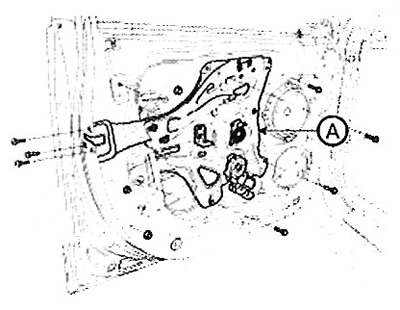
4. Loosen the module mounting bolts.
5. Loosen the lock mounting nuts and remove the module (A).
Note: Tightening torque: 6.9 - 10.8 Nm.
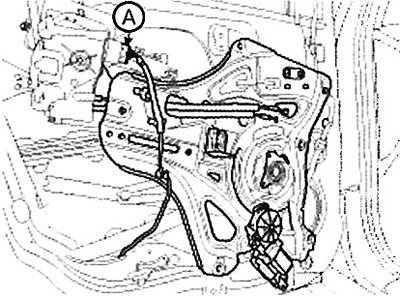
6. Disconnect the connector (A) and the retainer.
7. Installation is carried out in reverse order.
Note:
The parts to be installed must be well lubricated.
Check that the connector is connected correctly and that all rods are securely connected.
Make sure the door locks/unlocks and opens/closes correctly.
Replace damaged fasteners.
Replacing the outer handle
1. Remove the cover, unscrew the mounting bolt.
2. Remove the cover (A) of the outer handle.
Note: Tightening torque: 6.9 - 10.8 Nm.
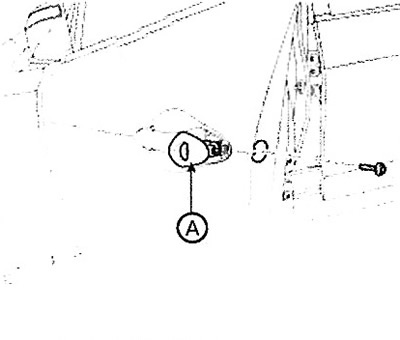
3. Remove the outer handle (A) by sliding it backwards.

4. Disconnect the connector (A) of the outer handle.
5. Installation is carried out in the reverse order of removal.
Note: Make sure the door locks/unlocks and opens/closes correctly.