
Note:
- 1. Clean all parts thoroughly before assembly.
- 2. Immediately before assembly, apply a thin layer of fresh engine oil to all friction surfaces.
- 3. When assembling, replace all gaskets, sealing rings and oil seals with new ones.
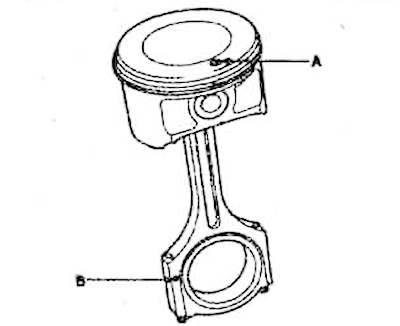
1. Connect the piston and connecting rod. Press the connecting rod pin with a hydraulic press, making sure that the marks on the piston (A) and connecting rod (B) are on the same side and are directed towards the front of the engine (the side with the drive belts) when installing.
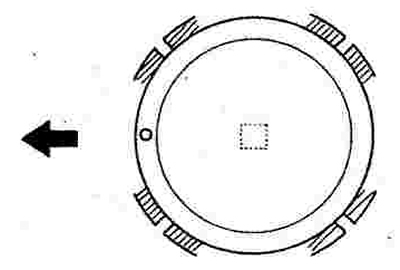
2. Install the discs and the oil scraper ring expander. Using the piston ring expander, install the lower and upper compression rings with the installation mark facing up. Move the compression ring locks as far apart as possible, making sure that they are not in the same plane as the locks of the oil scraper ring discs and the piston pin.
3. Install the connecting rod bearing shells so that the protrusions on the shells fit into the corresponding grooves in the connecting rod cap and connecting rod.
4. Install the main bearing shells.
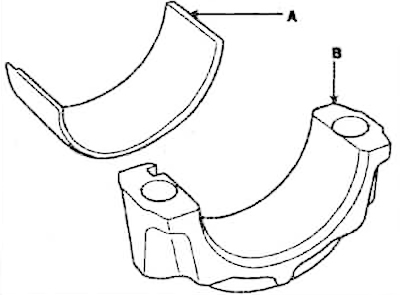
Note: The upper bearing shells of main bearings No.1, 2, 3, 4 have an oil groove and a hole, the lower shells do not.
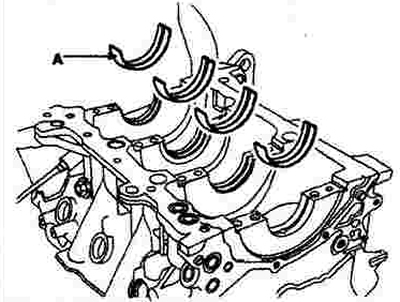
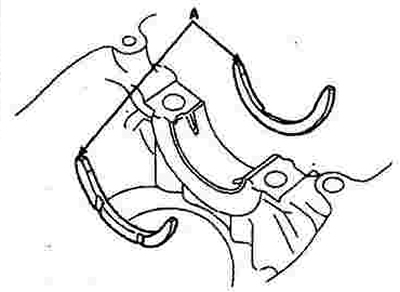
Align the projections on the upper bearing shells (A) with the recesses in the cylinder block seats and insert the shells with light pressure.
(The material was obtained from a web resource: www.HyundaiBook.ru)
Align the projections in the lower bearing shells (A) with the recesses in the main bearing cap sockets (B) and insert the shells with light pressure.
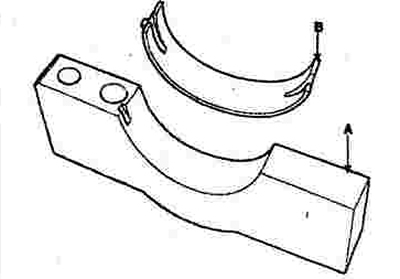
5. Install two thrust bearings (A) on the sides of the main bearing №3 of the cylinder block with the oil grooves facing outward.
 |
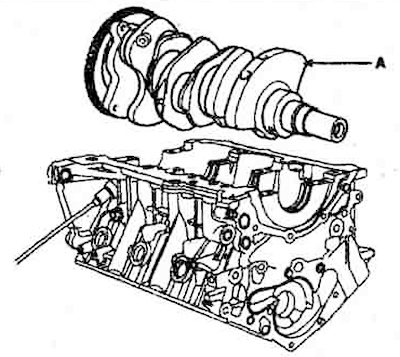 |
6. Insert the crankshaft (A) into the cylinder block.
7. Install the main bearing caps and ladder frame into place in the cylinder block.
8. Apply a thin layer of engine oil to the threaded portion of the main bearing cap bolts and tighten in two stages:
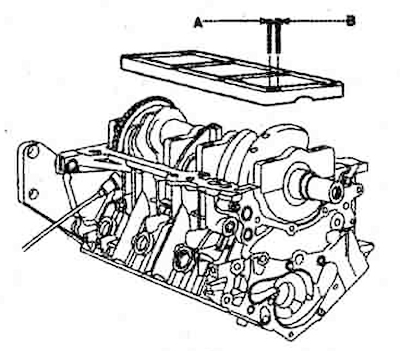
Stage I - tighten the main bearing cap bolts in a specific order to the following torques:
- M8 (A): 13-19 Nm;
- M10 (B): 27-33 Nm.
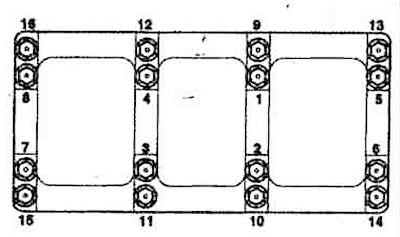
Stage II - tighten the bolts in the order shown in the figure by 90° - 94°.
Note: If the threaded portion of the bolts is damaged or the bolts themselves are deformed, replace them with new ones.
9. Check the ease of rotation of the crankshaft.
10. Check the axial clearance of the crankshaft.
Note: Before installing the pistons with connecting rods into the cylinders, apply engine oil to the cylinder surface and piston rings.
11. Remove the connecting rod caps and place sections of rubber hose on the threaded portion of the connecting rod bolts.
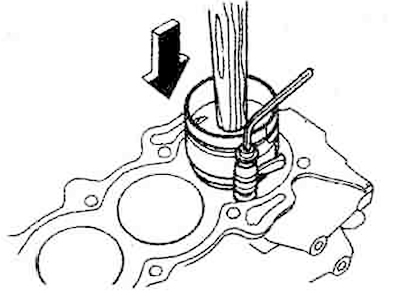
12. Install a piston ring compressor on the piston and, after making sure that the connecting rod bearing is installed correctly, push the piston with the connecting rod into the cylinder using the wooden handle of a hammer.
Note: When moving the piston into the cylinder, support the piston ring compressor to prevent the piston rings from expanding prematurely.
13. After the piston rings are in the cylinder, make sure that the connecting rod is on the crankshaft journal.
14. Remove the hose sections from the threaded portion of the connecting rod bolts and lubricate the bolts with engine oil. Install the connecting rod caps with bearing shells and tighten the bolts to a torque of 16 - 20 N·m.
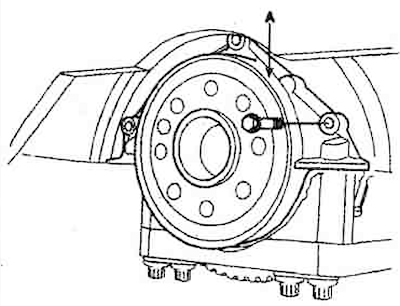
15. Apply sealant to the oil seal housing (A) and install it on the cylinder block. Tighten the mounting bolts to a torque of 10-12 Nm.
Note: Use sealant M724-40A or similar. Before applying the sealant, make sure the surface is clean and dry.
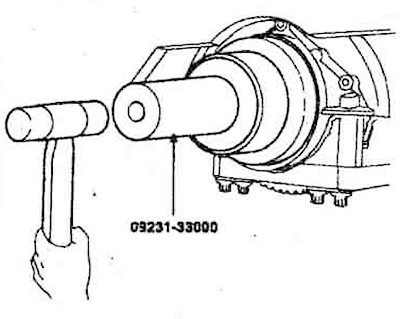
16. Apply a small amount of engine oil to the rear oil seal seat. Using a special tool (09231 - 33000) and a hammer, press in a new seal.
17. Install the front cover.
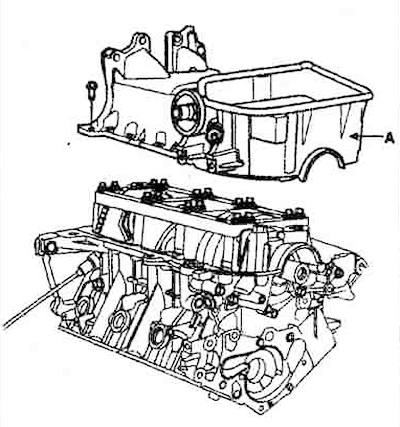
18. Using a blade and scraper, remove the remains of the old sealant from the surface of the upper part of the engine crankcase. Make sure that the surface of the crankcase joint is dry and clean and apply the sealant.
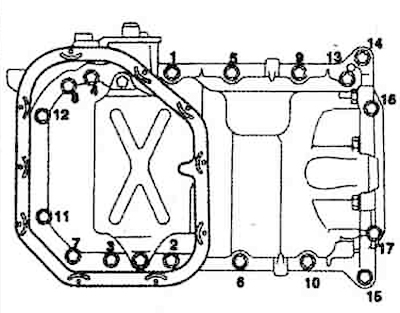
Install the upper part of the crankcase (A) on the cylinder block and tighten the bolts in the order shown in the figure to a torque of 19-28 Nm.
 |
 |
Note: To prevent oil leaks, apply sealant to the threaded holes before tightening the bolts. Tighten the bolts no later than 5 minutes after applying the sealant, otherwise remove the sealant from the holes and reapply fresh sealant. After assembling the engine, wait at least 30 minutes before adding engine oil to the engine.
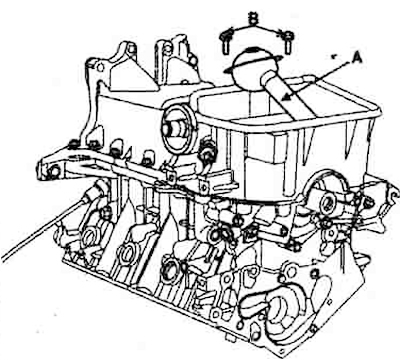
19. Install the oil intake (A) with a new gasket and tighten the bolts (B) to 15-22 Nm.
20. Apply MS 721-40A sealant or similar to the clean and dry joint surface of the lower part of the crankcase.
Note: To prevent oil leaks, apply sealant to the threaded holes before tightening the bolts. Tighten the bolts no later than 5 minutes after applying the sealant, otherwise remove the sealant from the holes and reapply fresh sealant. After assembling the engine, wait at least 30 minutes before adding engine oil to the engine.
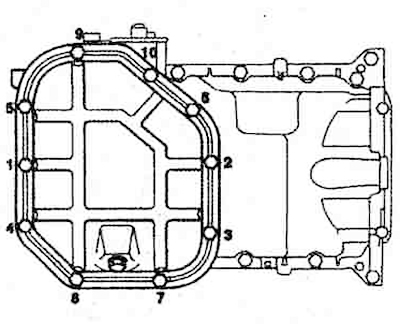
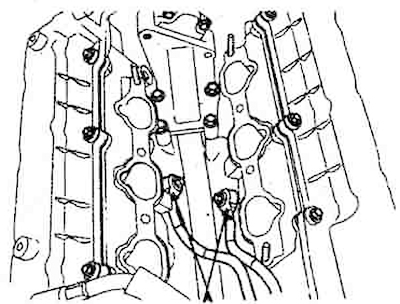
21. Install the lower part of the crankcase on the engine and tighten the 10 mounting bolts in the order shown in the figure.
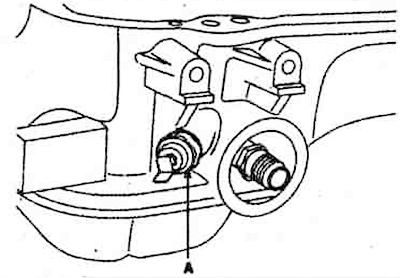
22. Apply THREE BOND TB2403 sealant or similar to the threaded part of the oil pressure sensor (A) and tighten the sensor to a torque of 15-22 Nm.
23. Install the knock sensors (A). Tightening torque of the knock sensors: 17-26 Nm.
24. Install the water pump.
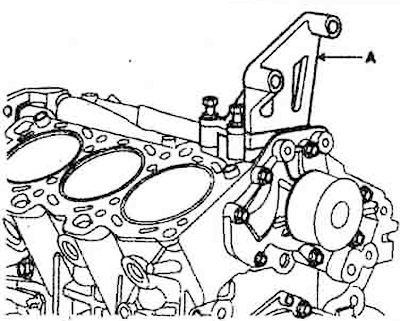
25. Install the power steering pump bracket (A). Tighten the mounting bolts to 35-55 Nm.
26. Install the compressor.
27. Install the generator.
28. Install a new sealing ring onto the dipstick. Apply engine oil to the sealing ring and screw the dipstick into the cylinder block.
29. Install the cylinder head.
30. Install drive belts.
31. Install the flange (cars with automatic transmission). Tightening torques for flange bolts 73-77 Nm.