
2. Install the engine on a special stand for disassembly.
3. Remove the drive belt.
4. Remove the cylinder head.
5. Remove the oil dipstick.
6. Remove the generator.
7. Remove the compressor.
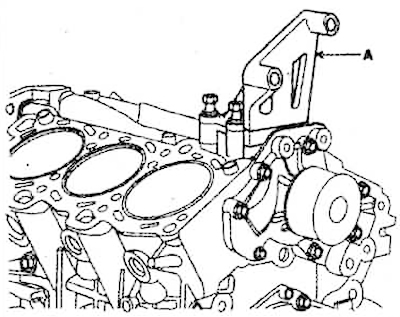
8. Remove the power steering pump bracket.
9. Remove the water pump.
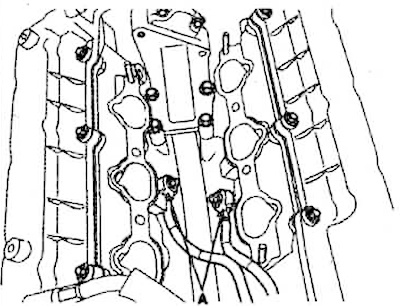
10. Remove the knock sensors (A).
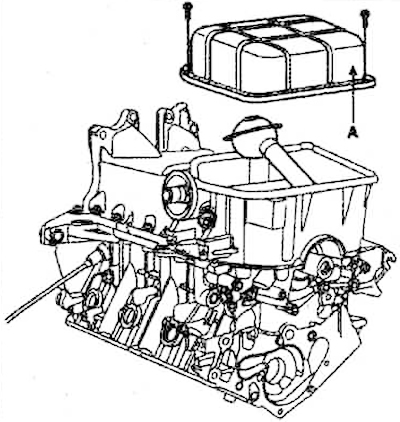
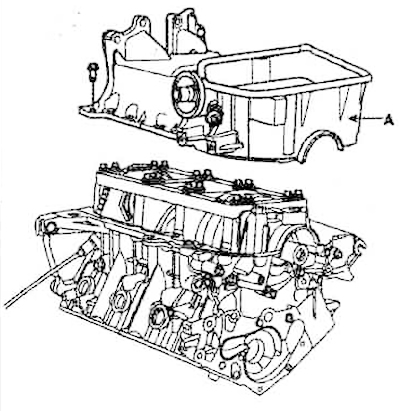
11. Remove the lower part of the crankcase (A).
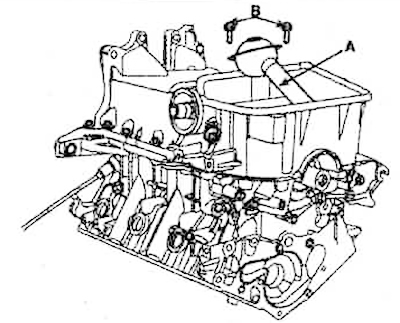
12. Unscrew the two bolts (B) and remove the oil receiver (A) with the gasket.
13. Remove the upper part of the crankcase (A).
14. Check the crankshaft axial clearance (see below).
15. Remove the connecting rod caps and check the clearances in the connecting rod bearings (see below).
16. Use a scraper to clean the top of the piston from carbon deposits. Push the piston together with the connecting rod out of the cylinder through the top.
Note.
- Do not disassemble the connecting rod, connecting rod cap and connecting rod bearings.
- Place the removed pistons with connecting rods in the order corresponding to the cylinder numbers for correct installation later.
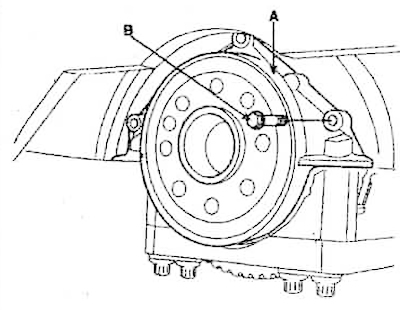
17. Loosen the three bolts (B) and remove the oil seal housing (A).
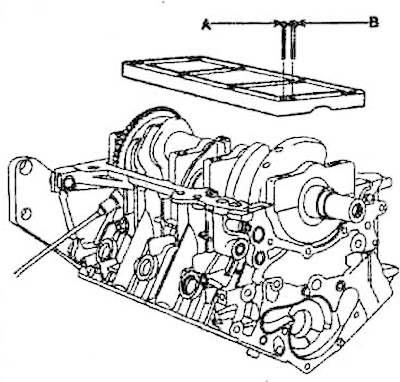
18. Check the crankshaft axial clearance (see below).
19. Remove the ladder frame and main bearing caps. Measure the crankshaft main bearing clearance (see below).
20. Carefully remove the crankshaft (A) from the cylinder block so as not to damage the main journals.
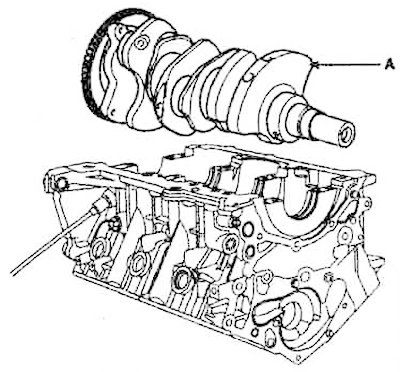
Note: Arrange the main and thrust bearing shells in the order for installation.
21. Check the suitability of the piston pin. To do this, try to move the piston relative to the pin. If relative movement is possible, it is necessary to replace the piston pin and piston as a set.
22. Using a special puller, remove the two compression rings. Manually remove the discs and the oil scraper ring expander.
Note: Arrange the piston rings strictly in the order corresponding to the cylinder numbers.
23. Disconnect the piston from the connecting rod.