HyundaiBook.ru
Repair Chevrolet Repair Honda Repair Toyota Repair Land Rover Repair VAZ Repair Renault Repair Nissan
English Русский
Български
Беларускі
Український
Српски
Hrvatski
Română
Polski
Slovenský
Magyar
ArticlesSitemapContacts  


  Accent   Elantra   Getz   Grandeur   Sonata   Santa Fe   Tucson   Others
Tucson 1 (2005-2010) Tucson 2 (2009-2015)
  • Main
  • Tucson
  • JM (2005-2010)
  • Power unit
  • Gasoline engine G6BA
  • Removal and installation the engine with gearbox assembly

Removal and installation the engine with gearbox assembly (Hyundai Tucson JM)

0
Removal and installation the engine with gearbox assembly

Note:
  • 1. To avoid incorrect connections during installation, mark all connectors and hoses when disconnecting them.
  • 2. Check drive belts before removing the cylinder head.
  • 3. Turn the crankshaft so that the piston of the first cylinder is at the top dead center of the compression stroke.


1. Remove the air intake (A).
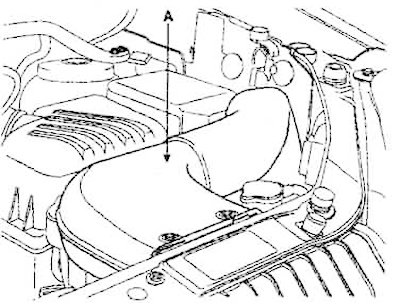
1. Remove the air intake (A).


2. Disconnect the negative terminal from the battery.
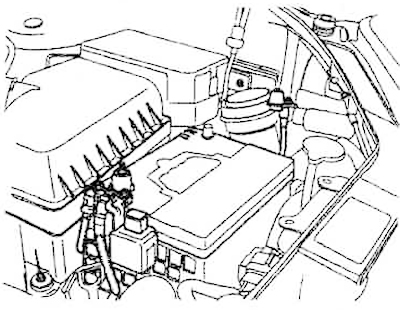
2. Disconnect the negative terminal from the battery.


3. Unscrew the radiator cap and the drain plug of the cooling system and drain the coolant.


4. Remove the engine cover.

5. Disconnect the MAF sensor connector (A). Disconnect the breather hose (B) from the air cleaner hose. Remove the air cleaner (C) complete with the intake hose.
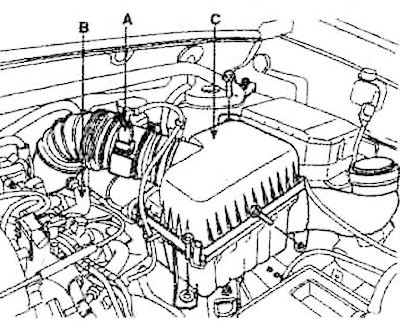
5. Disconnect the MAF sensor connector (A). Disconnect the breather hose (B)…


6. Remove the upper (A) and lower (B) radiator hoses.
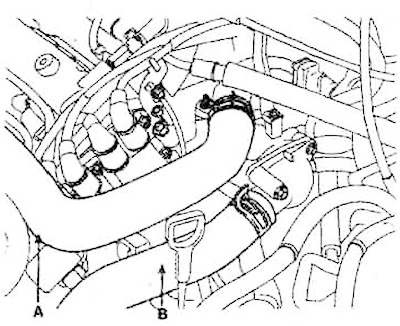
6. Remove the upper (A) and lower (B) radiator hoses.


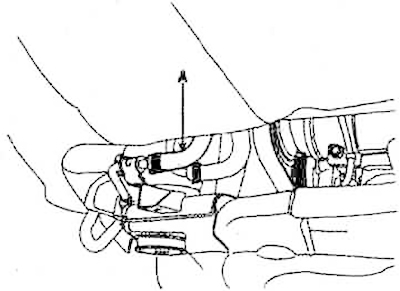
7. Remove the heater hoses (A).
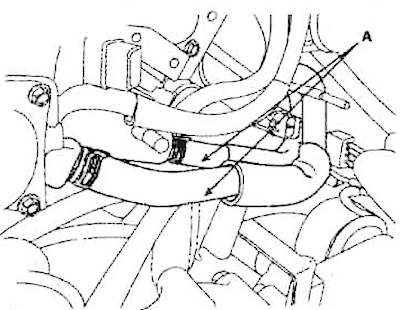
7. Remove the heater hoses (A).


8. Disconnect the connectors on the cylinder head and intake manifold (for the disconnection procedure and location of the connectors, see the section "Removing the cylinder head").


9. Disconnect the ground wire (A) from the hood cover.
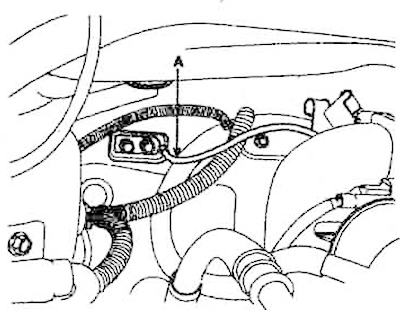
9. Disconnect the ground wire (A) from the hood cover.


10. Disconnect the intake air temperature sensor connector (A) and the VIS actuator connector (B).
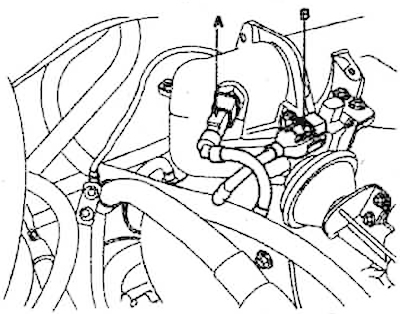
10. Disconnect the intake air temperature sensor connector (A) and the VIS…


11. Disconnect the fuel hose (A) from the line.
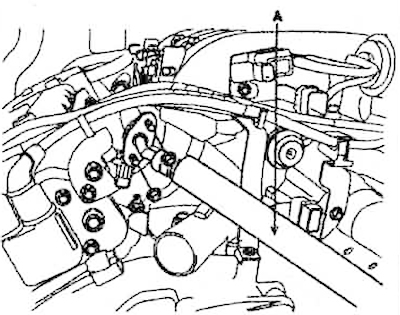
11. Disconnect the fuel hose (A) from the line.


12. Disconnect the crankcase ventilation hose.

13. Disconnect the vacuum hose (A) from the brake booster.
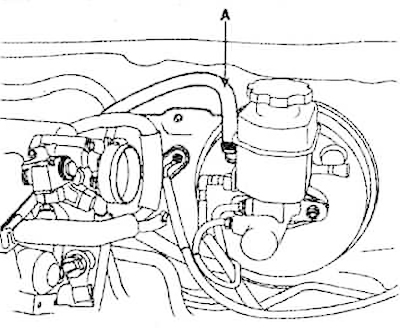


13. Disconnect the vacuum hose (A) from the brake booster.


14. Loosen the lock nuts and remove the throttle cable.
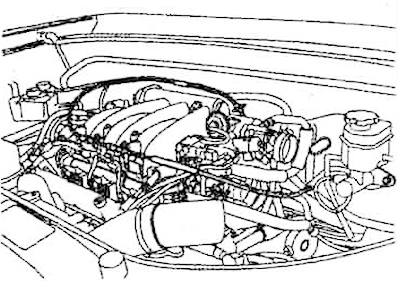
14. Loosen the lock nuts and remove the throttle cable.


15. Disconnect the hose from the power steering pump (A).
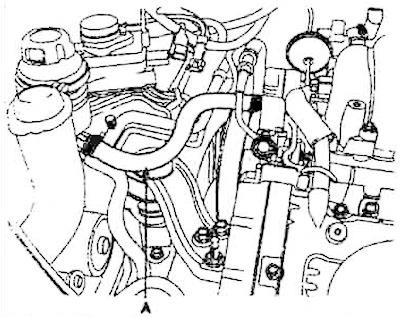
15. Disconnect the hose from the power steering pump (A).


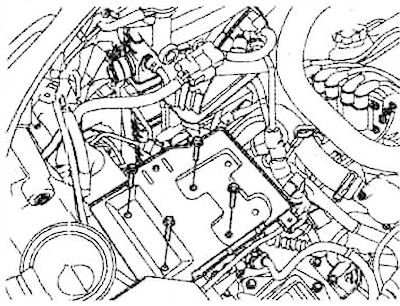
16. Remove the battery bracket.


16. Remove the battery bracket.

(The basis of the material is information from the website: «HyundaiBook.ru»)


17. Disconnect the gearbox connectors:
  • 1) A - gear divider connector;
  • 2) B - connector of the gearbox mode switch;
  • 3) C- connector of the gearbox input shaft speed sensor;
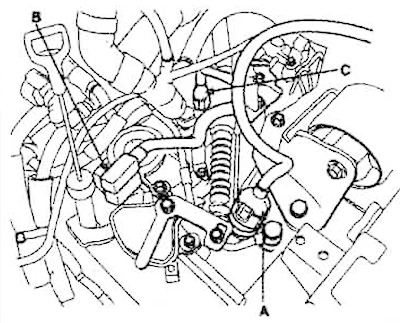
3) C- connector of the gearbox input shaft speed sensor;

  • 4) A - output shaft speed sensor connector;
  • 5) B - vehicle speed sensor connector.
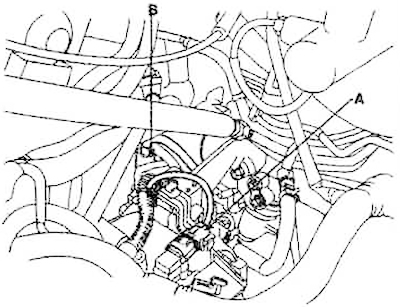
5) B - vehicle speed sensor connector.


18. Remove the transmission mode shift control cable (A).
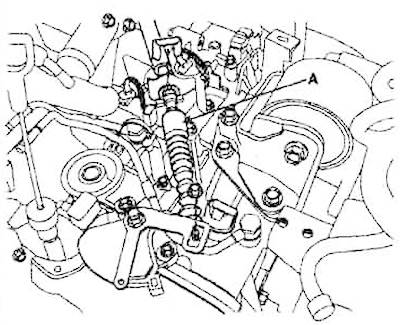


18. Remove the transmission mode shift control cable (A).


19. Disconnect the oil cooler hoses from the automatic transmission (A).
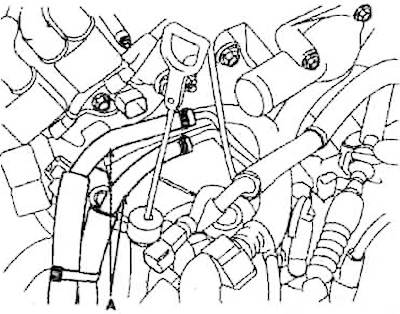
19. Disconnect the oil cooler hoses from the automatic transmission (A).


20. Remove the crankcase guard (A).
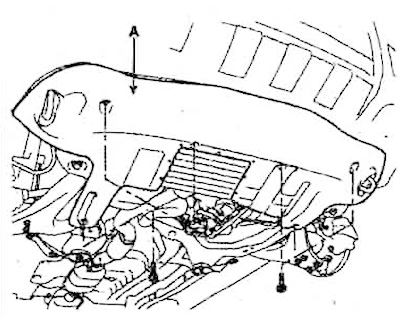
20. Remove the crankcase guard (A).


21. Remove the front outlet pipe (A).
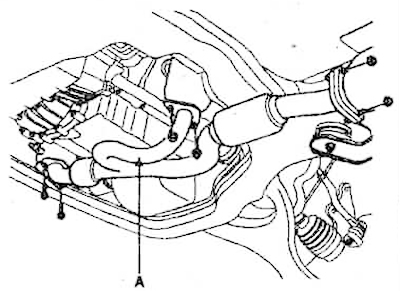
21. Remove the front outlet pipe (A).


22. Disconnect the wheel speed sensors (A) from both steering knuckles.
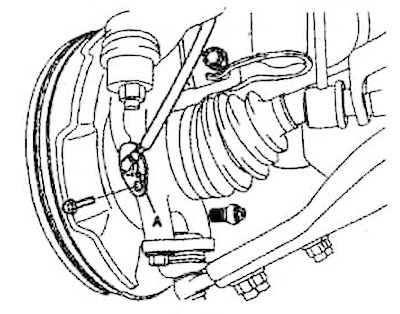


22. Disconnect the wheel speed sensors (A) from both steering knuckles.


23. Loosen the bolts and nuts of the front strut.
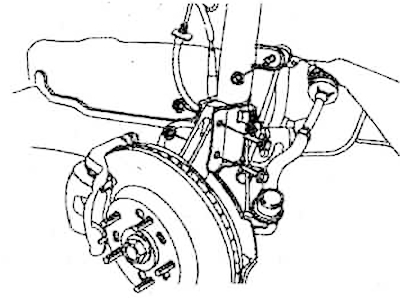
23. Loosen the bolts and nuts of the front strut.


24. Remove the brake caliper (A) and tie it with wire to the suspension elements.
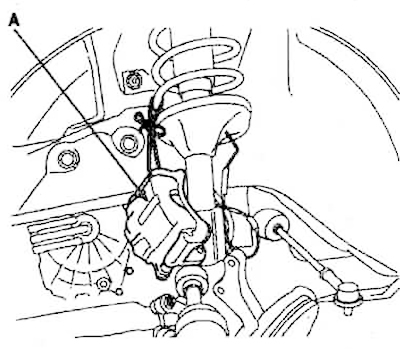
24. Remove the brake caliper (A) and tie it with wire to the suspension…


25. Disconnect the steering universal joint (A) from the steering shaft.
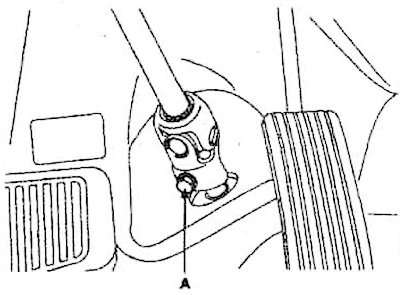
25. Disconnect the steering universal joint (A) from the steering shaft.


26. Install a jack to support the engine and gearbox assembly.


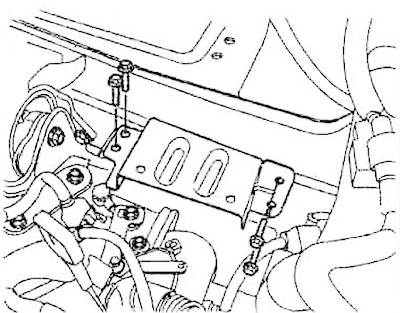
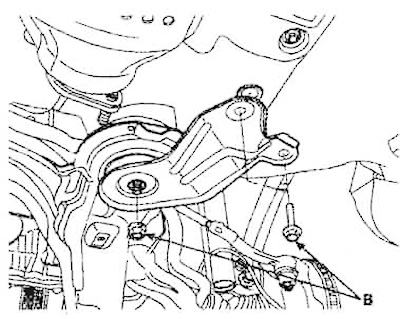
27. Remove the engine mount bracket (A).
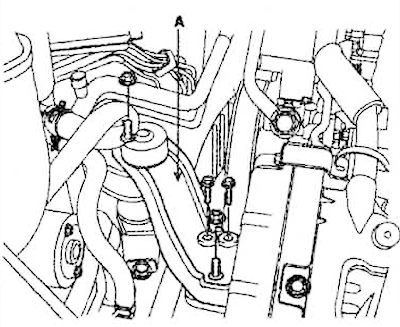
27. Remove the engine mount bracket (A).


28. Remove the gearbox support bracket (A).
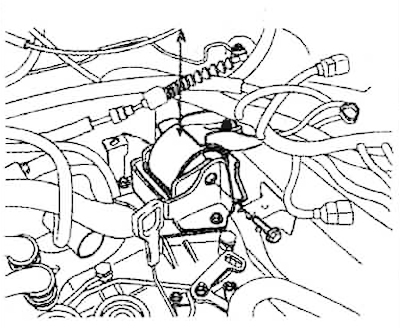
28. Remove the gearbox support bracket (A).


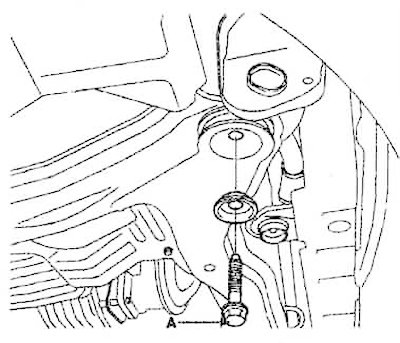
29. Loosen the bolts and nuts of the engine mounts (A) and subframe brackets (B).
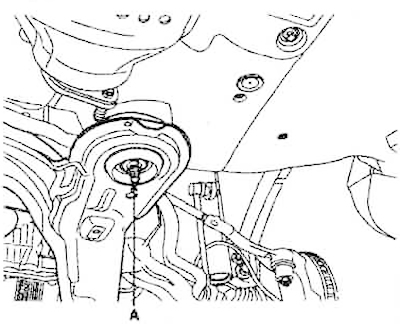
29. Loosen the bolts and nuts of the engine mounts (A) and subframe brackets…


29. Loosen the bolts and nuts of the engine mounts (A) and subframe brackets…


30. Jack up the car.

Installation is carried out in the reverse order of removal.

After installation, do the following:

1. Adjust the throttle cable.

2. Fill the engine with engine oil.

3. Pour transmission oil into the gearbox.

4. Fill the cooling system with coolant.

5. Remove air from the cooling system.

6. Clean the battery terminals with sandpaper and connect them. Apply lubricant to the terminals to prevent corrosion.

7. Inspect the fuel lines for leaks.

8. Turn on the ignition (without starting the engine) to start the fuel pump for 1-2 seconds. During this time, pressure will build up in the fuel line. Repeat the operation 3-4 times and check the fuel lines again for fuel leaks.
This article is available at russian, bulgarian, belarusian, ukrainian, serbian, croatian, romanian, polish, slovak, hungarian
This article has been reviewed by: Konstantin Smirnov
Add to social network:

Previous
Tucson 1: Gasoline engine G6BA
Next

Cylinder head — installation
Cylinder head — assembly
Cylinder head — replacing guide bushings
Cylinder head — technical condition check
Cylinder head — disassembly
Cylinder block — device
Cylinder Block — Disassembly
Cylinder block — checking technical condition
Cylinder Block — Assembly
Intake and exhaust systems — device
We recommend other articles on the topic of Hyundai manuals:

Engine and gearbox assembly Hyundai Accent 1 (1994-1999)
Removal and installation of engine and gearbox Hyundai Elantra 3 (2000-2006)
Replacement of the electronic control unit of the engine and… Hyundai Getz (2002-2011)
Engine and gearbox assembly — removal and installation Hyundai Sonata 3 (1993-1998)
Removal and installation of the engine and gearbox assembly Hyundai Santa Fe 2 (2007-2012, petrol)
Removal and installation of the engine and gearbox assembly Hyundai Matrix (2001-2010, petrol)

Link in different formats to this article

Visitor comments
No comments yet


How much will 36 + 32 ?


Tucson 2 (2009-2015) 
  • General information
  • Faults en route
  • User manual
  • Maintenance
  • Power unit
  • Gasoline engines
  • Diesel engines
  • Engine cooling system
  • Engine lubrication system
  • Engine power system
  • Control system
  • Intake and exhaust systems
  • Engine electrical equipment
  • Transmission
  • Clutch
  • Mechanical gearbox
  • Automatic gearbox
  • Drive shafts
  • Chassis
  • Suspension and wheels
  • Brake system
  • Steering
  • Body
  • Exterior (external elements)
  • Interior (internal elements)
  • Security systems
  • Air conditioning and heater
  • Electrical equipment
  • Electrical circuits
Tucson 1 (2005-2010) 
  • General information
  • User manual
  • Maintenance
  • Power unit
  • Gasoline engine G6BA
  • Gasoline engine G4GC
  • Diesel engine D4EA
  • Fuel system (gasoline)
  • Fuel system (diesel)
  • Engine lubrication system
  • Engine cooling system
  • Engine electrical equipment
  • Transmission
  • Clutch
  • Car gearbox
  • Drive shafts and cardan
  • Chassis
  • Car suspension
  • Steering
  • Brake system
  • Body
  • Exterior (external elements)
  • Interior (internal elements)
  • Air conditioning and heater
  • Airbags
  • Electrical equipment
  • Equipment and devices
  • Electrical circuits
HyundaiBook.ru © 2018-2026 · Mobile version · Sitemap: EN BG BY UA RS HR RO PL SK HU · Administration · Site search · Hyundai owners Accent 1 · Accent 2 · Accent 3 · Elantra 1 · Elantra 2 · Elantra 3 · Getz · Sonata 3 · Sonata 4 · Santa Fe 2 · Tucson 1 · Tucson 2 · Matrix ·
This site uses cookies to optimize its functionality. By continuing, you agree to our terms.