
Warning: Do not open the radiator cap when the engine is hot. When the engine is hot, the coolant is under pressure and may be released when the radiator cap is opened. Failure to do so may result in serious burns. Open the cap only after the radiator tank has cooled down so much that you can touch it with your hand.
Coolant used
 |
 |
Use a quality fluid that is a 50% to 50% mixture of ethylene glycol and water. The coolant should not be aggressive towards aluminum parts. Do not add additional corrosion inhibitors or additives to the fluid. To prevent engine corrosion and fluid freezing, use antifreeze of the required brand in the specified concentration. The antifreeze content in the liquid should be no higher than 60% and no lower than 35%, otherwise the cooling system will be damaged. The composition of the fluid for topping up or replacement is indicated in the table below.
| Ambient temperature,°C | Coolant composition,% | |
| Antifreeze | Water | |
| -15 | 35 | 65 |
| -25 | 40 | 60 |
| -35 | 50 | 50 |
| -45 | 60 | 40 |
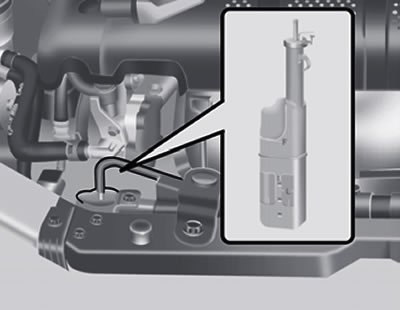
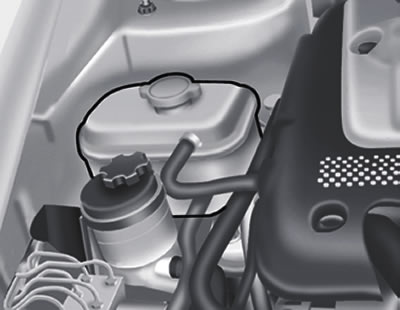
Checking the coolant level
Gasoline engine |
Diesel engine |
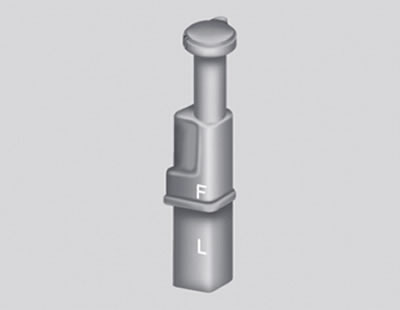
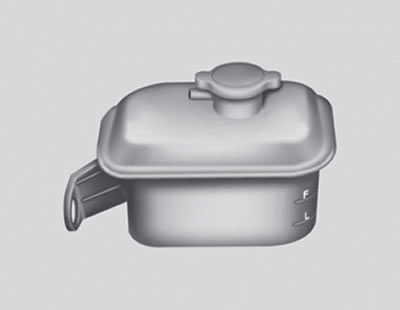
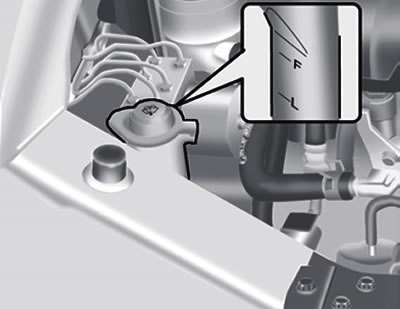
The liquid level is determined by the marks on the transparent wall of the expansion tank. When the engine is cold, the coolant level should be between the "L" (Min.) and "F" (Max.) marks on the reservoir. If the fluid level is below the "L" mark, add fluid until the level is between the "L" and "F" marks. If the fluid level drops, check the cooling system for leaks and check the level more often. If the level drops again, contact your Hyundai dealer to have it checked and determine the cause.
Replacing the coolant
The coolant must be replaced at the intervals specified in section 5.
Caution: Coolant can damage your vehicle's paintwork. If coolant gets on the paintwork, rinse it off thoroughly with clean water.
1. Place the car on a level horizontal surface, apply the parking brake and, after the engine has cooled down, remove the radiator cap.
2. Place a container to collect the drained liquid. Open the radiator drain cock, drain the fluid into a container, then close the drain cock securely.
3. The filling capacity of the cooling system is indicated in section 9. Pour the required amount of coolant into the radiator in accordance with the manufacturer's instructions on the container.
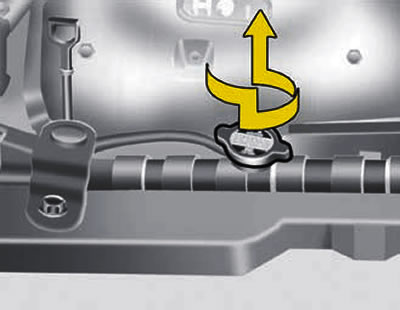
4. Turn the radiator cap fully counterclockwise without pressing on it to release residual pressure in the cooling system. Remove the radiator cap by pressing it down and turning it counterclockwise. After this, fill the radiator with clean demineralized or distilled water. Add water in small portions until the liquid level reaches the radiator neck.
5. Start the engine and add water to the radiator up to the neck, then add liquid from the expansion tank so that its level is between the "L" and "F" marks.
6. Tighten the radiator and expansion tank caps and check that the system drain cocks are securely closed and that there is no leakage through them.
Warning: The cooling fan switches on and off depending on the coolant temperature and may therefore switch on when the engine is not running. When performing any work near the fan, be careful not to be injured by the fan when it starts. When the coolant temperature drops, the fan automatically turns off - this is normal.