
Contents: Removal and installation ⇓ Checking the speedometer ⇓ Tachometer ⇓ Fuel level indicator ⇓ Resistance check ⇓ Fuel level sensor ⇓ Temperature indicator ⇓ Oil pressure sensor ⇓
Removal and installation
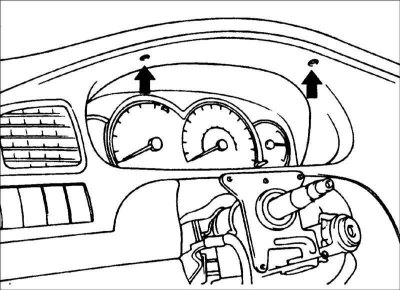
1. Disconnect the cable from the negative terminal of the battery
2. Remove the instrument cluster mounting screws.
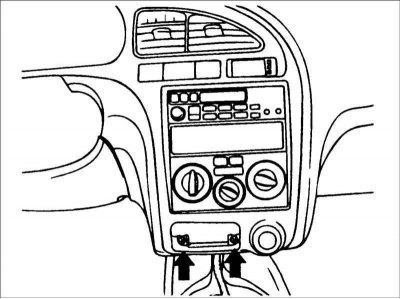
3. Remove the ashtray, then unscrew the instrument cluster mounting screws.
(The original article is posted on the portal: www.hyundaibook.ru)
4. Disconnect the connectors from the instrument cluster. Remove the instrument cluster.
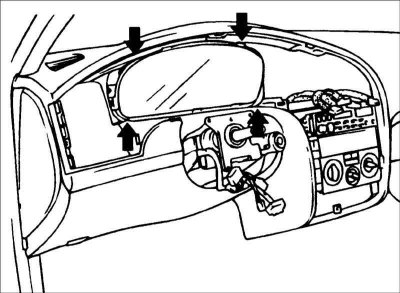
5. Installation is carried out in the reverse order of removal.
Checking the speedometer
1. Adjust tire pressure.
2. Place the vehicle on a speedometer test stand and place chocks under the rear wheels.
3. Check if the speedometer readings are within the tolerance specified in the technical data.
Warning! When checking the speedometer, do not suddenly press the clutch pedal or increase/decrease the speed sharply.
Caution: Tire wear and incorrect tire pressure will increase the speed measurement error.
Tachometer
1. Connect the test tachometer.
2. Start the engine. Compare the vehicle's speedometer reading with the test tachometer reading. If the difference in readings exceeds the permissible values, replace the tachometer.
1. Reversing the tachometer will damage the semiconductor devices inside the tachometer.
2. When removing and installing the tachometer, be careful not to drop or hit it.
Fuel level indicator
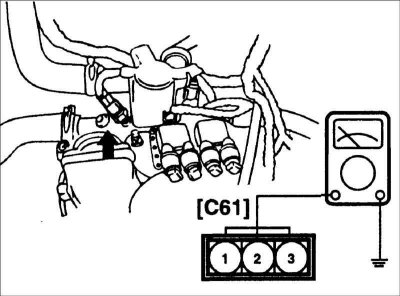
1. Turn on the ignition.

2. Connect a 3.4W, 12V lamp to terminals 1 and 3.
3. Turn on the ignition and make sure that the indicator lamp is fully lit and the indicator arrow shows a full tank.
Resistance check
1. Remove the instrument cluster.
2. Connect a variable resistor to terminals 11 (M09–1) and 13 (M09–1). Check that the gauge shows the fuel level according to the change in resistance. Otherwise, replace the fuel gauge.
Resistance, Ohm | Level |
97 | E (Empty) |
32,5 | 1/2 |
6 | F (Full) |
Fuel level sensor
1. Using an ohmmeter, measure the resistance between contacts 1 and 3 in each float position.
| Float position | F | 1/2 | E |
| Resistance, Ohm | 3 | 32,5 | 110 |
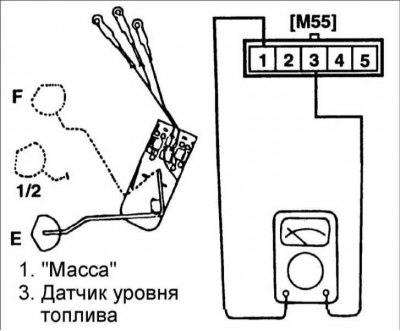
2. Also make sure that when moving the float from position "E" to position "F" the resistance changes smoothly.
Temperature indicator
1. Use an ohmmeter to measure the resistance between contacts 2 and ground.
2. If the resistance does not match those shown in the table, replace the temperature gauge.
| Temperature,°C | 60 | 85 | 110 | 125 |
| Resistance, Ohm | 119,4 | 48,9 | 25 | 15,8 |
Oil pressure sensor
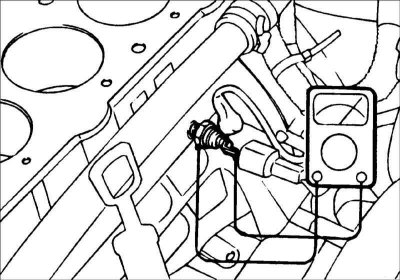
1. Make sure that there is continuity between the sensor contact and ground when the engine is off.
2. Make sure that there is no conductivity between the sensor contact and ground when the engine is running.
3. Otherwise, replace the oil pressure sensor.