
Contents: Removal and installation ⇓ Cleaning the head and the main shaft…⇓ Front speakers ⇓ Rear speakers ⇓ High frequency speaker ⇓ Checking the speaker ⇓
Removal and installation
1. Disconnect the cable from the negative terminal of the battery.
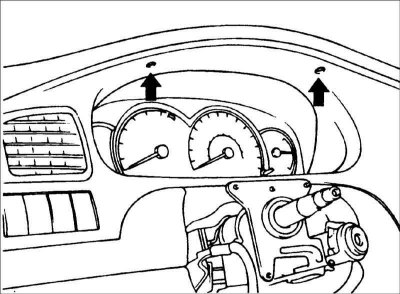
2. Remove the instrument cluster mounting screws.
3. Remove the ashtray, then unscrew the instrument cluster mounting screws and remove it.
4. Remove the instrument cluster and disconnect the connectors from the instrument cluster.
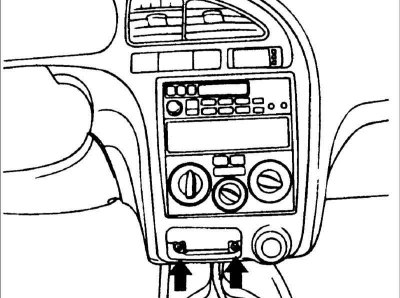
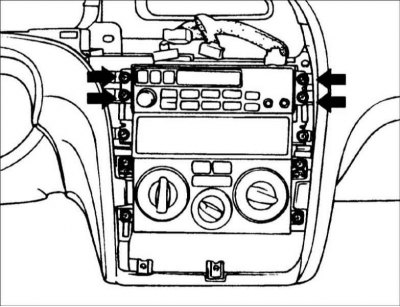
5. Remove the radio.
6. Installation is carried out in the reverse order of removal.
Cleaning the head and the main shaft of the tape recorder
(The text is provided by the web resource: www.HyundaiBook.ru)
1. To ensure optimum performance of the tape recorder, clean the head and capstan as necessary. The frequency of cleaning depends on the frequency of use of the tape recorder and the cleanliness of the tape.
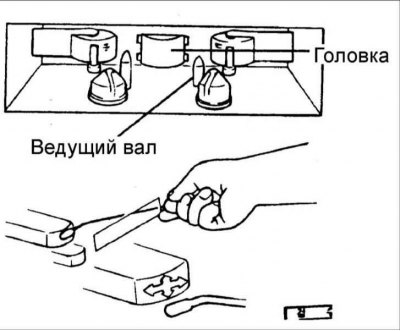
2. Use a cotton swab soaked in alcohol to clean the head and drive shaft. Wipe the head and shaft.
Front speakers

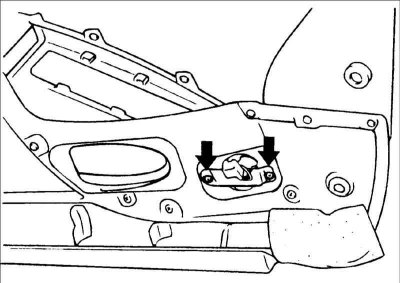
1. Remove the front door trim, unscrew the screws and remove the speaker.
2. Installation is carried out in the reverse order of removal.
Rear speakers
1. Remove the rear seat.
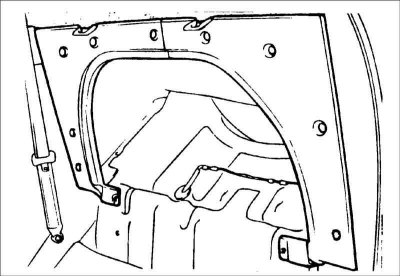
2. After removing the clips, remove the separate upholstery.
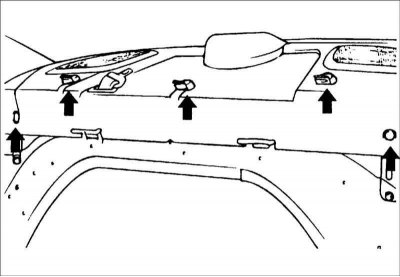
3. Remove the bolts and fasteners holding the rear shelf.
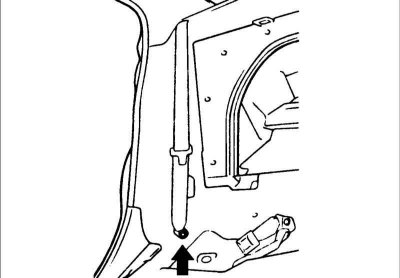
4. Remove the rear seat belt lower mounting bolt.

5. Remove the rear shelf.
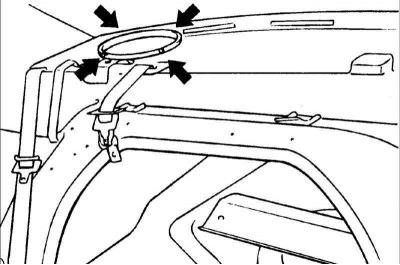
6. Remove the screws and remove the speaker.
7. Installation is carried out in the reverse order of removal.
High frequency speaker
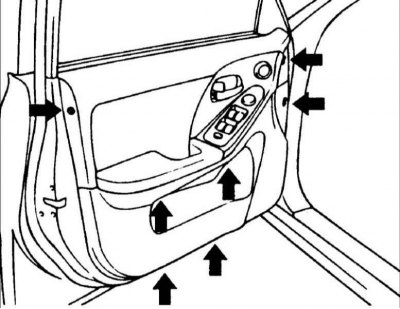
1. Remove the front door trim.
2. Disconnect the connector and remove the tweeter.
3. Installation is carried out in the reverse order of removal.
Checking the speaker

1. Use an ohmmeter to check the resistance of the speaker voice coil.
2. If the speaker makes a clicking sound when you connect the ohmmeter, it is working properly.