
Removal
1. Loosen the front wheel mounting nuts.
2. Raise the vehicle and secure it on supports.
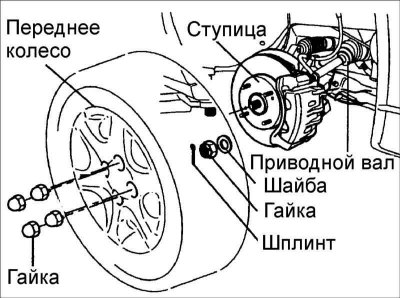
3. Loosen the nuts and remove the front wheel.
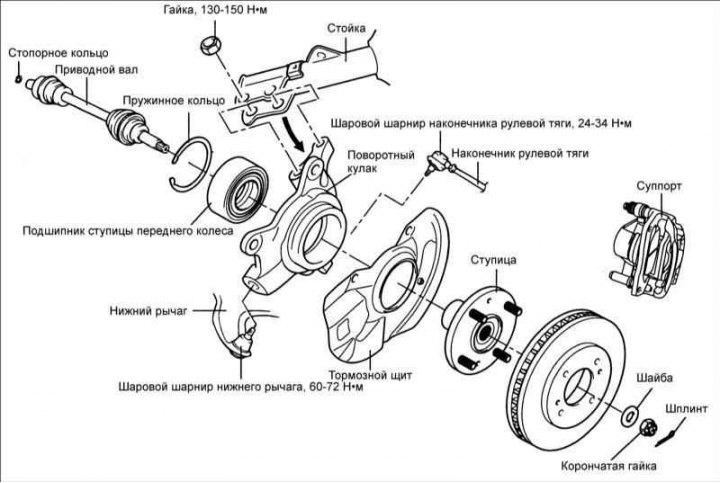
4. Remove the cotter pin, unscrew the castle nut and remove the washer securing the drive shaft to the front wheel hub.
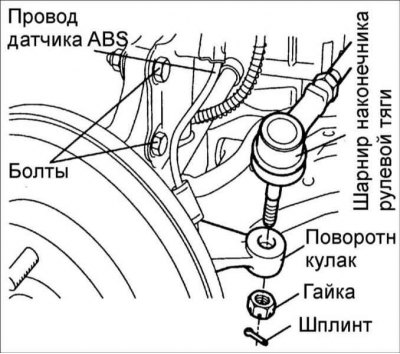
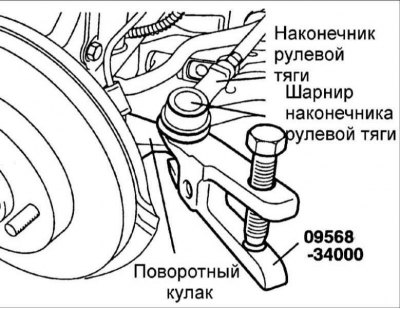
5. Remove the cotter pin and unscrew the nut securing the ball joint journal of the steering rod end to the steering knuckle. Using puller 09568–34000, press the ball joint pin out of the steering knuckle.
6. Remove the caliper and secure it to the front strut with soft wire.
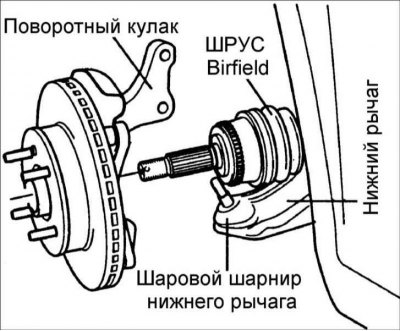
7. Using puller 09568–34000, disconnect the lower arm ball joint from the steering knuckle.
8. Remove the speed sensor from the steering knuckle.
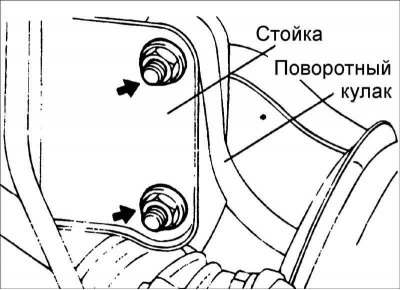
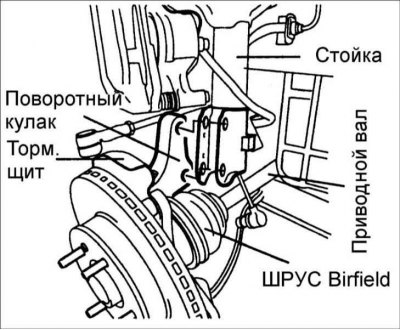
9. Mark the position and remove the bolts securing the lower part of the front suspension strut to the steering knuckle.

10. Use a nylon hammer to knock the drive shaft out of the front wheel hub. If the drive shaft is a tight fit in the front wheel hub, spray penetrating aerosol solvent into the spline area and then re-tighten the flange nut until it is flush with the end of the shaft. Using a brass hammer, tap the nut to knock the drive shaft out of the hub.
11. Tilt the steering knuckle outward and remove the drive shaft from the front wheel hub.
12. Drain the transmission fluid from the gearbox.
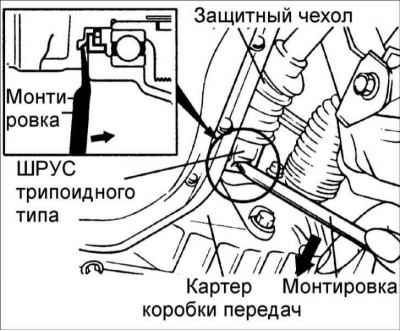
13. Insert a pry bar between the inner CV joint of the drive shaft and the gearbox and lightly tap the pry bar to remove the drive shaft from the gearbox.
- To avoid damaging the gearbox housing and CV joint, use the crowbar very carefully.
- Do not insert the pry bar too deeply to avoid damaging the oil seal ring.
- Do not pull on the drive shaft as this will damage the constant velocity joints.
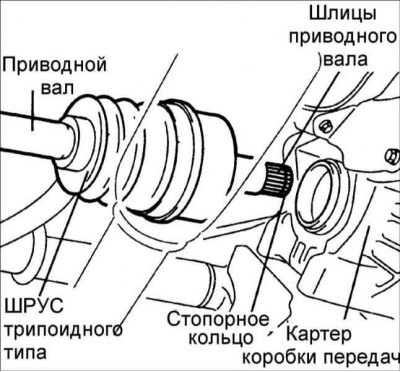
14. Remove the drive shaft from the gearbox.
- Install special plugs instead of drive shafts to prevent dirt from getting into the gearbox.
- Support the drive shaft properly.
- Replace the differential seal whenever the drive shaft is removed.
- After disconnecting the drive shaft from the hub, be careful not to damage the ABS sensor and the sensor toothed rotor on the drive shaft.
Examination
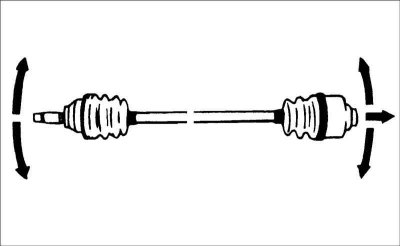
1. Check the protective covers of the drive shaft CV joints for damage and hardening of the rubber.
2. Check the ball joints for wear.
3. Check the splines on the ends of the drive shaft for wear and damage.
4. Check the dynamic vibration damper for cracks and wear.
Installation
1. Lubricate the sealing lip of the differential oil seal ring.
2. Install a new snap ring onto the inner end of the drive shaft. Push the drive shaft into the gearbox with the snap ring slot facing downwards.
3. After installation, pull the drive shaft outward and make sure it is securely fixed with the round snap ring.
4. Install the brake shield, hub, brake disc and wheel bearing into the steering knuckle.
Caution: Be careful not to damage the brake shield and sealing ring.
5. Install the Birfield CV joint into the steering knuckle.
6. In practice, the steering knuckle should be installed in the lower arm at the same time as the Birfield CV joint is installed in the steering knuckle.
Caution: Be careful not to damage the ABS sensor and the sensor toothed rotor on the drive shaft.
7. Connect the steering knuckle to the front suspension strut and secure them with bolts and nuts, tightening them to a torque of 75–90 N·m.
8. Install the lower arm ball joint pin into the steering knuckle and secure with a nut, tightening it to a torque of 60–72 N·m.
9. Install the ball joint pin of the tie rod end into the steering knuckle and secure with a nut.
10. After installation, manually check the smooth rotation of the drive shaft.
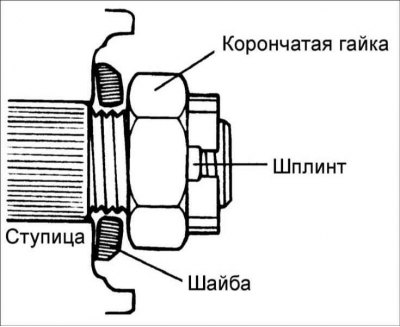
11. Place the washer under the drive shaft to hub mounting nut with the convex side facing outward, then screw on the castle nut and secure it with a cotter pin.
12. Fill the gearbox with transmission fluid.
13. Install the wheel.
14. Check the front wheel alignment angles.
15. Check the ABS sensor signal.