


Contents: Identification of knocks and noises ⇓ Smoke analysis ⇓ Checking the PCV system (exhaust gas…⇓ Checking with a vacuum gauge ⇓ Checking for leaks in cylinders ⇓ Oil analysis ⇓
Identification of knocks and noises
There is no need to figure out which part of the engine is responsible for the knocking noise, your goal is simply to determine if there are any faults with the main engine parts that could be causing the sound you are hearing. If the knocking part is one of the main engine parts, it does not matter which specific part is knocking; the repair is the same in all cases: engine overhaul.
Car enthusiasts use three devices to find a possible source of knocking in a car: high-voltage wires, a stethoscope and a rubber hose.
High voltage ignition wires
With the engine running at idle, disconnect and then reconnect each high-tension wire in turn. If the intensity of the knocking changes when one of the spark plug high-voltage wires is disconnected, then the knocking is coming from the connecting rod bearing. If the sound doesn't change much, it's probably the result of a bad main bearing or something else. Don't forget about things like camshaft timing gears and valve adjustments.
Stethoscope
A mechanic's stethoscope has the ability to detect engine noises. Place the end of the stethoscope on the cylinder block or cylinder head where the suspect part is located. When a sound is detected with the stethoscope, move the end of the stethoscope around the area until the sound becomes loudest. The part closest to where the sound intensity is detected is most likely the faulty one. Keep in mind, however, that sound can be transmitted from one place to another through metal.
Rubber hose
If you don't have a stethoscope, use a piece of rubber hose. It doesn't work as well as a stethoscope, but it still works.
Smoke analysis
Three distinct smoke colors are used in engine diagnostics; black, white and blue.
Black or dark brown smoke is usually associated with an engine that is running too rich. Although engine performance can be affected by the air/fuel ratio, especially on fuel injected engines, engine rebuild is the last resort to reduce smoke. Refer to the fuel injection system rebuild information for more information.
White
White smoke has two common causes; transmission fluid and antifreeze (coolant). If the car is equipped with an automatic transmission, pay attention to the vacuum modulator. The vacuum modulator is usually located at the rear of the transmission (transmission) near the output shaft housing. It is easy to identify because the vacuum hose enters into it. Remove the vacuum hose and check for transmission fluid in the hose. If you find transmission fluid in the hose, replace the vacuum modulator, this is the most likely source of white smoke.
If you do not find transmission fluid in the vacuum hose, or the vehicle does not have an automatic transmission or a vacuum modulator, the most likely source of the white smoke is a bad head gasket, a cracked head, or the engine block itself. These faults can be confirmed by doing a compression test or, better yet, checking for cylinder leaks. For details on using the cylinder leak finder, see below.
It is fairly easy to determine whether white smoke is a product of combustion of transmission fluid or coolant. The coolant has a sweet smell and the transmission fluid has a smoky smell.
Blue
Blue smoke indicates engine oil is burning. Pay attention when smoke comes out of the exhaust pipe. If smoke appears during acceleration, then its source is worn piston rings. If it appears during engine braking, then pay attention to the valve guides.
Checking the PCV system (exhaust gas recirculation)
Crankcase pressure can affect whether or not intake manifold vacuum will pull engine oil into the intake manifold. Check the PCV system before deciding to repair the engine due to a smoking problem.
You can choose one of two possible ways to check the PCV system. One way is to replace the PCV valve and check the vent hose for blockage. A more sophisticated approach is to purchase a special PCV tester from an auto parts store that fits over the PCV vent hose to determine if the crankcase pressure is within the proper range. Of course, if the pressure is incorrect, then you will need to replace the PCV valve and check the vent hose for clogging.
Checking with a vacuum gauge
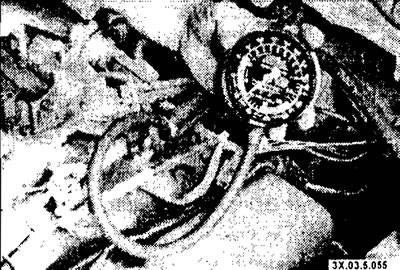
The vacuum gauge is a convenient device for diagnosing faults in the valve timing mechanism and camshaft. Any of these faults will cause pressure pulsation in the manifold (this can be seen by the jumps of the instrument's arrow). However, manifold pressure pulsation can be caused by ignition system malfunctions or piston malfunctions. The vacuum gauge should only be used to confirm the presence of a fault, not to indicate the fault.
Using a vacuum gauge is an easy way to begin to separate low compression problems as being the result of piston ring or head gasket failures, or as being the result of valve failures. With the engine idling, connect a vacuum gauge to the intake manifold. If the vacuum gauge needle jumps back and forth a lot, then some valves are not sealing properly. Low compression due to faulty piston rings or cylinder head gaskets also causes the needle to jump, but not as sharply.
Distinguishing between possible causes of low compression using a vacuum gauge requires a lot of experimentation and is highly subjective. Two other methods are compression testing and cylinder leak testing.
Checking for leaks in cylinders
Checking cylinders for leaks is a higher level test than checking compression, although its purposes are the same. It requires more equipment. When the piston is at TDC of the compression stroke, connect the cylinder leak tester to the first cylinder. Measure the leak percentage. Additionally, use a piece of rubber hose and place one end of it against your ear to determine where the leak is. Insert the other end of the hose into the open hole of the fuel injection system throttle body. If a lot of air comes out of there, then you have a damaged intake valve. If you hear a hissing sound from the exhaust pipe, the exhaust valve is damaged. Look at the coolant in the radiator. If there are a lot of bubbles in it, then you have a damaged cylinder head gasket, a crack in the head or in the block itself.
Oil analysis
Of the various ways to determine if an engine needs major repairs, engine oil analysis is one of the most accurate. Contact a car repair shop. Some workshops may perform oil analysis or contact locations that have the equipment to do so. An oil analysis will determine how much bearing and crankshaft material is contained in the oil. If the amount of these materials is high, this indicates the need for engine repair. This procedure costs money, but can help avoid major unexpected repair costs.