
Contents: Removal ⇓ Installation ⇓
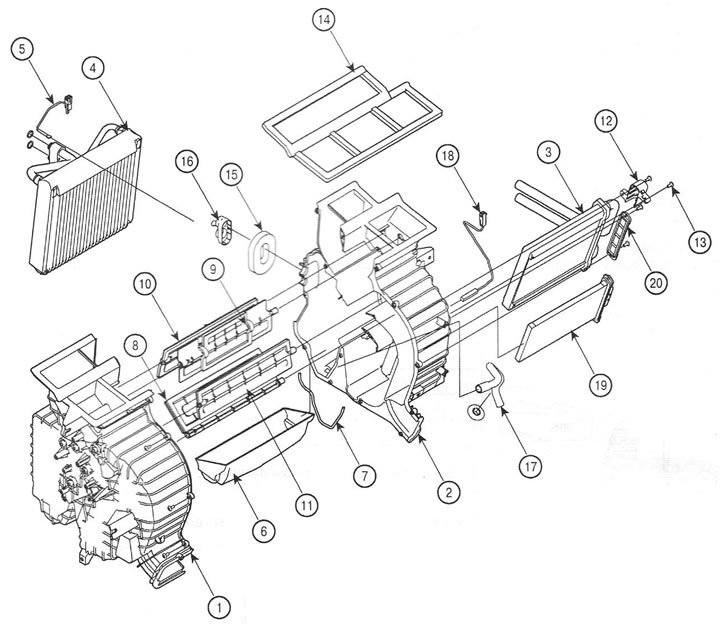
1. Body (left side); 2. Body (right side); 3. Heater radiator; 4. Evaporator; 5. Evaporator temperature sensor; 6. Heat shield; 7. Gasket; 8. Temperature damper; 9. Cabin ventilation flap; 10. Windshield heating flap; 11. Air supply valve to the feet; 12. Heater radiator cap; 13. Screw; 14. Seal; 15. Seal; 16. Lid; 17. Drainage hose; 18. Water temperature sensor; 19. Electric heater; 20. Heater cover
Removal
1. Disconnect the wire from the negative terminal of the battery.
2. Remove the refrigerant from the air conditioner.
3. Drain the coolant.
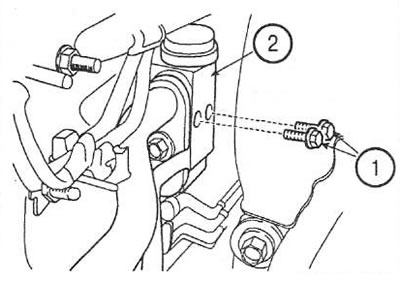
4. Unscrew the screws (1) and remove the expansion valve (2). Seal the tubes with plugs.
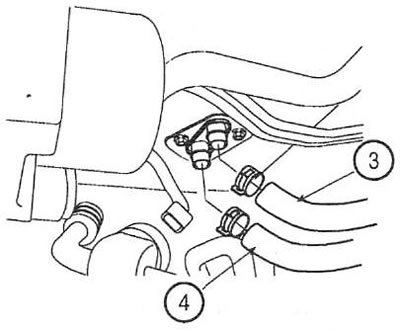
5. Disconnect the inlet (3) and outlet (4)
6. Remove the instrument panel.
7. Disconnect the connectors from the damper actuators and the evaporator temperature sensor.
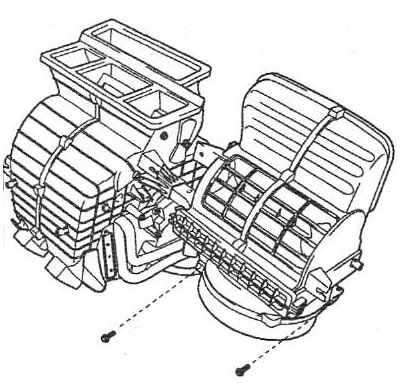
8. Unscrew the two screws of the heater unit.
9. Unscrew 12 screws and remove the instrument panel crossbar with the heater.
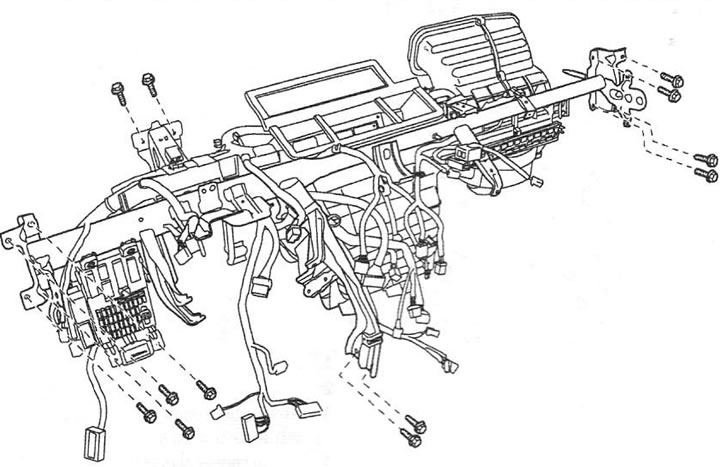
10. Unscrew the nuts and remove the heater from the crossmember.
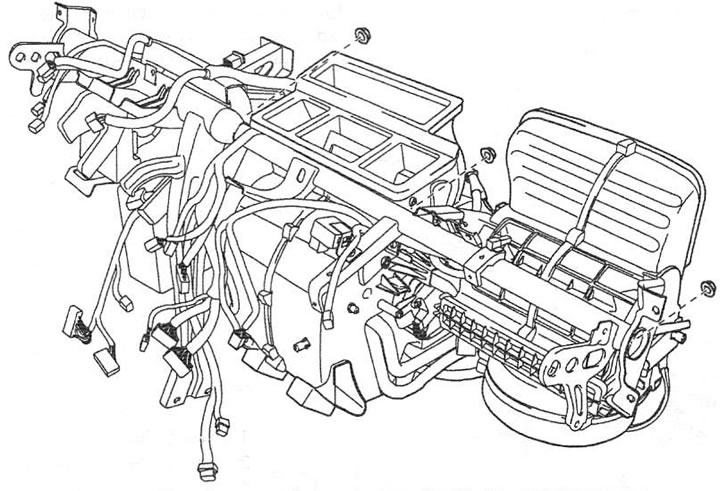
11. Unscrew the self-tapping screws (5) and remove the cover or electric heater (6) (if installed).
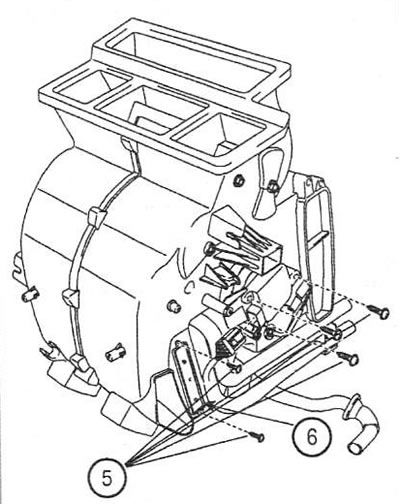
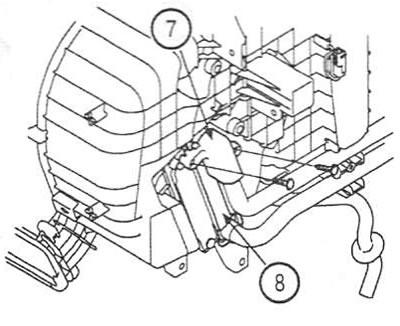
12. Remove the cover (7) and take out the heater radiator (8).
Installation
13. Installation is carried out in the reverse order of removal.