Attention.
- To avoid damage to painted surfaces, use protective coatings.
- To avoid damaging the cylinder head, wait until the coolant temperature drops to room temperature (20°C) before removing it.
- When working with a metal gasket, be careful not to bend it or damage its contact surfaces.
- To avoid damage, disconnect the connectors carefully, holding the connector with your hand.
Note:
- Label all wires and hoses to avoid mistakes when reconnecting.
- Turn the crankshaft pulley so that the piston of cylinder No.1 is at top dead center (TDC).
1. Remove the engine assembly with the gearbox.
2. Install the engine on the stand.
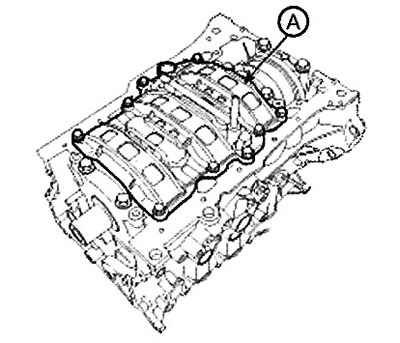
3. Remove the intake and exhaust manifolds.
4. Remove the timing chain.
5. Remove the cylinder head.
6. Remove the high pressure fuel pump.
7. Remove the coolant pump.
8. Remove the flywheel (vehicles with manual transmission).
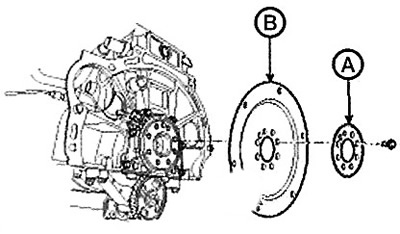
9. Remove the drive disc (B) and intermediate plate (A) (vehicles with automatic transmission).
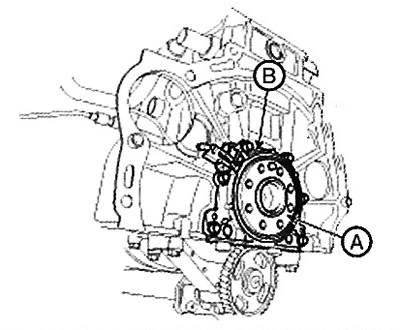
10. Remove the encoder (A) and rear oil seal housing (B) as an assembly.
Attention.
- Reuse of the rear oil seal housing is not permitted.
- Do not place magnetic materials near the encoder.
- Be careful not to scratch or damage the encoder.
- Do not allow sealant or other harmful materials to come into contact with the coding device.
11. Remove the oil pump module.
12. Remove the ladder frame (A).
13. Remove the pistons and connecting rods as an assembly:
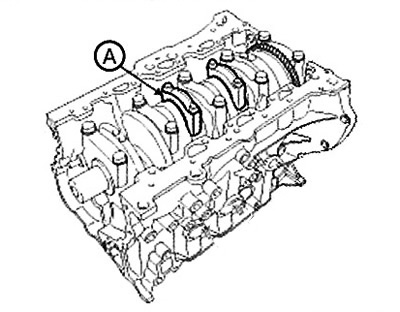
Using a special tool, remove carbon deposits from the top of the cylinder.
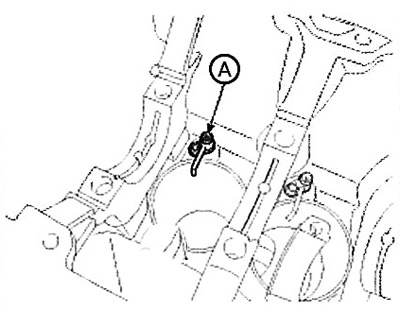
Remove the connecting rod cover (A).
Note: Mark the connecting rods and caps so that they can be reassembled in their original position and orientation.
Push the piston and connecting rod with the upper bearing through the top of the cylinder block.
Note:
- Connecting rods and bearing caps must not be disassembled.
- Place the piston and connecting rod in the correct order.
- Mark the piston and connecting rod so that they can be reassembled later in their original position and direction.
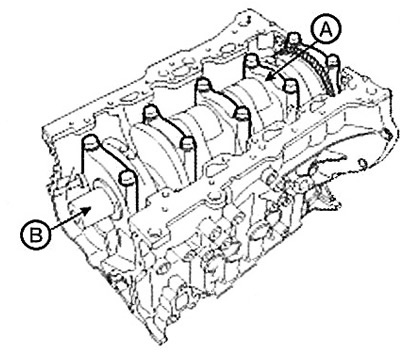
14. Remove the main bearing caps (A), then remove the crankshaft (B) from the cylinder block, being careful not to damage the journals.
Note:
- Arrange the main and thrust bearings in the correct order.
- The caps and main bearings must not be disassembled.
15. Remove the oil nozzle (A).
16. Check the fit between the piston and the pin:
Try to move the piston back and forth on the pin. If movement is impossible, replace the piston and pin.
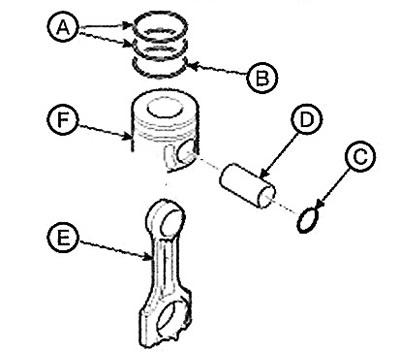
17. Remove the piston rings:
Using a ring expander, remove the two compression rings (A).
Remove the oil scraper ring and spring (B) by hand.
Caution: Do not use excessive force to remove the oil scraper ring from the piston. This may damage the oil scraper ring.
Note: Place the piston rings in the correct order.
18. Disconnect the connecting rod from the piston:
Remove the retaining ring (C) from the piston.
Remove the pin from the piston using a press.
Disassemble the piston (F) and connecting rod (E).