
Removal
Remove the cylinder head, timing belt, front cover, flywheel, pistons and crankshaft.
Examination
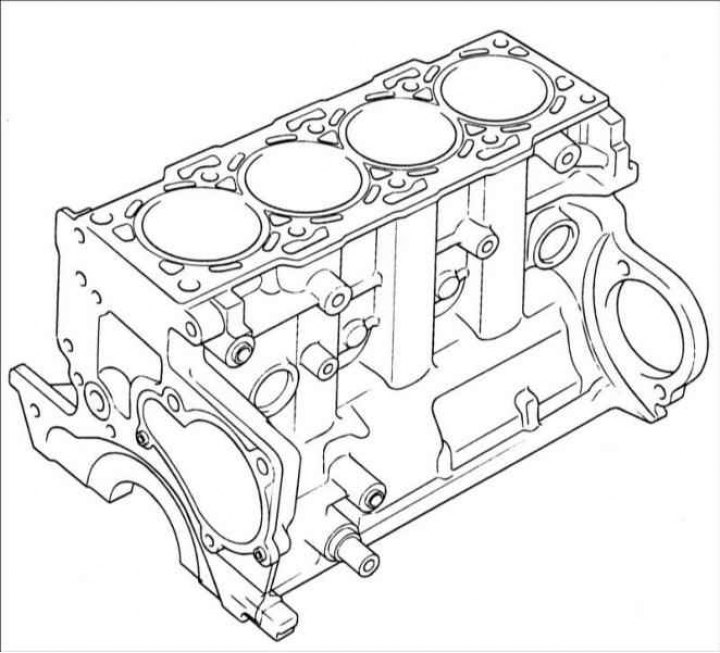
Cylinder block
1. Remove any gasket, sealant, dirt, oil, grease or other foreign material from the engine block. Visually inspect the cylinder block for rust, corrosion, cracks and other defects.
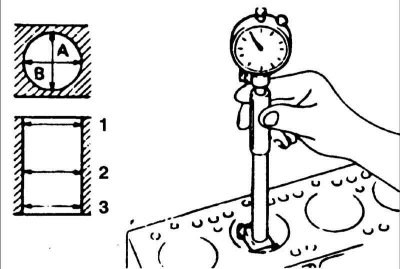
2. Measure the diameters of the cylinders in diametrically opposite directions (A and B), in three planes along the height of the cylinders (1, 2 and 3).
3. If the cylinder diameters exceed the permissible values, are out of round or taper, or the cylinder surface is damaged or has wear, the cylinder block must be bored and honed, and new pistons and piston rings of the repair size must be installed.
- Nominal cylinder diameter: 83 0.03 mm
- Cylinder taper: no more than 0.01 mm
4. If there is a step at the top of the cylinder, cut it off with a special tool.

5. Pistons are supplied as spare parts in four oversize sizes: 0.25, 0.5, 0.75 and 1.00 mm. When boring cylinders to the nearest oversize, maintain the clearance between the piston and cylinder and make sure that the pistons have the same oversize. The standard measurement of the piston outside diameter should be taken at a distance of 2 mm from the skirt and perpendicular to the thrust surfaces. Clearance between piston and cylinder: 0.069–0.091 mm.
6. Check the cylinder block for damage and cracks.
7. Clean the mating surfaces of the cylinder head and cylinder block from gasket residue. Using a metal ruler and feeler gauge, check the flatness of the mating surface of the cylinder block in six directions.
Deviation from flatness:
- by width: 0.042 mm;
- by length: 0.096 mm;
- diagonal: 0.012 mm.
Maximum permissible deviation from flatness: 0.1 mm.
Attention! The mating surface for the cylinder block gasket after regrinding should reduce the height of the cylinder block by no more than –0.2 mm.
Cylinder boring
1. Oversized pistons to be used should be determined based on the largest cylinder bore diameter.
Increase in size | Marking |
0.25 mm | 0,25 |
0.50 mm | 0,5 |
0.75 mm | 0,75 |
1.00 mm | 1 |
Attention! The marking is stamped on the piston bottom.
2. Measure the outside diameter of the piston.
3. Based on the measured size, determine the boring size. Bore size = Piston diameter 0.02 mm (honing value).
4. Bore each cylinder to the calculated size.
Caution! To avoid temperature-induced dimensional changes during honing, process cylinders in the following sequence: #2, #4, #1, and #3.
5. Hone the cylinders to the required design diameter (piston outer diameter clearance).
6. Check the clearance between the piston and the cylinder.
Attention! When boring, bore all cylinders to one oversize. Do not overbore just one cylinder to an oversize size.
Assembly
Install the parts in the following order:
- 1. Crankshaft
- 2. Flywheel
- 3. Piston
- 4. Cylinder head
- 5. Toothed belt
- 6. Front cover