

Removal
1. Remove the timing belt.
2. Remove all oil pan mounting bolts.
3. Remove the oil pan.
4. Remove the mesh oil filter and O-ring.
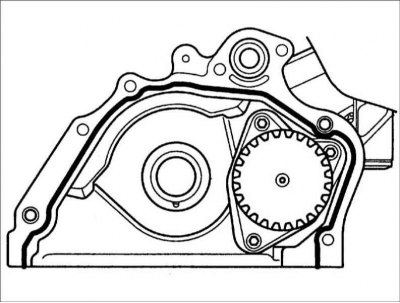
5. Remove the oil pump housing.

6. Remove the oil pressure sensor.
7. Remove the balance shaft mounting bolts.
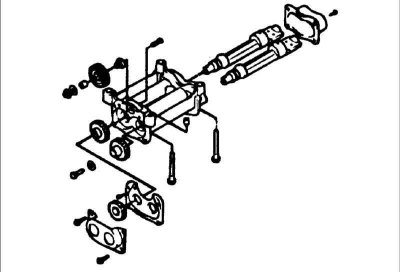
8. Remove the balance shaft assembly.
9. Unscrew the bolts and remove the oil pump housing and O-ring from the cylinder block.
10. Remove the oil pump cover from the oil pump housing.
Examination
Front cover
1. Check the oil holes for blockages and clean them if necessary.
2. Check the front cover bearings that contact the balance shafts for wear, damage, and seizure.
3. Check the front cover for cracks or damage and replace it if necessary.
4. Replace a cracked or damaged front cover.
Balance shaft
1. Check the shaft journals for wear or seizure
2. If there is excessive wear or signs of seizure, carefully inspect the bearing.
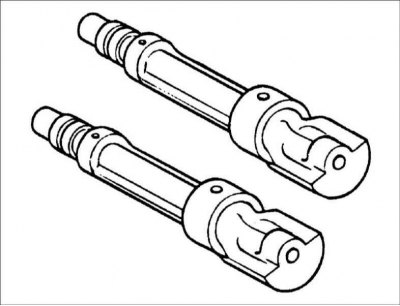
3. If there are any defects, replace the bearing or balance shaft.
Oil seal
1. Check the working lips of the oil seal for wear and damage.
2. Check the working lips of the oil seal for damage.
Installation
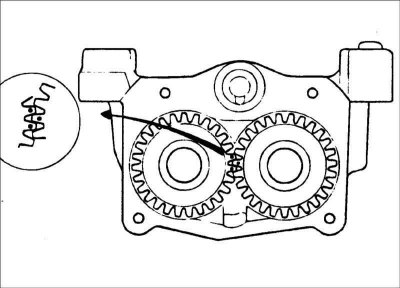
1. Lubricate the gears and align the timing marks on the gears.
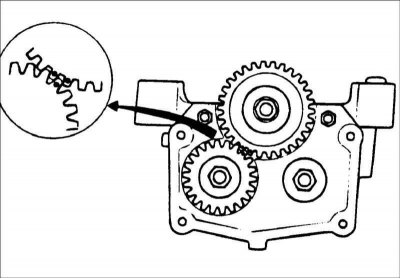
2. Apply Locitite272 sealant to the pinion and idler gear mounting bolts.
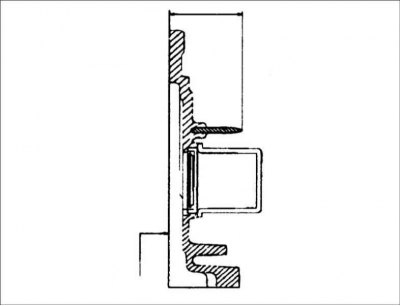
3. Using special tool 09231–27100, install the crankshaft front oil seal into the oil pump housing.
4. Fill the groove of the oil pump housing with sealant. Sealant: Loctite 5900 or equivalent.
- 1. The thickness of the sealant layer should be about 2.5±0.5 mm.
- 2. After applying the sealant, install the oil pump housing within no more than 5 minutes.
5. Install a new O-ring into the oil pump housing and temporarily tighten the pump mounting bolts.
6. Install the oil pump housing with a new O-ring and tighten the oil pump mounting bolts to the specified torque. Tightening torque: 20–27 Nm.
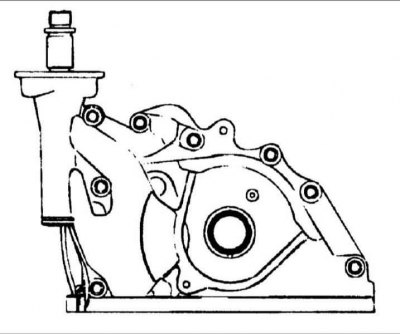
7. Install the balance shaft assembly into the cylinder block.
8. Apply a bead of sealant to the oil pan flange groove.
- 1. The thickness of the sealant layer should be 3±0.5 mm.
- 2. After applying the sealant, install the oil pan within no more than 5 minutes.
9. Install the oil pan and secure with bolts, tightening them to the required torque. Tightening torque: 10–12 Nm.
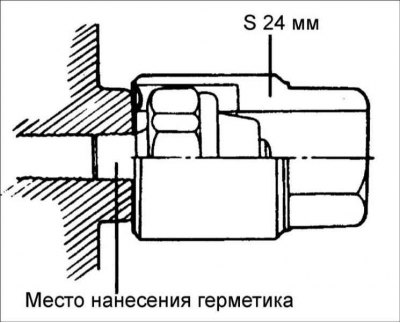
10. Using a special tool, screw in the oil pressure sensor, having first lubricated the sensor threads with a layer of sealant. Sealant: Threebond 1104 or equivalent.
Caution: Do not tighten the pressure sensor with high torque. Pressure sensor tightening torque: 15–22 Nm.
[The basis of the material is information from the website: www.hyundaibook.ru]