


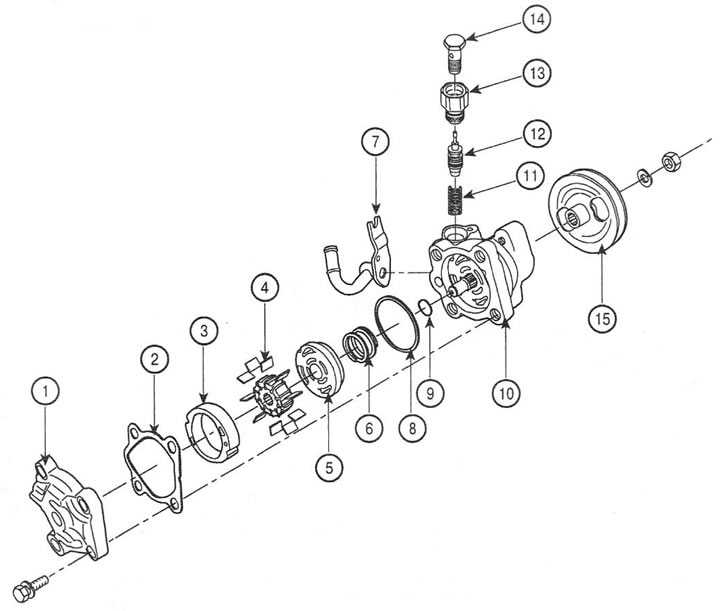
1. Lid; 2. Gasket; 3. Cam washer; 4. Rotor and plates; 5. Side plate; 6. Spring; 8. Sealing ring; 9. Sealing ring; 10. Pump body; 11. Spring; 12. Flow control valve; 13. Fitting; 14. Hollow screw; 15. Pulley
Disassembly
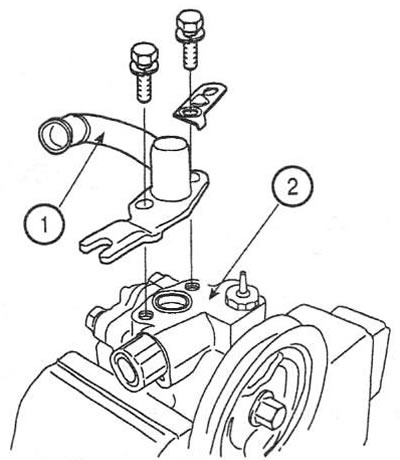
1. Unscrew the two screws and remove the feed pipe (2) from the pump body (1). Remove the sealing ring.
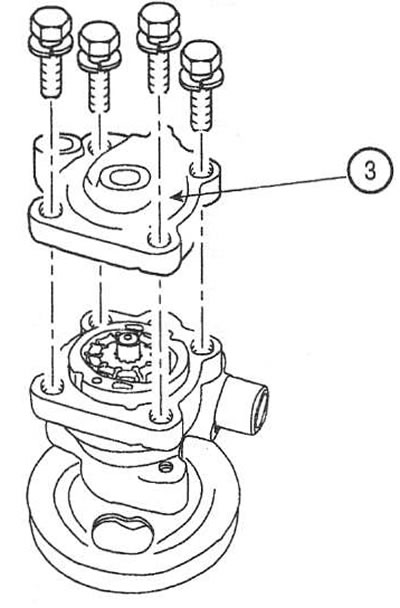
2. Unscrew the four screws and remove the pump cover (3) with the gasket.
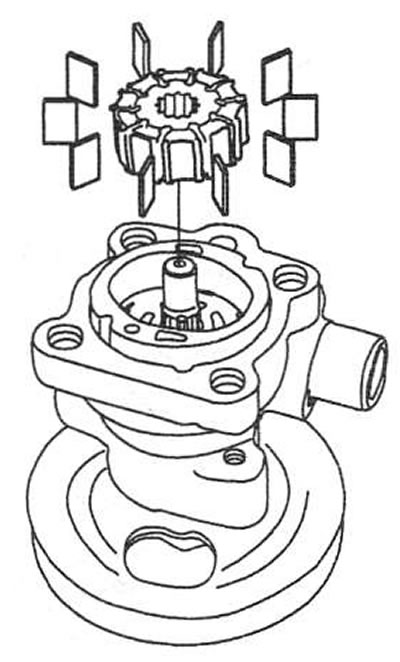
3. Remove the rotor and vanes from the pump body.
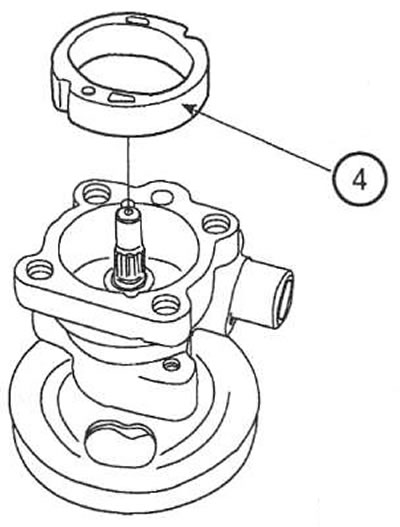
4. Remove the cam washer (4).
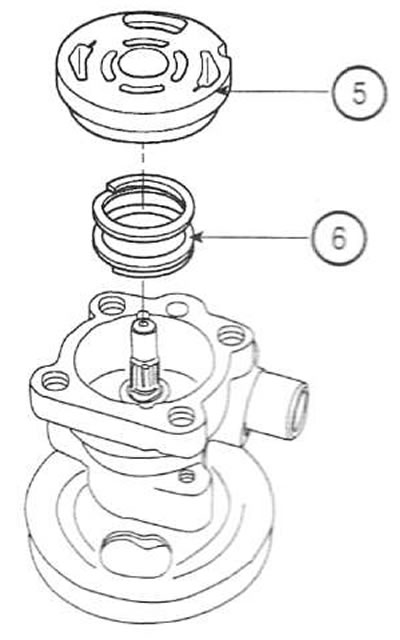
5. Remove the pump side plate (5) with the spring (6).
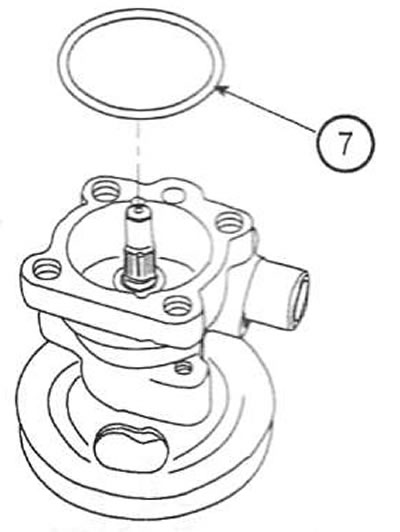
6. Remove the inner and outer sealing rings (7).
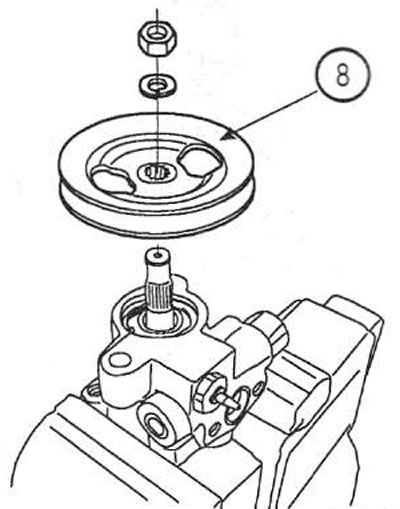
7. Secure the pump in a vice, unscrew the nut and remove the pulley (8) with the washer.
8. Remove the shaft retaining ring (9) and take out the boot.
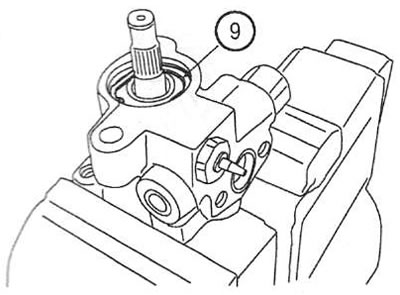
9. Using a rubber hammer (10), remove the pump shaft (11) from the housing on the rotor side.
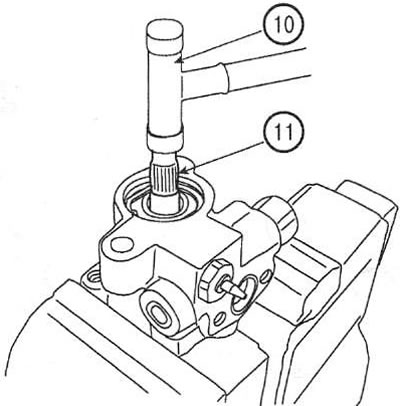
10. Remove the seal from the pump body.
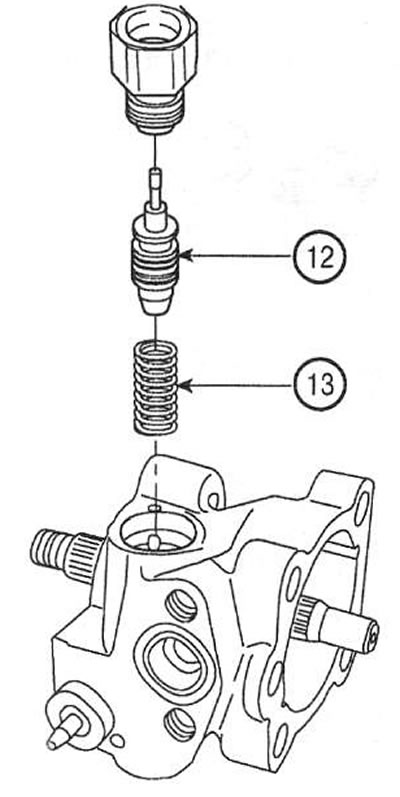
11. Unscrew the plug and remove the flow control valve (12) with the spring (13). Remove the plug sealing ring.
Caution: Do not disassemble the flow control valve.
Examination
12. Check all pump parts for damage and wear.
13. Check the gaps between the rotor slots and the plates.
14. Check the control valve and spring for damage.
Assembly
Note: When assembling, replace all O-rings and seals with new ones.
15. Install the spring, flow control valve and tighten the plug.
16. Using a suitable drift, install the shaft seal.
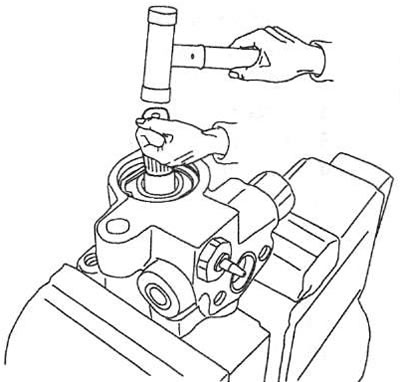
17. Install the shaft into the pump housing. Install the dust cover and retaining ring.
18. Install the pump pulley and tighten the nut. Tightening torque: 55-69 Nm.
19. Install the outer and inner sealing rings.
20. Install the spring and side plate into the housing.
21. Insert the locking pin into the groove of the pump body and install the side plate.
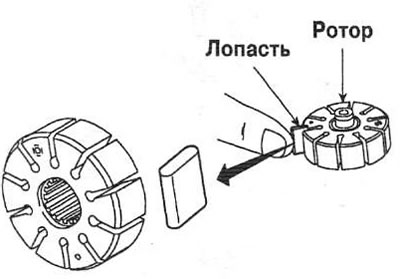
22. Install the rotor and blades. The mark on the rotor should be at the top.
Note: The rounded end of the blade should face outward.
23. Install the pump cover gasket.
24. Install the pump cover.
25. Install the pump intake pipe. Tightening torque: 14-19 Nm.