
Contents: Removal ⇓ Installation ⇓
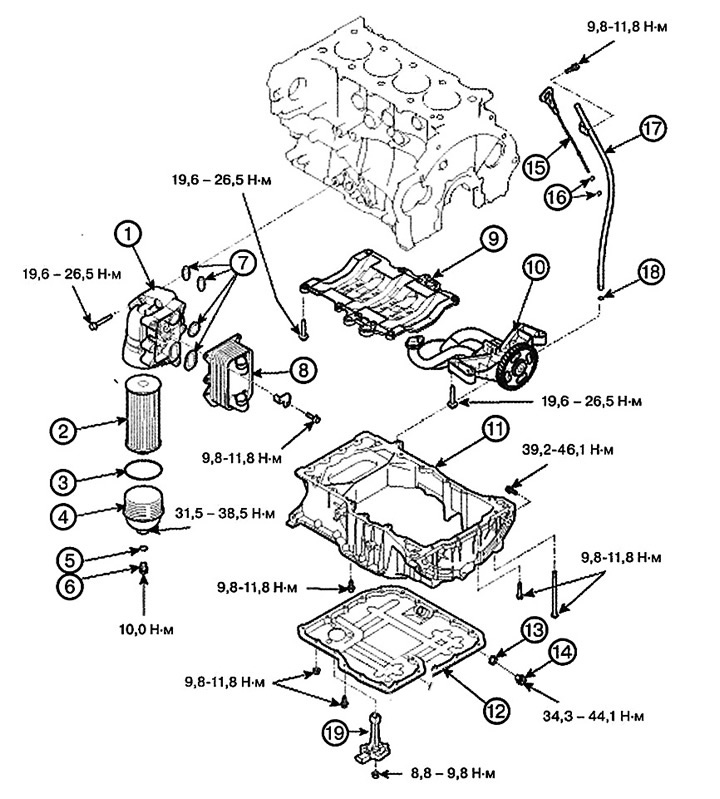
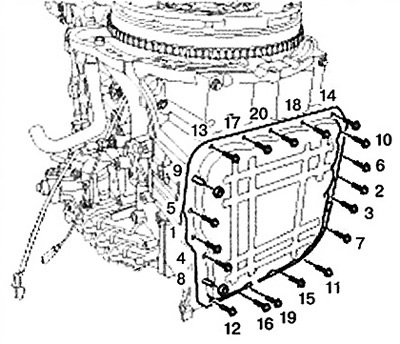
1. Oil filter housing
2. Oil filter element
3. Filter cover sealing ring
4. Filter cover
5. Drain bolt sealing ring
6. Drain bolt
7. Filter housing sealing ring
8. Oil cooler
9. Carter
10. Oil pump unit
11. Upper oil pan
12. Lower oil pan
13. Drain plug gasket
14. Drain plug
15. Oil dipstick
16. Oil dipstick sealing ring
17. Oil dipstick guide
18. Oil dipstick guide sealing ring
19. Oil level sensor (if installed)
Removal
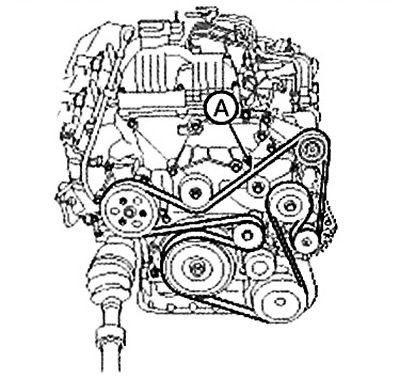
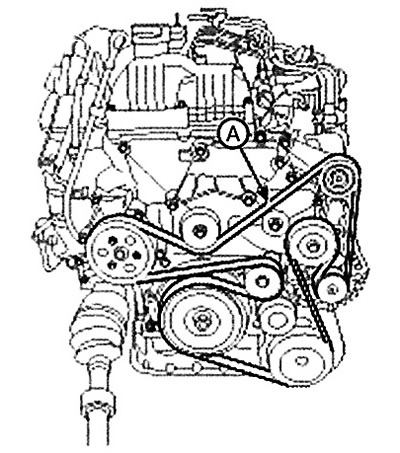
1. Loosen the tensioner by turning it counterclockwise with a wrench. Then remove the drive belt (A).
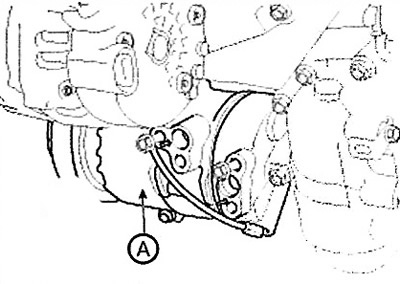
2. Drain the engine oil, then remove the oil filter and oil cooler assembly (A).
Note: Before removing the oil filter and oil cooler assembly, drain the engine oil from the oil filter.

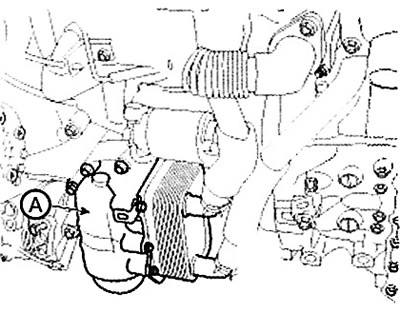
3. Remove the air compressor (A).
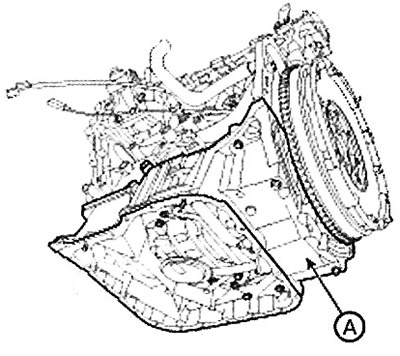
4. Remove the lower oil pan (A).
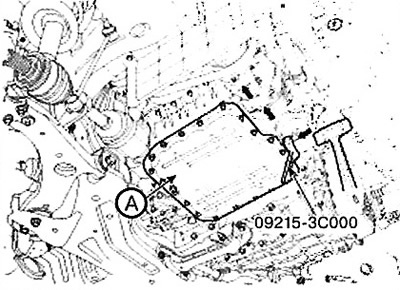
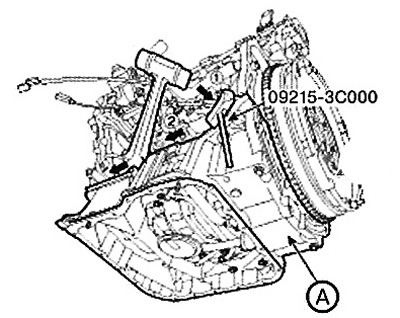
5. Remove the upper oil pan (A).
Note: To avoid damaging the surface between the cylinder block and the oil pan, use the special tool (09215-ЗС000) when removing the upper and lower oil pans.
Attention.
- Place the special tool between the oil pan and the cylinder block (or upper oil pan), tapping it lightly with a plastic hammer in the direction of the arrow.
- Using a plastic hammer, tap the special tool lightly in the direction of the arrow, and go along the edge of the oil pan for at least ⅔ of its length. Then remove the pan from the cylinder block (or upper oil pan).
- Do not turn the special tool over without tapping it. Doing so may damage the special tool.
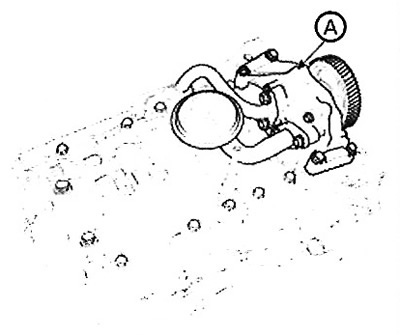
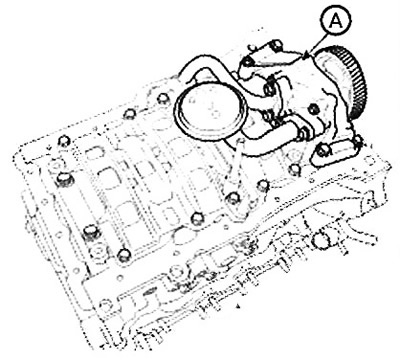
6. Remove the oil pump assembly (A).
Installation
1. Install the oil pump assembly.
Note: Tightening torque: 19.6 - 26.5 Nm.
Attention.
- When installing the oil pump assembly, make sure that the sealing ring on the end of the pipe is not damaged.
- Do not disassemble the oil pump assembly.
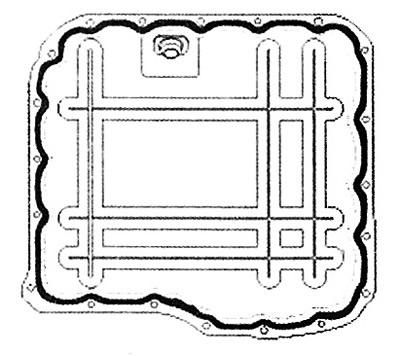
2. Apply sealant evenly to the mating surfaces of the upper oil pan.
Note:
- Standard sealant: LOCTITE 5900H or equivalent.
- Before applying sealant, ensure that the mating surfaces are clean and dry.
- Apply a 4mm thick bead of sealant (5mm or more for T-joint, 3.5mm for rear seal) without stopping.
- Install the oil pan within 5 minutes after applying the sealant.
- After installing the oil pan, wait at least 30 minutes before adding oil to the engine.
- After installation, remove excess sealant from the rear oil seal area.
- Before installing the upper oil pan, remove any excess sealant squeezed out from the contact surface between the cylinder block and the timing chain cover.
Caution: Be careful not to apply too much sealant or in the wrong direction. If sealant gets into the rear oil seal housing assembly installation holes, it may cause contamination or cracking.
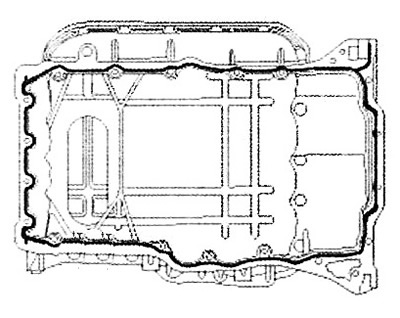
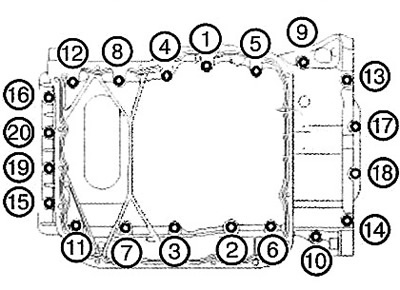
3. Install the upper oil pan (A).
(1) Tighten the bolts in the order shown.
Note: Tightening torque: 9.8 - 11.8 Nm.
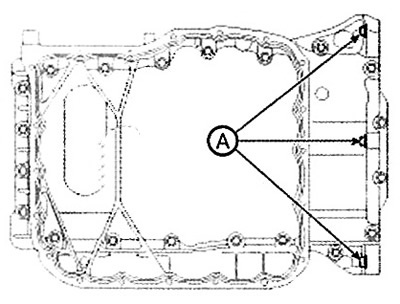
(2) Tighten the gearbox housing bolts (A).
Note: Tightening torque: 39.2 - 46.1 Nm.
4. Apply sealant evenly to the mating surfaces of the lower oil pan.
Note:
- Standard sealant: LOCTITE 5900H or equivalent.
- Before applying sealant, ensure that the mating surfaces are clean and dry.
- Apply sealant in a continuous 4mm bead.
- Install the oil pan within 5 minutes after applying the sealant.
- After installing the oil pan, wait at least 30 minutes before adding oil to the engine.
5. Install the lower oil pan. Tighten the bolts in the order shown.
Note: Tightening torque: 9.8 - 11.8 Nm.
6. Install the air compressor (A).
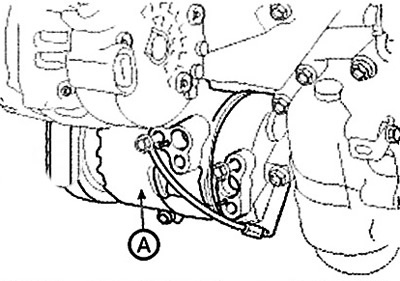
7. Install the oil filter and oil cooler assembly (A).
Note: Tightening torque: 19.6 - 26.5 Nm.
Caution: When installing the oil filter and oil cooler assembly, check for O-rings on the mating surface with the cylinder block. Tighten the 4 upper bolts first, then tighten the remaining lower bolt.
8. Install the drive belt (A).
9. Fill with engine oil.