HyundaiBook.ru
Repair Chevrolet Repair Honda Repair Toyota Repair Land Rover Repair VAZ Repair Renault Repair Nissan
English Русский
Български
Беларускі
Український
Српски
Hrvatski
Română
Polski
Slovenský
Magyar
ArticlesSitemapContacts  


  Accent   Elantra   Getz   Grandeur   Sonata   Santa Fe   Tucson   Others
Elantra 1 (1990-1995, petrol) Elantra 2 (1995-2000, petrol) Elantra 3 (2000-2006)
  • Main
  • Elantra
  • XD (2000-2006)
  • Power unit
  • Gasoline engines
  • Checking and adjusting valve clearances on 1.8 and 2.0 L engines (MLA)

Checking and adjusting valve clearances on 1.8 and 2.0 L engines (MLA) (Hyundai Elantra XD)

0

Procedure


Caution! Check and adjust valve clearances on a cold engine (coolant temperature 21°C) and the cylinder head installed on the cylinder block.
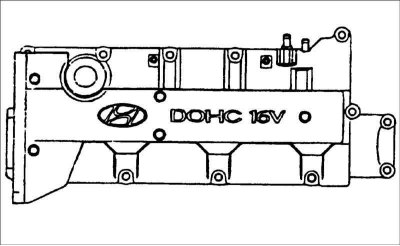

1. Remove the engine cover.

1. Remove the engine cover.

2. Remove the cap from the oil filler neck.


2. Remove the cap from the oil filler neck.

3. Remove the screws and remove the center cover.
4. Remove the upper timing belt cover.


4. Remove the upper timing belt cover.


  • Loosen the bolts securing the upper timing belt cover and remove it.

5. Remove the cylinder head cover.
  • Disconnect the high-voltage wires without applying significant force to them.
  • Disconnect the crankcase ventilation hose from the cylinder head.
  • Disconnect the accelerator cable from the cylinder head.
  • Remove the cylinder head cover mounting bolts and remove the cover and gasket.

Caution! Applying significant force or bending high-voltage wires may damage the central core of the wire.
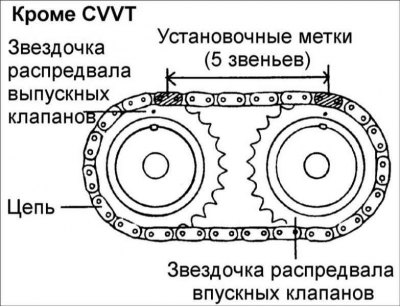

6. Set the piston in the first cylinder to the top dead center in the…


6. Set the piston in the first cylinder to the top dead center in the compression stroke.
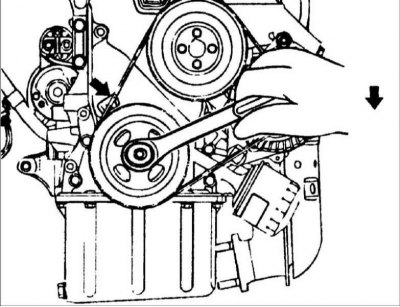
  • Turn the crankshaft clockwise and align the groove on the pulley with the "T" mark on the lower timing belt cover.
Check that the hole on the camshaft pulley is aligned with the mark on the…

  • Check that the hole on the camshaft pulley is aligned with the mark on the bearing cap, otherwise, rotate the crankshaft one revolution (360°).

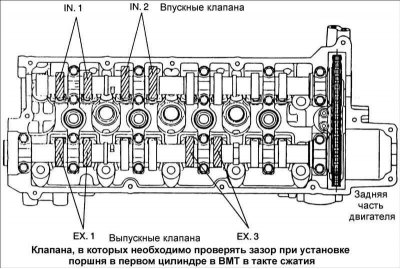
7. Check valve clearances.


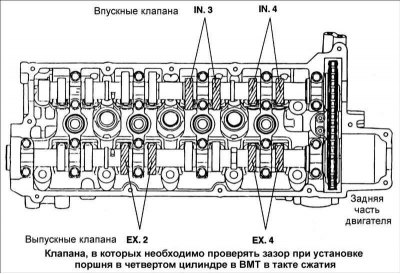
  • a. Check only the valve clearances shown in the illustration (the piston in the first cylinder is set at TDC in the compression stroke).
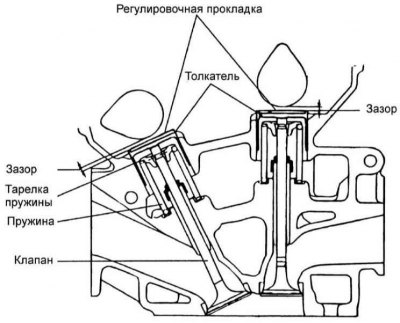
  • Using a feeler gauge, measure the clearance between the tappet adjusting shim and the base of the camshaft lobe.
  • Record the measured gap value. This value will be needed to calculate the required thickness of the adjusting shim.

Valve clearance (coolant temperature 20°C):
  • inlet valves: 0.20 mm;
  • exhaust valves: 0.28 mm.

Valve clearance (coolant temperature 80°C):
  • inlet valves: 0.29 mm;
  • exhaust valves: 0.34 mm.

Maximum permissible valve clearance:
  • inlet valves: 0.12–0.28 mm;
  • exhaust valves: 0.20–0.36 mm.

b. Turn the crankshaft one revolution (360°) clockwise and align the groove on…

  • b. Turn the crankshaft one revolution (360°) clockwise and align the groove on the pulley with the "T" mark on the lower timing belt cover.
c. Check only the valve clearances shown in the illustration (the piston in the…

  • c. Check only the valve clearances shown in the illustration (the piston in the first cylinder is set at TDC in the compression stroke).
  • Using a feeler gauge, measure the clearance between the tappet adjusting shim and the base of the camshaft lobe.
  • Record the measured gap value. This value will be needed to calculate the required thickness of the adjusting shim.
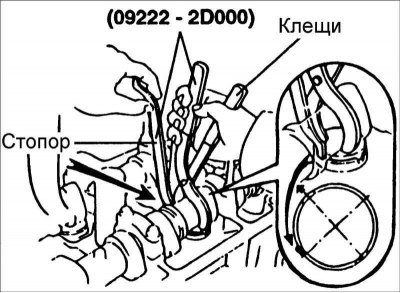
8. Adjust the clearances of the intake and exhaust valves.


8. Adjust the clearances of the intake and exhaust valves.


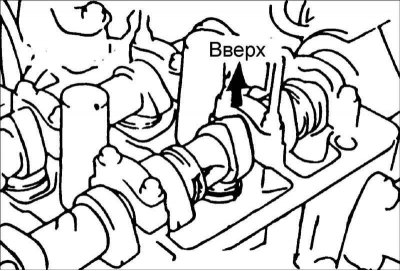
  • a. Turn the crankshaft so that the camshaft lobe contour on the valve being adjusted faces upward.
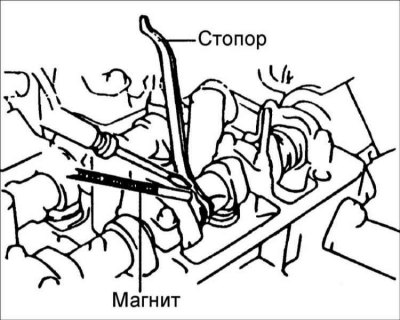
b. With a special tool (09220 - 2D000) press the valve tappet, insert the…

  • b. With a special tool (09220 - 2D000) press the valve tappet, insert the stopper between the camshaft and the tappet and remove the special tool.
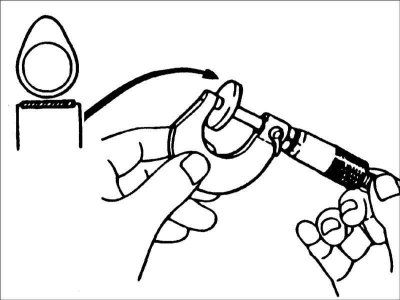
c. Use a small screwdriver or magnet to remove the adjusting shim.

  • c. Use a small screwdriver or magnet to remove the adjusting shim.
  • d. Use a micrometer to measure the thickness of the removed adjusting shim.
  • e. Calculate the thickness of the new adjusting shim so that the valve clearance is within the specified value.

Valve clearance (coolant temperature 20°C)
  • T: Thickness of the removed adjusting shim
  • A: Measured valve clearance
  • N: Thickness of the new adjusting shim


Inlet valves: N = T (A – 0.20 mm)

Exhaust valves: N = T (A – 0.28 mm)


  • f. Select a new shim with a thickness closest to the calculated value.

Attention! Adjusting shims of 20 sizes with thickness from 2.00 mm to 2.76 mm with a step of 0.04 mm are supplied as spare parts.

  • g. Install a new adjusting shim onto the valve lifter.
  • h. Special tool (09220 - 2D000) press the valve tappet and remove the stopper.
  • i. Recheck the valve clearance.

Valve clearance (coolant temperature 20°C):
  • inlet valves: 0.20 mm;
  • exhaust valves: 0.28 mm.

Maximum permissible valve clearance:
  • inlet valves: 0.17–0.23 mm;
  • exhaust valves: 0.25–0.31 mm.
This article is available at russian, bulgarian, belarusian, ukrainian, serbian, croatian, romanian, polish, slovak, hungarian
This article has been reviewed by: Konstantin Smirnov
Add to social network:

Previous
Elantra 3: Gasoline engines
Next

Camshafts
Adjusting the alternator drive belt tension
Adjusting the tension of the poly V-belt
Adjusting the timing belt tension
Timing belt — removal and installation
Hydraulic valve clearance compensators for 1.6L engine
Installing the cylinder head cover
Chain guide
Timing chain — check
Installing camshafts
We recommend other articles on the topic of Hyundai manuals:

Checking and adjusting the drive belt tension Hyundai Accent 1 (1994-1999)
Checking the one-way valve of the brake booster Hyundai Getz (2002-2011)
Adjusting valve clearances Hyundai Sonata 3 (1993-1998)
Adjusting valve clearances Hyundai Santa Fe 2 (2007-2012, petrol)
Checking and adjusting valve clearances Hyundai Tucson 1 (2005-2010)
Checking and adjusting the valve drive clearance Hyundai Matrix (2001-2010, petrol)

Link in different formats to this article

Visitor comments
No comments yet


How much will 24 + 29 ?


Elantra 3 (2000-2006) 
  • User manual
  • Control devices
  • Audio system
  • Starting the engine and driving
  • Faults en route
  • Maintenance and care
  • Technical information
  • Power unit
  • Gasoline engines
  • Diesel engines
  • Lubrication system
  • Cooling system
  • Fuel system (gasoline)
  • Fuel system (diesel)
  • Decreased toxicity
  • Ignition system
  • Transmission
  • Clutch
  • Mechanical gearbox
  • Automatic gearbox
  • Drive shafts and axles
  • Chassis
  • Car suspension
  • Steering
  • Brake system
  • Body
  • Exterior (external elements)
  • Interior (internal elements)
  • Air conditioning system
  • Electrical equipment
  • Equipment and devices
  • Headlights and lighting
  • Power devices
  • Electrical circuits
Elantra 2 (1995-2000, petrol) 
  • General information
  • Maintenance
  • Power unit
  • Engine repair
  • Cooling system
  • Intake and exhaust system
  • Fuel system
  • Transmission
  • Clutch
  • Manual gearbox
  • Automatic gearbox
  • Drive shafts and axles
  • Chassis
  • Front suspension
  • Rear suspension
  • Steering
  • Brake system
  • Body
  • Body elements
  • Electrical equipment
  • Equipment and devices
  • Electrical diagrams
Elantra 1 (1990-1995, petrol) 
  • General information
  • Introduction to the guide
  • Maintenance
  • Power unit
  • Minor engine repair
  • Engine overhaul
  • Lubrication system
  • Cooling system
  • Fuel injection system
  • Ignition system
  • Exhaust system
  • Transmission
  • Clutch
  • Manual gearbox
  • Automatic gearbox
  • Drive shafts
  • Chassis
  • Front suspension
  • Rear suspension
  • Steering
  • Wheels and tires
  • Troubleshooting
  • Brake system
  • Body
  • Body elements
  • Electrical equipment
  • Equipment and devices
  • Power devices
  • Heating and air conditioning
  • Electrical circuits
HyundaiBook.ru © 2018-2026 · Mobile version · Sitemap: EN BG BY UA RS HR RO PL SK HU · Administration · Site search · Hyundai owners Accent 1 · Accent 2 · Accent 3 · Elantra 1 · Elantra 2 · Elantra 3 · Getz · Sonata 3 · Sonata 4 · Santa Fe 2 · Tucson 1 · Tucson 2 · Matrix ·
This site uses cookies to optimize its functionality. By continuing, you agree to our terms.