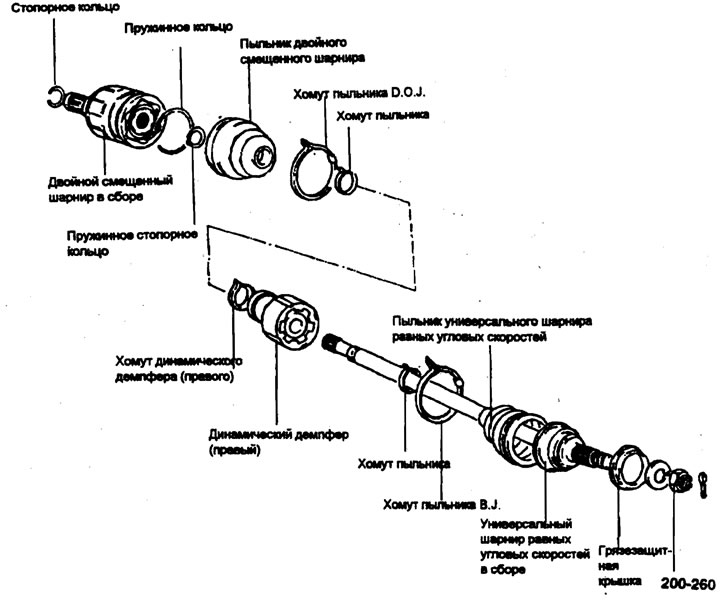
Tightening torque: Nm
Disassembly
Warning:
- 1) Do not disassemble the universal joint assembly.
- 2) A special type of lubricant is used in the drive shaft joints. Do not mix it with other lubricants.
- 3) The boot clamp must be replaced with a new one.
1. Remove the clamps from the boot and pull the boot off the outer ring of the universal joint.
Warning. Be careful not to damage the boot.
2. Remove the retaining spring ring and three-way crosspiece assembly from the drive shaft.
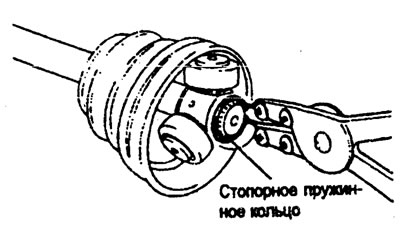
3. Clean the three-way cross assembly.
4. Remove the clamps from the constant velocity joint boot and pull off the boots of the universal joint and cardan joint.
Warning. If the boots are to be reused, apply tape to the drive shaft splines to protect the boots from damage.
Checking after disassembly
1. Check the splined portion of the drive shaft for wear and damage.
2. Check for water, foreign material and rust in the universal joint boot.
3. Check the roller rotation, wear and corrosion of the three-way crosspiece assembly.
4. Check the groove inside the universal joint housing for wear and corrosion.
5. Check the dynamic damper for cracks and damage.
Assembly
1. Apply adhesive tape to the splines of the drive shaft on the universal joint side to protect the dust boots from damage.
2. Apply grease to the drive shaft and install the dust boots.
Recommended lubricant
- Universal Joint Grease - Centioplex 278M/138K
- Cardan joint lubrication - ONE-LUBER MK
3. To install the dynamic damper, hold the universal joint and drive shaft so that they form a straight line. Install the dynamic damper in the position as shown in the figure and install the small boot clamp.
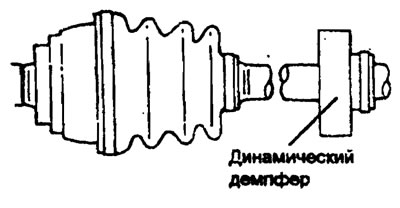
4. Place grease inside the universal joint boot and install the boot.
Amount of grease in the cardan joint (g) (1.6 A/T, M/T)
- Total - 105±6
- In the hinge - 65±3
- In the duster - 40+3
(1.8 A/T, M/T)
- Total - 120±6
- In the hinge - 75±3
- In the anther - 45±3
5. Tighten the universal joint clamps.
6. Add the same amount of grease to the universal joint that was lost during the inspection.
7. Install the anthers.
8. Tighten the universal joint boot clamps.
9. To control the amount of air inside the offset joint boot, maintain the specified distance between the boot clamps when tightening them.
Installation
1. Tighten the parts to the torque specified in the specification.
- Drive shaft nut -200-260
- Fist to suspension strut - 110-130
- Lower ball joint to knuckle - 60-72
2. Install a new snap ring each time the drive shaft is removed from the transmission case.
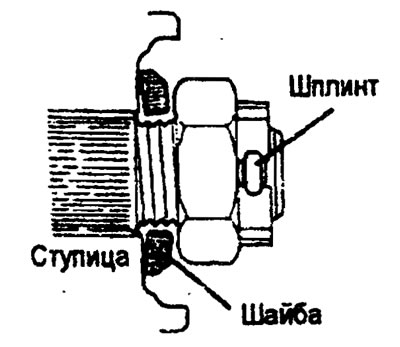
3. Place the washer under the drive shaft nut as shown in the figure.