
Contents: Removal ⇓ Installation ⇓
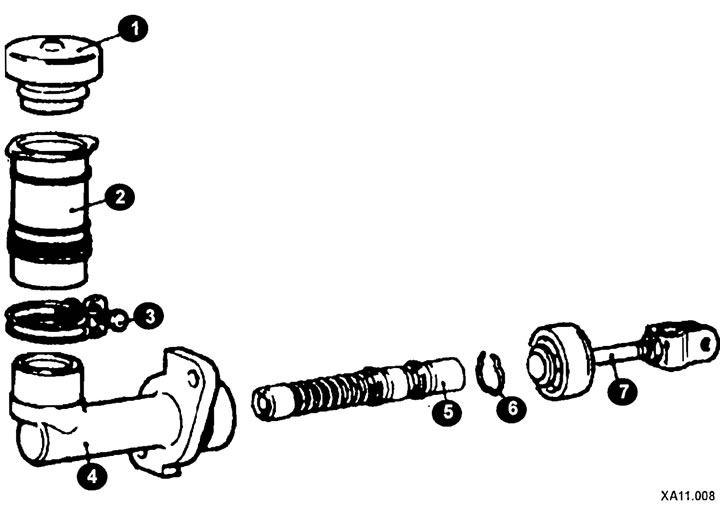
Clutch Master Cylinder Components (models before 2000.)
1 - lid;
2 - tank;
3 - clamp;
4 - body;
5 - piston assembly;
6 - retaining ring;
7 - pusher.

Clutch Master Cylinder Components (models since 2000.)
1 - expansion tank;
2 - holder;
3 - expansion tank branch pipe;
4 - body;
5 - spring;
6 - piston;
7 - pusher.
Removal
Remove the pin.
Unscrew the coupling and disconnect the hydraulic tubes from the clutch master cylinder.
[The publication is borrowed from the website: hyundaibook.ru]
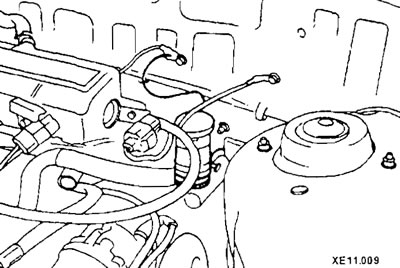
After unscrewing the nuts, remove the clutch master cylinder.
Installation
Installation is carried out in reverse order.
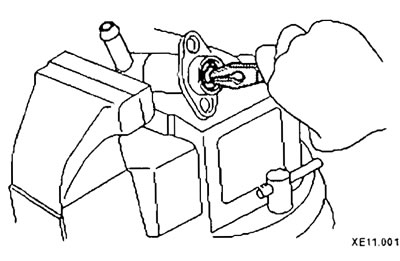
Clean the outside of the cylinder completely and carefully clamp it in a vice equipped with soft pads.
Loosen the clamp and remove the reservoir from the master cylinder.
Remove the dust boot from the rear of the master cylinder to gain access to the piston retaining ring,
Compress the retaining ring, then remove it from the cylinder bore and remove the pushrod, piston assembly and spring.
Inspect the piston and cylinder surfaces. If they are scratched or corroded, replace the master cylinder assembly.
If the cylinder is in good condition, purchase a piston replacement parts rebuild kit that will contain all the necessary components.
Make sure all components are clean and dry and lubricate the piston assembly with fresh brake fluid.
Install the spring onto the piston, then carefully insert the assembly into the cylinder. Move the piston into the working position with a rotational motion, being careful not to pinch the sealing edges.
Place the push rod against the end of the piston and install the snap ring, making sure it is seated correctly in the cylinder groove. Check the operation of the piston and tappet assembly, then install the dust boot into its working position on the master cylinder.
Install the tank onto the cylinder and tighten the mounting clamp.