
Contents: Removal ⇓ Installation ⇓
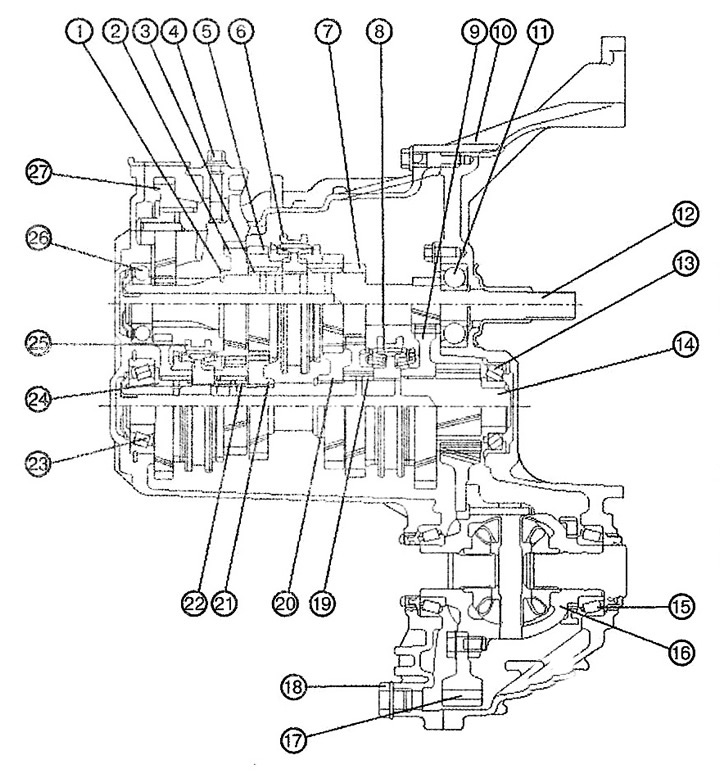
1. Retaining ring
2. Gear 5
3. 4th gear pinion sleeve
4. Reverse gear intermediate gear bolt
5. Gear 4
6. Hub and sleeve of synchronizer 3 and 4 gears
7. Gear 3
8. Hub and sleeve of synchronizer 1st and 2nd gear
9. 1st gear pinion
10. Clutch housing
11. Front primary shaft ball bearing
12. Primary shaft
13. Front secondary shaft tapered roller bearing
14. Secondary shaft
15. Differential tapered roller bearing
16. Differential
17. Differential pinion
18. Drain plug
19. 2nd gear bushing
20. Primary gear 3 gear
21. Primary gear 4th gear
22. Bushing Gear 5th gear
23. Rear/tapered roller, secondary shaft bearing
24. Reverse gear driven gear bushing
25. Hub and sleeve of synchronizer 5th reverse gear
26. Rear ball bearing of the primary shaft
27. Reverse intermediate gear
Removal
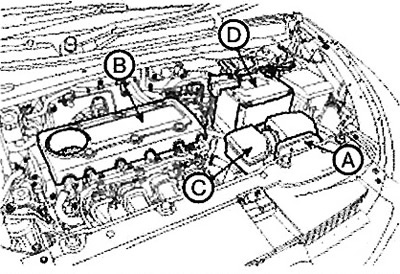
1. Remove the battery and shelf (D).
2. Remove the engine cover (B).
3. Remove the air cleaner assembly (C).
4. Remove the air duct (A).
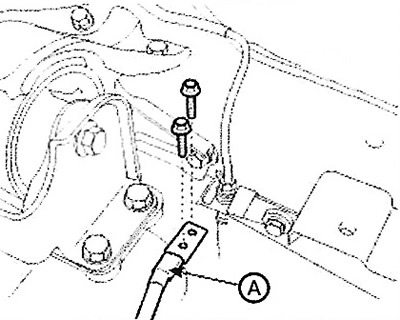
5. Disconnect the ground wire (A) from the gearbox.
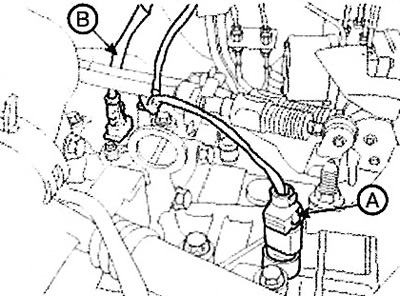
6. Remove the reversing light switch (A) and vehicle speed sensor (B).
7. Remove the shift cable assembly (A).
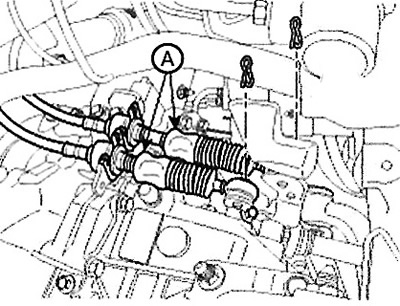
8. Remove the clutch slave cylinder (A).
Note: Tightening torque: 63.7 - 73.5 Nm.
9. Remove the upper hood cover or windshield wiper motor.
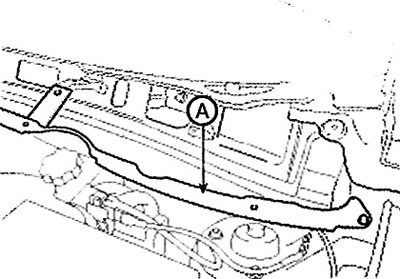
10. Remove the panel (A) assembly.
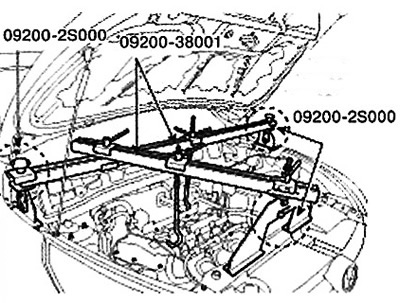
11. Using the engine support (Support (A) No.: 09200-23000, Beam (B) No.: 09200-38001), securely suspend the engine with the gearbox.
Attention
For safety reasons, when hanging the engine with the gearbox assembly, also support the engine from below with a jack.
In this case, the jack must be installed under the oil pan. A rubber gasket must be placed between the jack and the pan to avoid damage to the oil pan.
12. Remove the 2 upper gearbox mounting bolts (A) and 2 starter mounting bolts (B).
Note: Tightening torque: (A, B) 42.2 - 53.9 Nm.
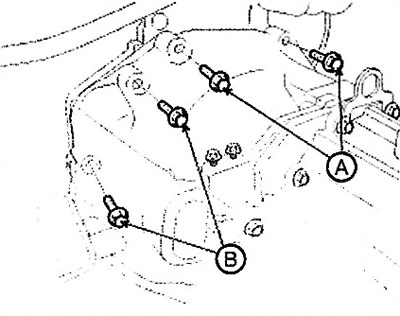
13. Support the gearbox with a jack, then loosen the mounting bolts (A).
Note: Tightening torque: 58.5-78.5 Nm.
14. Remove the engine protection.
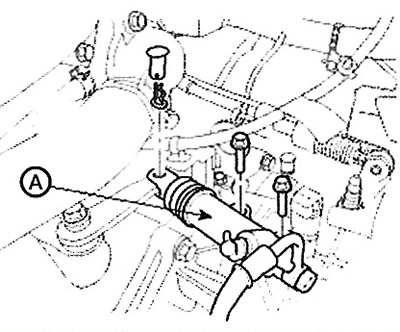
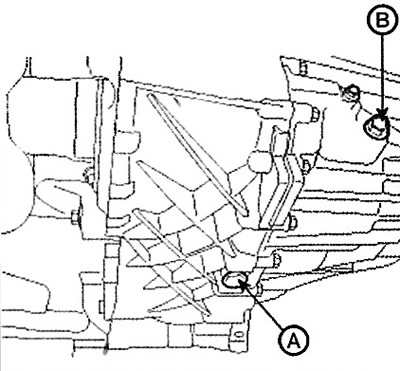
15. Drain the oil from the manual transmission by unscrewing the drain plug (A). To facilitate draining, unscrew the filler plug (B).
16. Remove the following parts:
- A. Front wheels.
- B. Subframe assembly.
- C. Drive shafts.
- D. Cardan shaft.
- E. For 4WD vehicles: Remove the transfer case.
17. Slowly lower the jack and remove the gearbox.
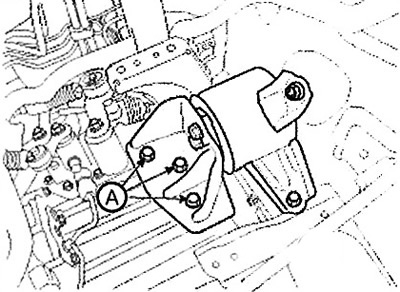
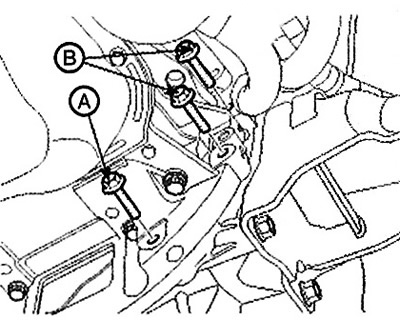
18. Unscrew the mounting bolts (A-3 pcs., B-3 pcs.) from the bottom of the gearbox and the left side cover, then remove the gearbox, supporting it with a jack.
- Note: Tightening torque:
- (A) 42.2-48.1 Nm.
- (B) 42.2-53.9 Nm.
 |
 |
Installation
1. Installation is performed in the reverse order of removal.
2. After installation, perform the following operations:
Fill the gearbox with transmission oil.
Add power steering fluid and bleed air from the system.
Add brake fluid and bleed the hydraulic clutch system.