
Contents: Removal ⇓ Installation ⇓
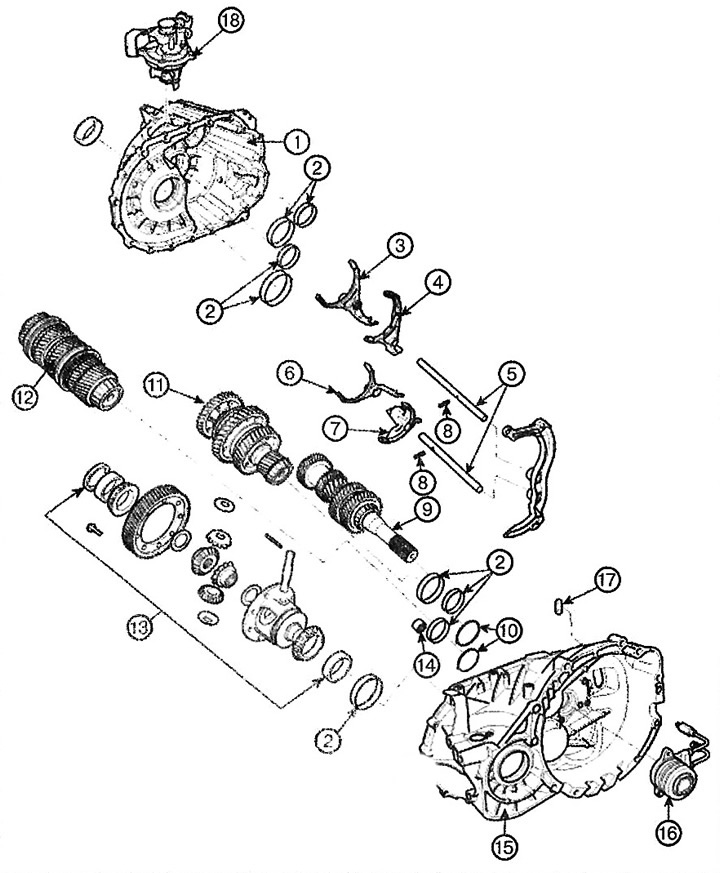
1. Gearbox housing
2. Outer ring of tapered roller bearing
3. First/second gear shift fork
4. Reverse gear shift fork
5. Gear shift rod
6. Third/fourth gear shift fork
7. Fifth/sixth gear shift fork
8. Spring pin
9. Input shaft assembly
10. Oil guide
11. First output shaft
12. Second output shaft
13. Differential assembly
14. Needle bearing
15. Clutch housing
16. Concentric slave cylinder assembly
17. Pin
13. Control shaft assembly
Removal
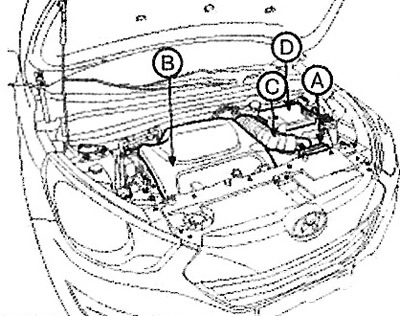
1. Remove the air duct (A).
2. Remove the engine cover (B).
3. Remove the air filter (C) assembly.
4. Remove the battery and shelf (D).
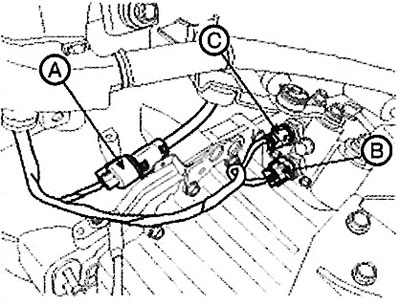
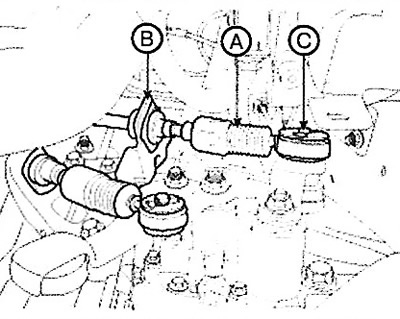
5. Disconnect the speed sensor connector (A).
6. Disconnect the connector (B) of the reversing light switch and remove the neutral position switch (C).
7. Remove the ground wire (A).
8. Remove the holders (B), remove the pins (C), then disconnect the cable (A) assembly.
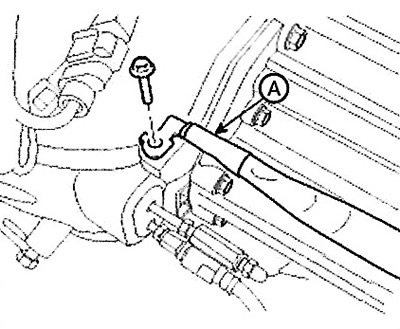
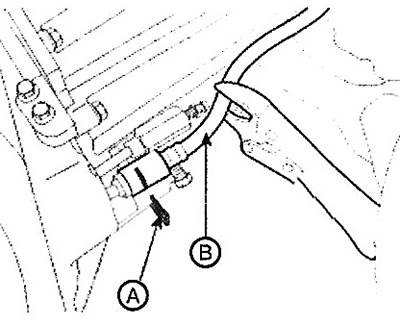
9. Remove the studs (A), then disconnect the concentric slave cylinder line (B).
10. Remove the upper hood cover or windshield wiper motor.
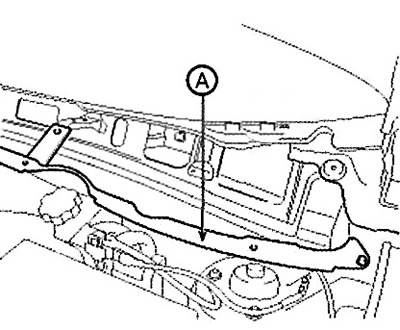
11. Remove the panel (A) assembly.
12. Using the engine support (Support (A) No.: 09200-2S000, Beam (B) No.: 09200-38001), securely fix the engine and gearbox.
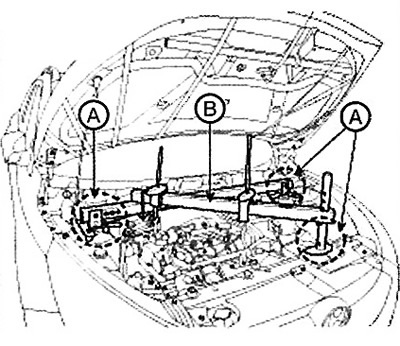
Attention.
- For safety purposes, when hanging the engine and gearbox assembly, also support the engine from below with a jack.
- In this case, the jack must be installed under the oil pan. A rubber gasket must be placed between the jack and the pan to avoid damage to the oil pan.
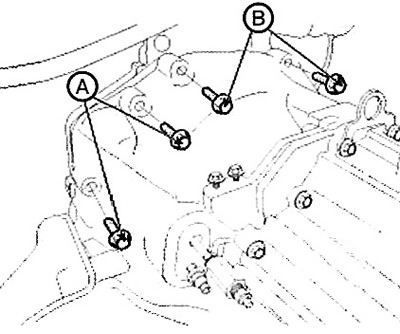
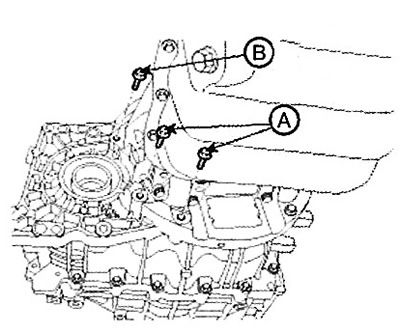
13. Remove the 2 upper gearbox mounting bolts (B) and 2 starter mounting bolts (A).
Note: Tightening torque:
- (A) 49.0-63.7 Nm
- (B) 42.2-53.9 Nm
The material was obtained from a web resource [HyundaiBook]
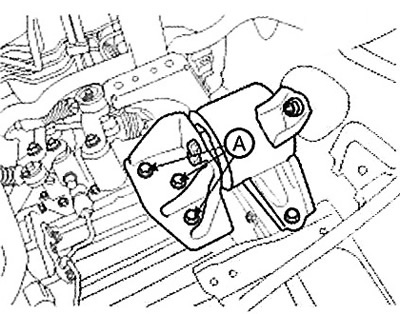
14. Support the gearbox with a jack, then remove the mounting bolts (A).
Note: Tightening torque: 88.3-107.9 Nm.
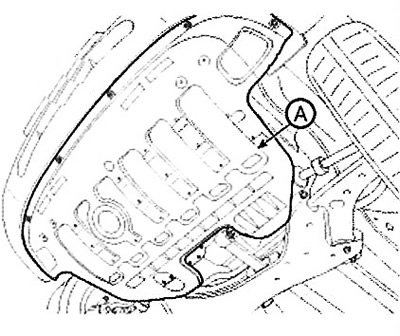
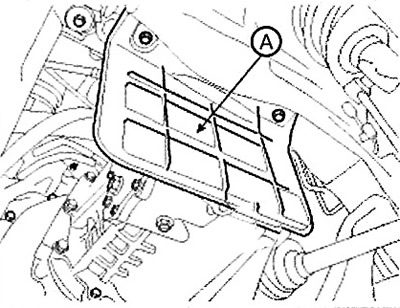
15. Remove the engine protection (A).
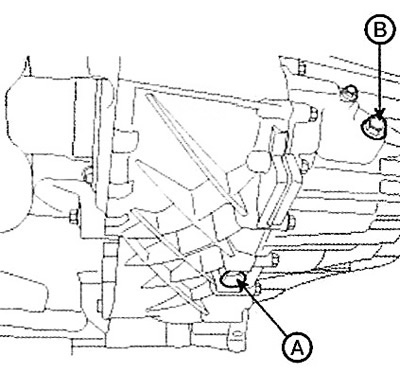
16. Drain the gearbox oil by unscrewing the drain plug (A). To facilitate draining, unscrew the filler plug (B).
Note: Tightening torque:
- (A) 58.5-78.5 Nm.
- (B) 29.4-34.3 Nm.
17. Remove the following items:
- A. Front wheels.
- B. Subframe assembly.
- C. Cardan shaft.
- D. For 4WD vehicles: Remove the transfer case assembly.
18. Remove the drive shafts from the gearbox.
Attention: The right drive shaft should be removed together with the central shaft after unscrewing the central shaft mounting bolt.
19. Remove the side cover (A).
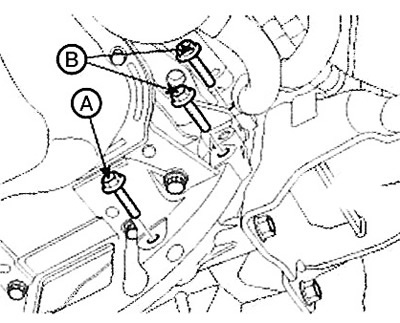
20. Unscrew the mounting bolts (A-3 pcs., B-3 pcs.) from the bottom of the gearbox and the left side cover, then remove the gearbox, supporting it with a jack.
Note: Tightening torque:
- (A) 42.2 - 46.1 Nm.
- (B) 42.2-53.9 Nm.
When removing the power unit, be careful not to damage surrounding parts and systems.
 |
 |
Installation
1. Installation is carried out in reverse order.
2. After installation, perform the following operations:
Fill the gearbox with transmission oil.
Add power steering fluid and bleed air from the system.
Add brake fluid and bleed the hydraulic clutch system.